You’re new to the 4X4 scene. You’ve broken yourself in gently on some nice local trail. Now you’re ready to have a crack at that steep, rocky section with all the scrapes and skid marks. Successfully tackling a technical rock climb can be tricky, and even downright dangerous, but with these five tips you’ll be armed with the knowledge you need to succeed at rock crawling.
Select your rubber
The tyre you select can make or break your adventure. You’ll notice a common theme across this article – you can basically call it a sliding scale. If your kind of rock crawling is fairly mild, as will be the mods and techniques required. If you plan on scaling virtual cliffs, you’re going to need the big guns.
You can absolutely climb rocks on highway tread. All terrains, hybrids, mud tyres – whatever, they’ll all do a job to some degree, but remember that sliding scale thing we mentioned? That applies here. The more aggressive the climb, the more aggressive the tyre you’ll need. Not just with the tread pattern, but the actual construction of the tyre.
4X4s are generally delivered with ‘passenger’ spec tyres. Great for on road drivability, low road noise, and so on. These tyres are built for comfort. What we need here are tyres that are built tough. There’ll be sharp rocks tearing at the sidewalls, we’ll have wheel spin, and you bet we’ll be running low pressure – rock crawling is a tyre’s worst nightmare.

To give yourself the best chance of success, fit up a set of LT or ‘light truck’ spec tyres. These have a much stronger carcass construction than passenger tyres, and thus will take the beating you’re about to hand out. These tyres will have a thicker sidewall and a higher ply rating (known also as ‘load range’, which is essentially an indicator of the strength of the carcass).
Once you’ve selected yourself a nice set of mud tyres with a good load rating, it’s time to pick a size. Legally, options are limited, but speaking purely factually – bigger tyres will do the job better. A larger diameter tyre will not only negotiate obstacles better, it’s one of only two ways to increase the clearance between your axles and the ground, and the other is VERY expensive. That is the key here; getting additional height between the lowest hanging part of your vehicle and the ground to prevent your diffs dragging on the rocks, and inevitably halting your forward progress.
Get Higher
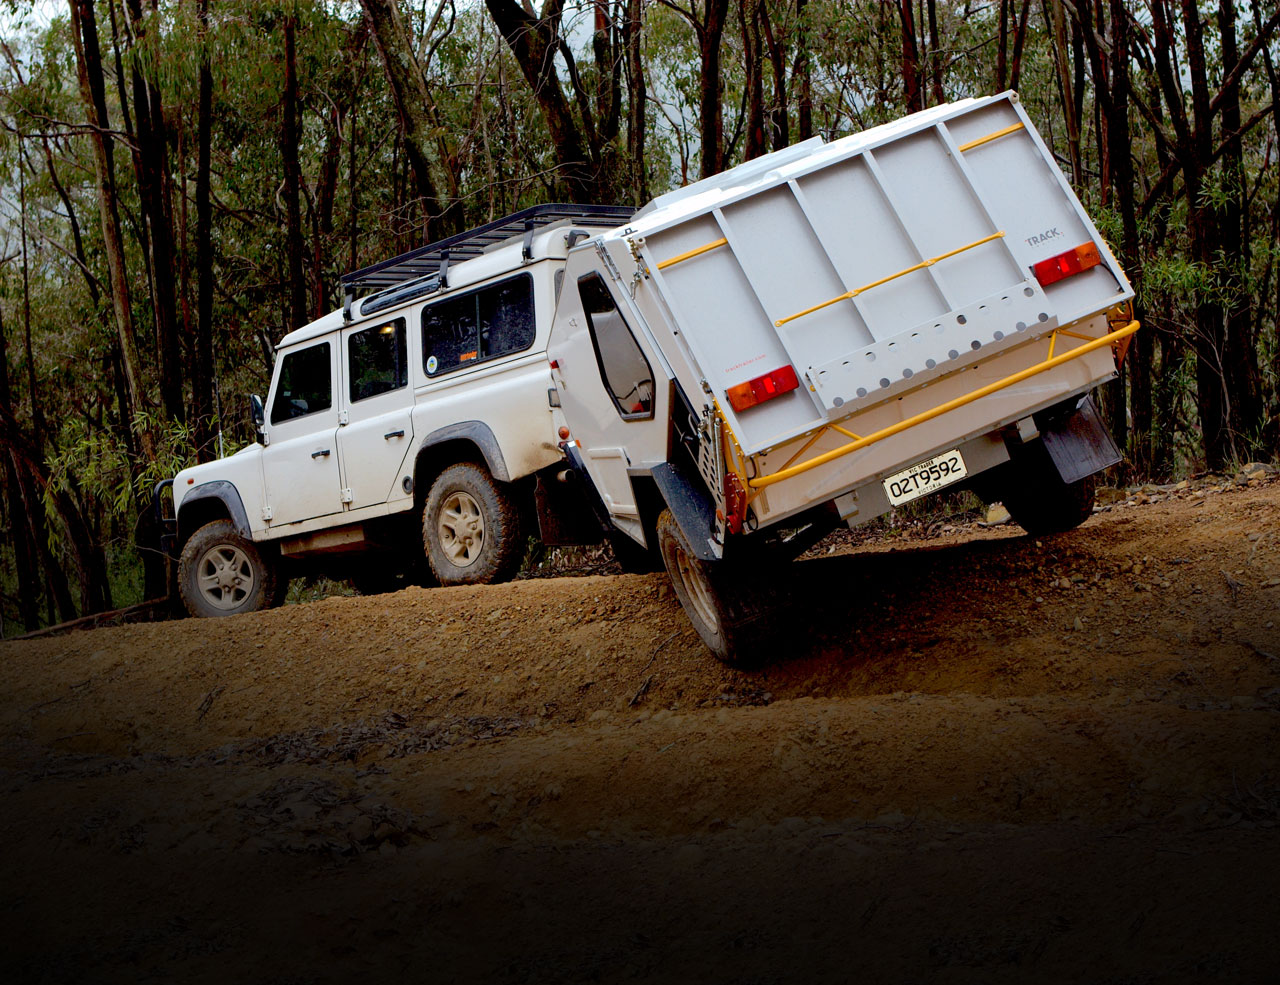
This bit isn’t rocket science. Do what you can to elevate your vehicle above the rocks, and let your driveline and suspension do the hard yards. There are two considerations when we’re talking clearance; ground clearance, and clearing those big new tyres you fitted a minute ago. The terms that you’ll often hear are approach angle, breakover angle, and departure angle.
The worst thing you can do here is jump on Google, type in ‘four inch lift’ and hit buy it now. The wrong kit won’t help you when you’re rock crawling. You need that precious lift, but more importantly than that, you need your suspension to really work. By that we mean doing what your suspension is fundamentally there for, and that is to keep your tyres on the ground.
Long-travel shocks are your friend, so too are soft springs. But these things are only useful if your vehicle’s suspension geometry allow them to work to their capacity. A lot of the time this means upgrading arms, bushes, shock mounts and so on. Our advice here is to work with a professional to achieve a goal relevant to you and your application.
If the budget allows, portal axles will give you four inches of additional clearance where you need it most; under the diffs. More on these cheeky little offerings below though.

Speed kills rock stars
Rock crawling is all about slow and steady; speed is not your friend. Generally, the slower you can go, the better off you’ll be – it is called crawling after all. There will be occasions where you’ll need to carry some momentum to pop up a ledge, but there is an exception to every rule, and the only way to know when that is necessary is to get out there and do it.
Time on the rocks is best spent in first gear, low range. In an auto, it’s pretty easy to keep your speed down. In a manual you basically want to keep your engine at idle, or just about as low is it’ll rev without stalling. To that end, if you’ve fitted bigger tyres and you find you can’t crawl slow enough, you might want to look at reducing your gearing.
How do you reduce your gearing? There are three options available, and none are particularly easy. Typically, your first port of call to correct for the oversize tyres is to change your diff gears. For most applications, that can be enough. But you’ve got the bug now, you want more. The next step is to swap out a couple of cogs in your transfer case for a set of reduction gears.
Not slow enough for you? Alright, go grab that piggy bank, smash it open and come with us. We’re getting portals. What are portals? Glad you asked. They’re basically a standard feature of the legendary Unimog. They’re a funny looking box of gears that attach to each end of your diff housing. They give you around a 16% reduction in your final drive, along with a host of other benefits. These benefits are costly, with a set of portals costing the best part of $30,000 installed. Another drawback is that they’re only available for a handful of models at the moment.

Protection
You’ve come this far, so let’s not muck this up. We want to look at what we can do now to protect this investment from the inevitable damage the rocks are planning on inflicting. We want to look at front, rear and side to start with.
A bull bar of some kind up front is almost a necessity on any 4X4 anyway, but it’s a big part of your armoury when tackling the rocks. A rear bar does much the same thing for the back end, and some sliders to protect those precious sills.
So that’s the body work covered, now poke your head under the car and have a look at all that important (expensive) stuff hanging down. You’re going to want to cover them up with bashplates. Do a bit of research here, and find a system that works with your bull bar to ensure your radiator, sump, transmission and transfer are all protected. There are other bits and pieces available as bolt on protection too. Things like plates that shield your lower shock mounts, bash plates for fuel tanks, and so on. There’s lots of vehicle specific stuff depending on how far you want to go.
Forward progress
All the tyres and suspension in the world will only get you so far. Lockers will get you further. A set of selectable diff locks front and rear will ensure that you are sending drive to all four wheels evenly when the going gets tough. You will need to disengage your front diff lock to turn, but flick it back on when the going gets tough.
If you find yourself stuck now, even with all these mods, you need a way out. If you’re travelling alone, this means self-recovery. There are plenty of options to suit all budgets here. A good winch and a decent recovery kit will get you out of plenty of situations. A rear winch can be a worthy investment if you’re really into the difficult stuff. Traction boards are worth their weight in gold, and are probably the cheapest form of insurance for an offroader. Often you’ll find that the extra traction those plastic boards afford is just enough to get you moving again.
If you’re well-versed with the workings of high-lift jacks, you’ll know just how versatile they can be. If you aren’t, tread carefully – they’re a fantastic tool that can lift a corner of your vehicle while you track build, or can even act as a hand winch with a couple of straps, but you need to be aware of the dangers. The physics of the high-lift need to be understood if you plan on relying on one in a recovery situation.

Above all else, once you’ve got your 4X4 set up for rock crawling, it’s still all up to you as the driver. If you pick the wrong line, you’ll fail. If you select good lines, you’ll be successful more often than not. To pick a good line for your vehicle, you need to have good spatial awareness so you can retain a picture of the terrain in your mind when the bonnet starts pointing to the sky. Focus on keeping your tyres on the ground as best you can, and keep your wheelbase in mind.
The length of your wheel base can cause you problems at times, and overcome them for you occasionally too. As long as you are aware of your limitations, you’ll quickly figure out how to use your length to your advantage.
Get comfortable with horrible noises. Your barwork and bashplates will make contact with the rocks at some stage, it is inevitable. You’ve heeded all our advice so far, so you’re moving as slow as you can, and there’s a horrendous scraping noise emanating from your passenger’s sill. That’s your good decisions at work; your investment in aftermarket protecting your vehicle. It’s hard to see the positives when you hear that noise, but trust us, it’s a positive!
It’s a sliding scale, remember? How far you go rock crawling depends on how far you go with your mods. Modify to suit your application, and go practice. There is no substitute for time behind the wheel, so get out there and work it out for yourself.


