In this article, we discuss how to use your recovery tracks (aka recovery boards) over different terrains, other things you can use them for, and general tips for using them.
In this article, we discuss how to use your recovery tracks over different terrains, other things you can use them for, and general tips for using them.
I own or have used just about one of every piece of 4X4 recovery equipment on the market. Sure, that’s a bold claim, but there is one item I take with me wherever I go, no matter the vehicle, and that’s recovery tracks(aka recovery boards). I’ve been using them for more than a decade now in all sorts of situations, and I just love them because they’re versatile, reliable (with no moving parts), can be used on any vehicle, and are easy to carry.
Recovery tracks give you three valuable ways to help a stuck 4X4 become unstuck. These are:
Traction: far better grip than, say, wet rock, mud or snow.
Flotation: stops the car sinking into soft ground like sand, snow or mud.
Clearance: they help raise the tyres and therefore the entire vehicle to get over obstacles, like rocks.
To a greater or lesser extent, each of the three traction environments is applicable in every terrain, and, as ever with recovery gear, it’s important to understand what you’re trying to achieve and know how to do it before you start. Recovery tracks are fantastic but they need some careful thinking and effort to set up properly if they are to be effective, not just arbitrarily thrown near a tyre and expected to work some kind of magic. Here’s what I’ve learned over many years of using them.
How to use your recovery tracks in different terrain
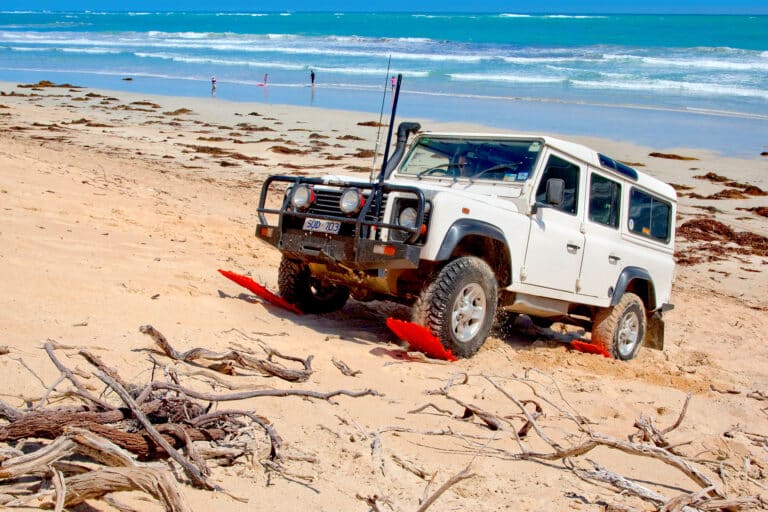
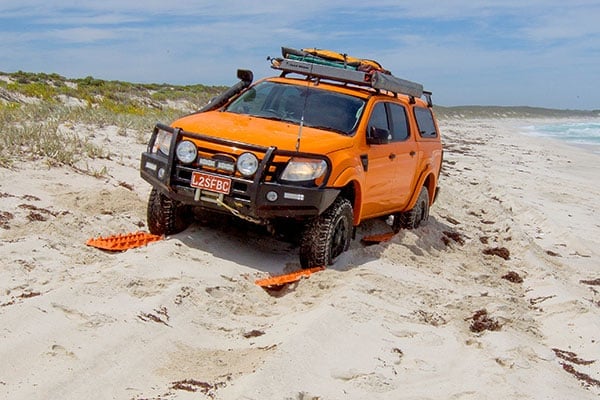
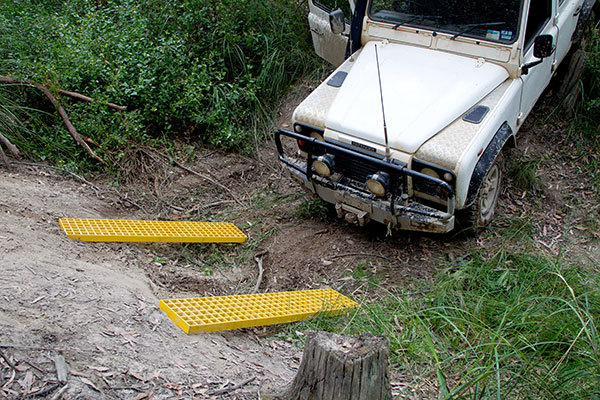
Sand
Dig first, right down in front of and underneath the tyre. You need to get the tip of the track/board down low and just about jam it in under the tyre. Also, dig away any sand that’s touching the underbody. Then, super-slow, first-gear low-range till you’re on the tracks, then a tiny bit of acceleration to get up and away.
If you’re going to drop tyre pressures further (always a good idea), do so after the recovery tracks are pushed under the tyre, not before, so the tyre expands onto the track. Try to make sure the track is as flat as possible, although they may work at an angle of up to 40 degrees. Here’s a statement I’m happy to make: Give me four tracks, a shovel, time, and a tyre pressure gauge, and there is no sand situation from which I cannot recover a vehicle.
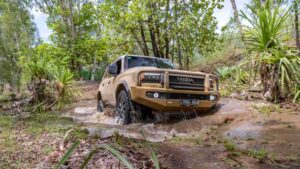
The ranger is bogged in soft sand on a sloping beach with the tide coming in. We recovered by using MAXTRAX, driving onto the tracks, then forwards, then stopping. It took seven or so repetitions, but we got there.
Mud
It’s the same sort of technique as sand, but it’s often harder to dig down. You may consider jacking a wheel and putting a recovery track underneath. Often, you’re cross-axled to some degree, unlike sand, and that’s where you need to put a track or two under the wheel with the least amount of weight on it.
You may need to track build, then put the track on top or use two or more stacked on top of each other. Sometimes, in mud, you can use the tracks to stop the car from sinking into the soft ground; other times, it’s simply for traction, and sometimes as a board to get out of bog holes. Sometimes, it may be better to use all your boards on one side of the car, not split them equally.
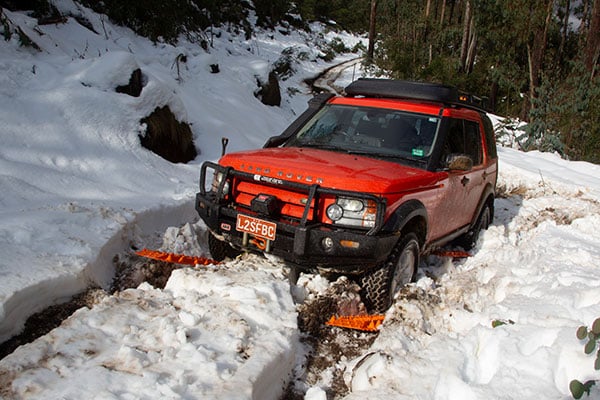
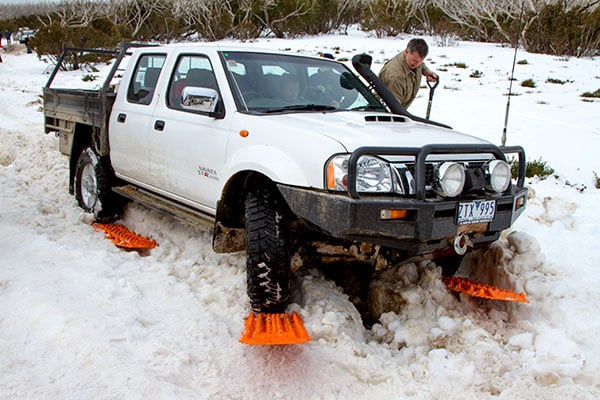
Snow
Use the same technique as mud, but snow is easier to dig out. Create snow ruts and lay the recovery tracks into them, too, because snow is slippery, and you don’t want the tracks or car sliding sideways. Tracks can also help to support your vehicle in soft snow, but be careful you don’t get yourself into more trouble that way.
The combination of snow and mud meant we couldn’t drive forwards, so we used the tracks to recover.
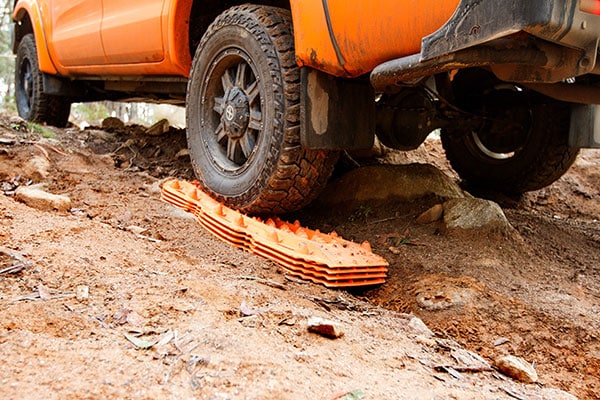
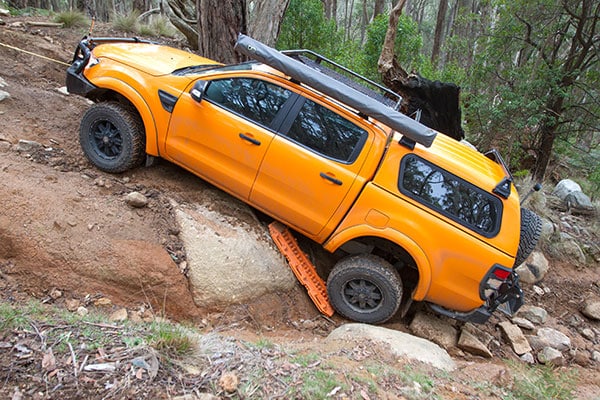
Rocks
Yes, you can use recovery tracks on rocks for clearance and bridging. Often, they need to be stacked two or more high to get clearance and to take the weight of the vehicle, and if used for bridges, put some rocks or logs under the tracks to help support the vehicle weight. As there is unlikely to be soft ground, the risk of the board moving is high, so think about how that can be stopped.
Boards can provide better traction than rocks, particularly when the rocks are wet. So even when there are no clearance problems they can be useful.
Recovery tracks work to help get over rocks.
Ruts
For extra clearance, just lay them in the ruts, often stacked two or more high, and supported underneath as required. Then drive over without wheelspin. Again, add track building material if needed. If you need to dig, then dig the centre of the track out and put the result in the ruts so you’re simultaneously lowering the centre and raising the ruts, don’t dig the outside of the track which just makes it unnecessarily wider.
Other ways to use your recovery tracks
Creeping
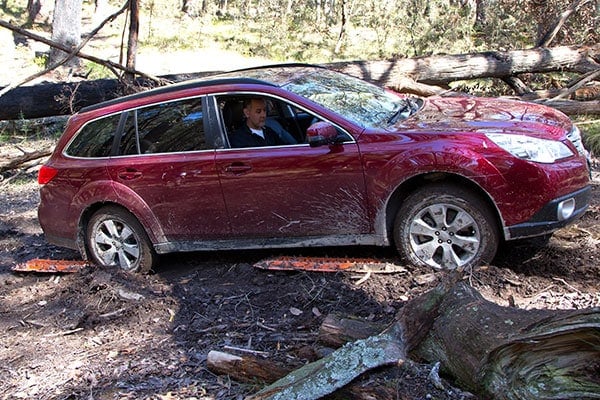
If you need to get up a hill with four recovery tracks, try putting them behind the tyres, rolling on, and then driving off. You may be able to get a metre or two further. Then repeat. Slow, but effective, and easier with eight boards.
We got this Outback up the hill by driving up four recovery tracks, stopping, repositioning the tracks and driving again. This also works in sand.
Bead breaking
Yes, you can break a bead using your recovery tracks. Ensure you put a block of wood under the track tip as you don’t want to totally compress the tyre sidewall and damage the carcass.
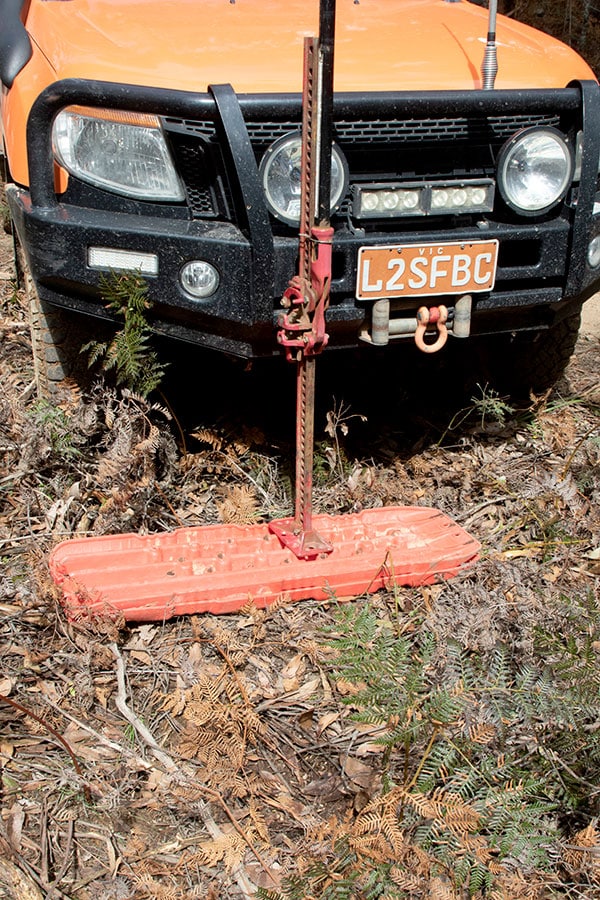
Jack helper
Invert a recovery track and use it as a back base, perfect for soft ground! The boards can also be used to level the vehicle or provide extra traction for the wheels on the ground.
Chocks
A couple of stacked boards in front of a wheel is an effective chock.
Bridging ladders
Popular in the UK are bridging ladders or sand ladders which are designed mostly to bridge gaps. I have a set, have used them, and find them ineffective compared to recovery tracks. The ladders are heavier, offer less traction and flotation, and it’s rare you need to bridge. A set of stacked tracks can bridge to some extent.
General tips for using recovery tracks
Other gear you’ll need
A shovel and a tyre pressure gauge. Almost all track recoveries involve some form of track building, and reducing tyre pressures will help the vehicle use the boards. Tracks do NOT work well as shovels, even in sand, so you need a proper shovel, I don’t care what the instructions say.
Don’t wait until its too late
As with any recovery, it’s easier if you give up and recover before you’ve dug the car entirely into the ground. With recovery tracks, if you can move even 100mm forwards onto them, that makes a big difference.
Steer-angle the recovery tracks
Place the recovery tracks where the steering wheels and rear wheels will go, which may not be straight ahead.
Buy and use four recovery tracks
I’ve seen many recoveries fail with two and succeed with four. If you’re carrying two, you may as well carry four. It’s so much more effective and less chance of wheelspin. If you regularly tow a trailer, take six and then you can use some to keep it level, too.
Use two or more stacked recovery tracks
Often, you need to do this for clearance or bridging. Another reason to have multiple recovery boards.
Tie them up
Tracks get smashed into soft ground to the point where they are literally buried and surprisingly hard to find, so you can tie them to your recovery point so they get pulled up afterwards. This is where bright colours help locate them. Camouflage-colour boards are not a good idea.
Front wheels, not rear
Only got two? Generally speaking, put them at the front so that way the rear wheels get the benefit when they roll over the top.
Don’t wheelspin on your recovery tracks
Wheelspin damages the recovery tracks and this means you may slip off. This is a lot easier to manage with four than two boards, as there is consistent traction across four wheels.
Easy access
Keep the recovery tracks handy. Put them on the roof-rack or somewhere else outside the vehicle, because then they’re very accessible, and the elements don’t affect them. More than that, once they’re filthy, they won’t mess up the inside of your vehicle.
How to care for your recovery tracks
Just wash them with a pressure washer. Easiest maintenance ever, and another reason I love them.
Build your own? You probably shouldn’t
Yes, you can theoretically build your own out of wood or metal. But my experience is neither is as good as purpose-designed plastic. Wood isn’t as strong or flexible, metal isn’t flexible enough and is heavy, and it’s really hard to make proper knobs for the tyres to grip and to make them stackable. I’d say the time and effort isn’t worth it, just buy the real deal as they’re better and a lot cheaper now than they once were.
Robert Pepper is an independent automotive journalist specialising in 4x4s, camping, towing, fast cars, and tech. Robert’s mission is to make these high-risk activities safer through education informed by his own experience and a commitment to inclusivity. He has written four books and hundreds of articles for outlets in Australia and around the world, and designed and delivered driver training courses in all aspects of offroading, towing, and car control. In order to maintain independence Robert’s current outlet is his own YouTube channel and website.