How to: fitting a Redarc BCDC1225D battery charger
Why you’d fit a Redarc BCDC1225D battery charger and how to do it on a vehicle with very little space under the bonnet. Words and photos: Ray Cully If you’ve ever heard the clicking of a starter motor with barely enough…
Why you’d fit a Redarc BCDC1225D battery charger and how to do it on a vehicle with very little space under the bonnet.
Words and photos: Ray Cully
If you’ve ever heard the clicking of a starter motor with barely enough power to energise its starter solenoid while out bush by yourself, you’ll know it’s a heart-stopping moment, which is just one of the reasons I recently fitted a Redarc BCDC1225D battery charger to my Jeep Wrangler.
Installing a dual-battery system to relegate the load from power-munching camping accessories to a dedicated power supply protects your vehicle’s sensitive electrical systems, and it ensures your engine kicks into life for the trip home.
A simple set-up has two batteries, potentially of different technologies such as a primary lead acid battery and an AGM second battery. The primary battery powers vehicle systems and factory installed accessories. It will be capable of high amperage bursts for short periods of time and is ideally suited for cranking over the engine for starting, or for powering a winch for challenging recoveries.
The auxiliary battery is preferably a deep–cycle unit, capable of supplying small current over an extended period. This battery’s design suits running a fridge, camplights or charging up a phone. Deep–cycle batteries are far more forgiving and tolerate being discharged slowly, andthey can be recharged multiple times.
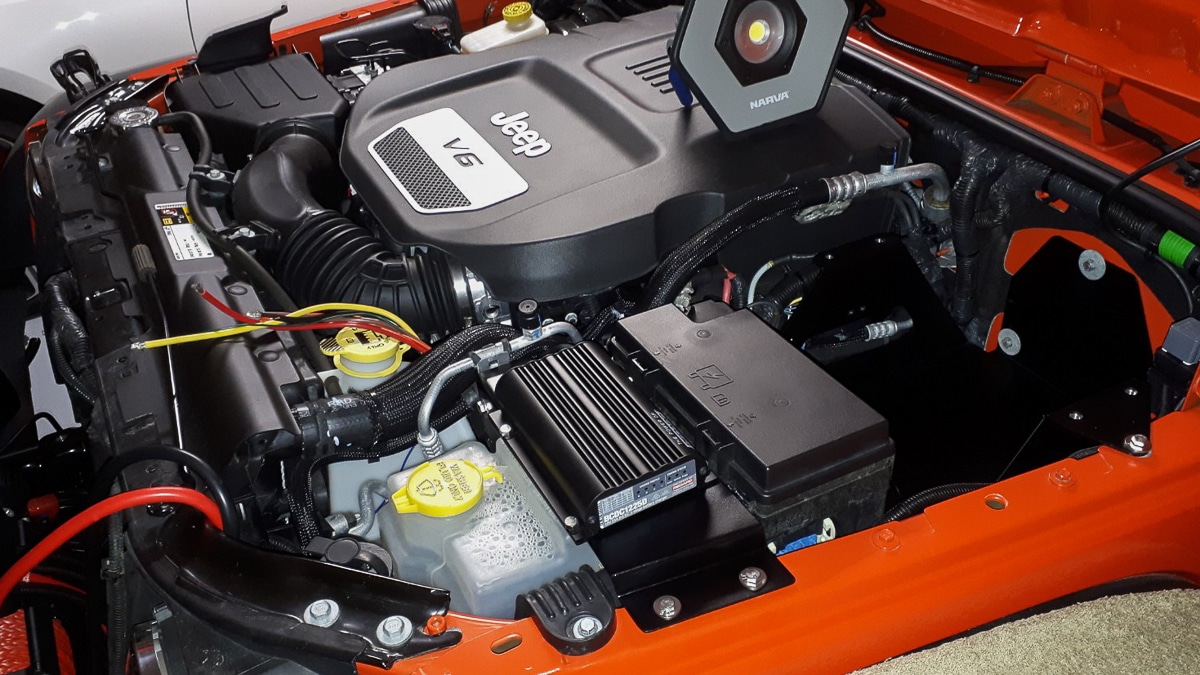
Two batteries squeezed under the ‘hood’ of Rays JK Wrangler.
Why you need a DC-DC charger
With two different types of construction and technology therein, each battery has unique charging requirements. So, a simple one-size fits-all charging approach that relies on the alternator’s output doesn’t work effectively for a deep–cycle batteryand,in turn, will reduce the auxiliary battery’s longevity.
To complicate things, from early 2007 some vehicle manufacturers introduced “smart” technology so that alternators no longer produced a constant voltage during charging for the simple purpose of charging the starter battery.
Smart alternators can make significant changes to their charging output voltages and when they produce it. A range of parameters such as engine load, speed and the battery’s current state of charge influence the alternator’s level of activity and load on the vehicle to reduce emissions and improve economy.
Because the alternator output can vary significantly, a deep-cycle auxiliary battery may never reach a fully charged state, which not only impacts how long your fridge will run over the long weekend, but will reduce battery performance, capacity and longevity.
Given the cost of batteries, you need to make sure both batteries are not being excessively discharged, are correctly maintained and fully charged for their specific construction. It’s for this reasonthat a dedicated charging system, independent of the fluctuations of a smart alternator, is an important addition to your dual-battery management strategy. Then of course, you want to make sure you are not trying to push too many amps into your auxiliary battery, as we talked about in a previous story hit this link.
There’s no need to plump for an expensive all the bells and whistles, complex set-up that is complete overkill. I’d rather have more money to spend on fuel and food than be able to power a football stadium for 22 minutes just to cause ‘accessory envy’ in my mates.
On the other hand, opening the fridge to find warm drinks and smelly fish isn’t the best way to keep the family smiling.
The Redard BCDC1225D charger in situ, but not yet wired up.
How to install the Redarc BCDC1225D
I had some significant challenges when it came to choosing the right charger for my project Jeep JK Wrangler shorty. With an engine bay crammed full of V6, I’d already performed a contortionist act to shoehorn in two large batteries. With no interior options, mounting a DC–DC battery charger was going to be a headache.
I needed a fully self-contained unit that was compact and durable enough to withstand the rigours of vibration, heat, dirt and moisture conditions in a 4X4’s engine bay. Plus, I wanted the option to feed my batteries via solar input.
After much research and discussion with patient experts, I chose the Redarc BCDC1225D because it packs a swag of features into a small footprint (165mm long, 120mm wide and a miserly 37mm high). With the option to mount in any orientation, it’s ideal for a cramped engine bay. I was grateful for the steer away from the higher cost 40Amp unit when Redarc pointed out that my batteries had a 16Amp charge rating and the 40Amp unit would be of no advantage, and if anything, possibly would have caused damage to my batteries due to over-juicing them.
Remove the Redarc BCDC1225D from the box and straight away you’ll notice that the attention to detail, the materials used, the surface finishes and the assembly confirm this is a quality-built product. I like the reassuring confidence that it has been designed and built in Australia and tested here in some of our most arduous conditions. Back that up with an Australia-wide network for product backup and support, and why would you go bush with anything less?
The list of standard features on the Redarc BCDC1225D is impressive. There’s simultaneous charging from both solar and vehicle inputs with Redarc’s built-in ‘Green Power Priority’ which selects solar charging first, reducing load on the alternator and the engine to minimise emissions.
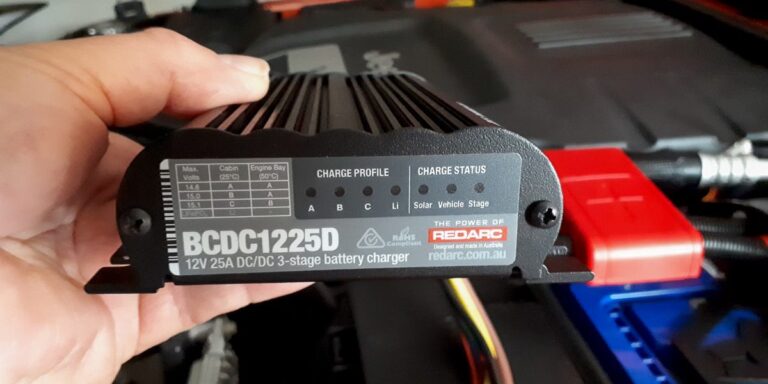
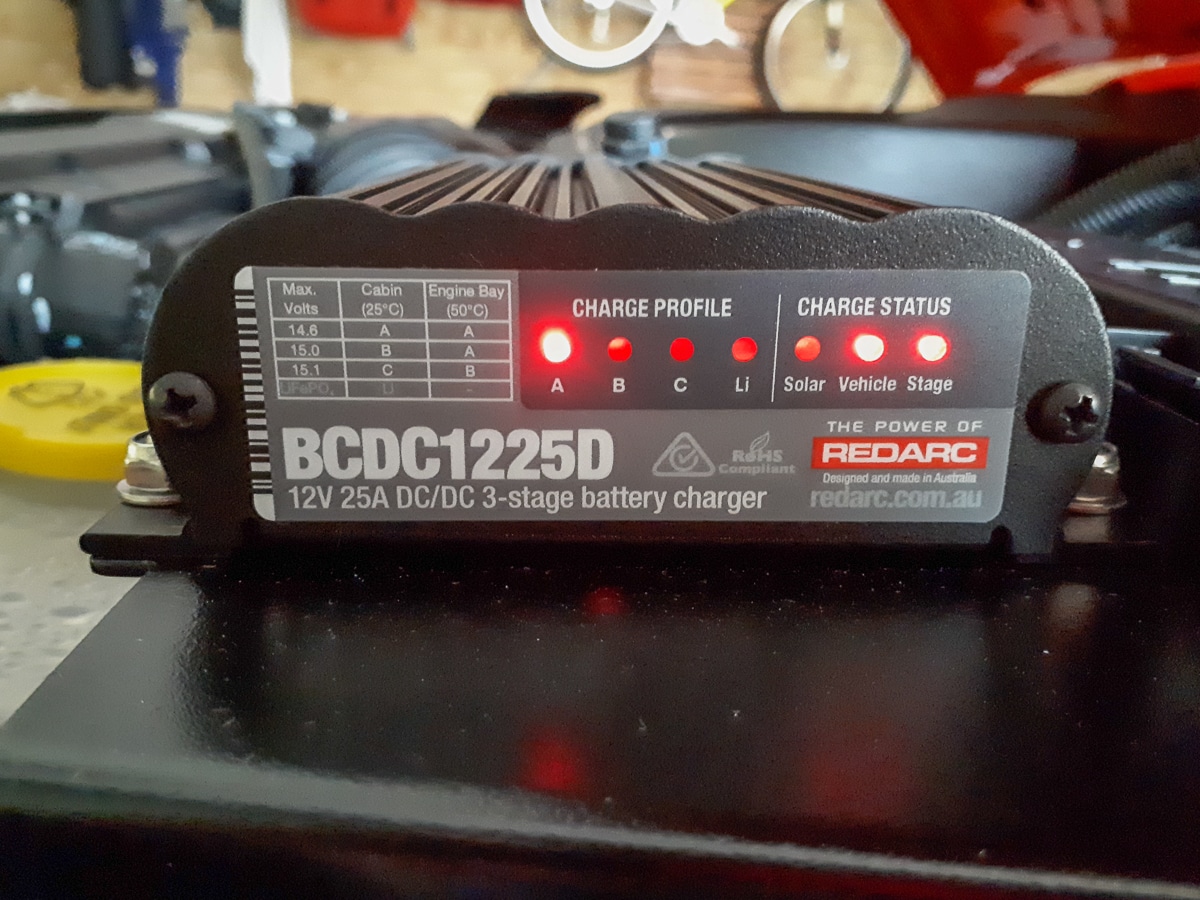
LEDs show charge profile and status.
Redarc has even incorporated a battery self-test mode which occurs every 100 seconds. It validates the input conditions have been met and that there is no issue with the output connector or battery. This high frequency check assists to protect the vehicle and the wiring in the event of a problem.
Rolling the unit over on its back and you can see the harness comprises seven wires. The four heavier gauge wires are red for main battery positive, brown auxiliary batterypositive, black for ground and yellow for solar positive input. The three smaller wires are orange, blue and green. Blue for standard or smart alternator; orange for charging profile based on your battery type, and green for the optional LED charging light.
This compact little powerhouse charger is suitable for batteries between 75Ah and 200Ah and has charging profiles for lead acid, GEL, calcium, AGM and even Lithium (LiFePO4) batteries. You can easily set it up for your preferred profile by connecting the orange wire in the supplied harness to ground for 15V output, battery positive for 15.3V, the green LED output wire for Lithium mode or I left it disconnected for a maximum charge of 14.6V, perfect for the batteries I was using.
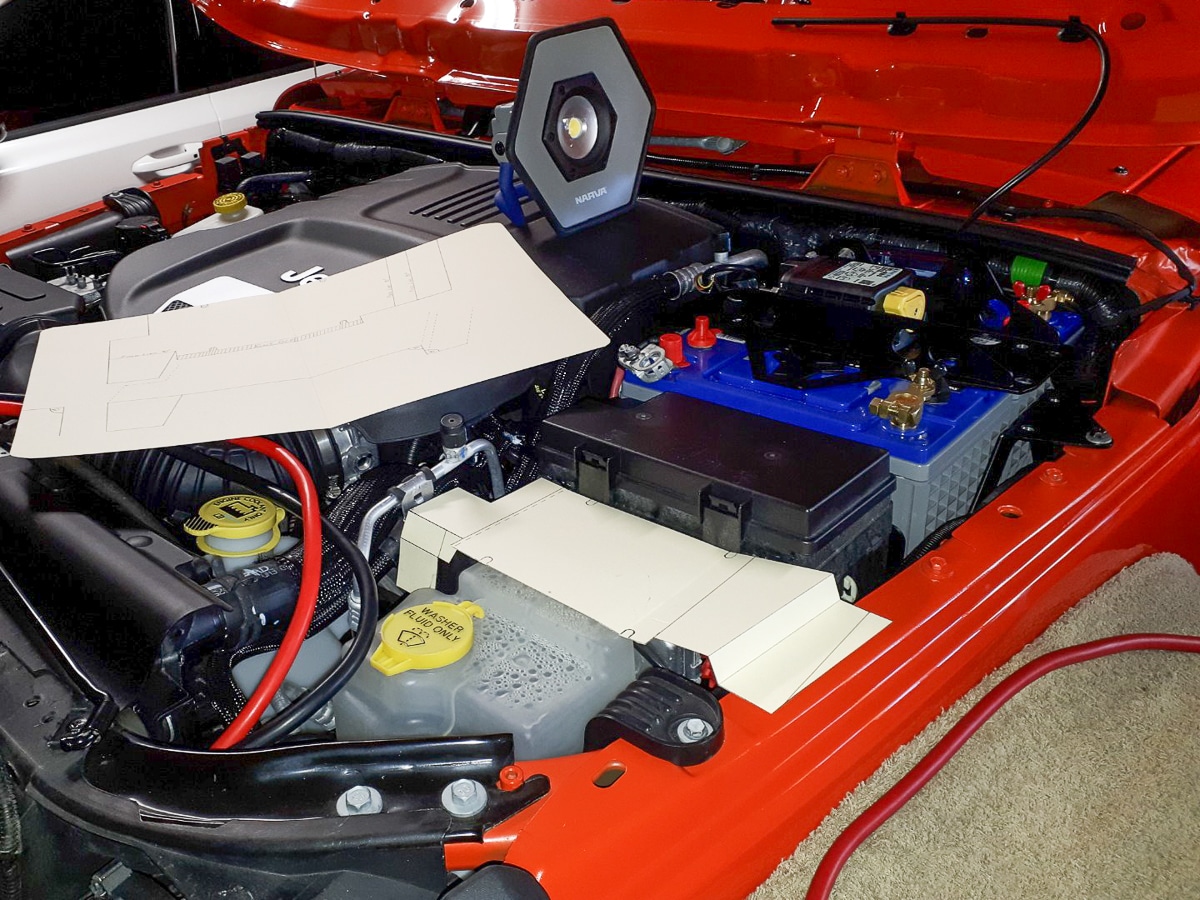
Okay, time for my first (and only) grumble: Redarc indicates the charger works at maximum efficiency within 1m of the auxiliary battery or closer. However, the unit only comes with a400mm-long wiring harness, meaning that even if you work within the specified maximum distance you might still have to extend the wiring… and with every join there is the propensity for resistance and corrosion over time, regardless of the quality of your initial connection. So, with my only gripe out of the way, my personal headaches were all location, location, location. While I chose a position unique to my JK Wrangler and spent days custom fabricating brackets, Redarc makes a range of mounting brackets for the more popular 4X4s. Check with Redarc on what’s available to avoid overthinking where to mount the unit, or having to make a custom bracket.
The template for the custom mounting bracket.
Given the need to stay within a metre of the battery, the flexibility of mounting any which way is a top feature. You need a location with maximum ventilation and as far away as possible from the hot engine. Ideally, you’ll be able to see the LED display panel easily; the brackets that Redarc make mount the units just in front of the radiator – solid airflow, and you can see the indicator LEDs.
I forgot my aggravation over the harness length when wiring in the unit was a snap. There was no head scratching as the well-written instructions had easily understood supporting charts and diagrams. It was like reading “Installing a DC-DC charger for dummies”. There’seven a troubleshooting page with frequently asked questions and clearly marked cautions that you might not have considered. Read the instructions first, heed the warnings and you’d be hard pressed to get it wrong. If you do happen to have any questions with wiring, you can give the team at Redarc a call from 6am to 7pm (ACDT) Monday to Friday for free expert technical advice on 08 8322 4848. How’s that for after (and before) sales support!
Having installed a twin 40Amp MIDI style bolt-down fuse assembly with the red wire connected to the primary and brown wire to the auxiliary battery, as per Redarc instruction, I simply connected the remaining wires to achieve the correct charging profile for my battery type and matched it to the vehicle’s alternator.
With everything connected, the wiring neatly tucked up out of harm’s way, and the unit firmly bolted in place, it was time to check the LED panel on the front of the unit.
Initially, the first four charge profile LEDs will show which battery charging profile you’ve selected (A, B, C or D) and will pulse dimly to indicate the unit is on. Start the vehicle, and with the alternator charge above 13.2V applied to the primary battery, the unit waits 20 seconds before activating and the charge status LEDs show which power source is being used. Solar is the first LED; vehicle is second LED; or both.
The third LED represents the stage of charge. An LED on all the time indicates a boost charge; flashing once every second is an absorption charge or flashing once every two seconds shows maintenance of a float charge of 13.3V, ensuring a full 100% charge for the auxiliary battery.
After switching off the engine, the unit remains connected until the primary battery returns to 12.7V and then it will disconnect. It will isolate your auxiliary battery to protect your vehicle’s own electrics; but it will not isolate your auxiliary battery from power munching camping conveniences.
Ray can now get out and about, have cold drinks and fresh food, and know the Wrangler will have enough charge to start again.
Final thoughts and longevity test
After running the unit for several months it’s been subject to dust, dirt, heat and water and performed flawlessly. It’s genuine Aussie quality and delivers exactly what’s on the box.
Don’t be fooled by the impressively small footprint, this compact unit packs some serious performance and features you’d expect to find in much larger and more expensive units.
If you’re only running two batteries with a capacity between 75Ah to 200Ah this unit has got you covered. Combine the Redarc BCDC1225D with the clever Hummingbird RF battery monitor kit like I did, and you’ve got a great compact combo solution for 4X4s where space is at a premium.
And fear not… if your motto is “the bigger the better”, and you’re looking to build a mobile power station with three, four or more batteries in case the generators fail at a rock concert, Redarc has you covered with its bigger 40A and 50A solutions.
Unsealed 4X4 delivers honest 4WD advice, gear reviews, and travel guides crafted from real Australian adventures. Since 2014, we've tested the gear, driven the tracks, and learned what works - so you can hit the tracks safely.