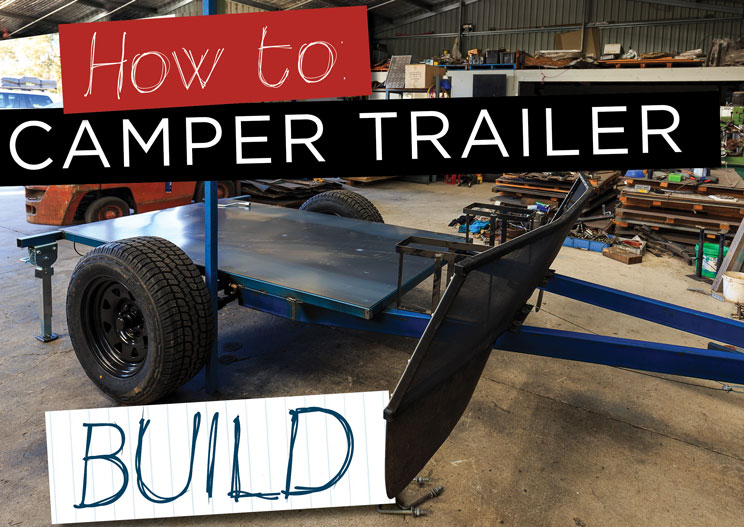
YOU CAN’T BUILD A CAMPER TRAILER ON THE CHEAP… OR CAN YOU?
If you know what you want and how to cut costs by doing some of the work yourself, designing and organising for a custom-built camper trailer to be built for cheaper than an off-the-shelf camper trailer is a piece of cake.
CLICK HERE TO READ THIS STORY IN OUR ONLINE MAGAZINE
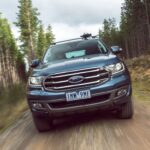
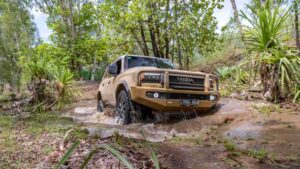
Operation Adventure Oz was dreamed up when I was on a travel-writing trip exploring National Parks in Queensland. I was sick and tired of trying to fit our 2.47m wide caravan through a 2.5m wide gate and knew it was time to dispose of the caravan, toughen up and build a camper trailer myself. The Ironman 4X4 rooftop tent atop the Prado is a great place to sleep each night, but I am restricted once I am camped. If I want to nick into town or head somewhere for a sunset photo shoot, I have to pack up the tent and hope that my chair, table and cooking gear will still be where I left them when I return; oh, and then I have to set up the tent again.
PLANNING AND DESIGN
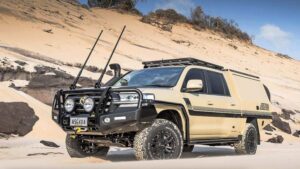
In my mind, a 6×4 foot enclosed trailer with rooftop tent would suit my needs. Add a kitchen, water tanks and batteries and I would still be able to go anywhere yet travel lightly and camp comfortably and securely.
On my return home, I drew up some plans. There would be a height restriction of 2,100mm and length restriction of 5,500mm, as the camper would live in the garage when not in use. It had to fit under the roller door and allow it to be closed. I recalled that a neighbour had recently had a trailer built and taken it 30,000km around Australia without any issues. The trailer builder was also a local, so that would make communication and planning easier.
Everything was coming together for me, but I was yet to discuss any of this with my wife Roxy. Thankfully, we were on the same page and within days our caravan was on the market. The goal was to finish the camper trailer for under $10K!
MUST-HAVE ITEMS
The more I thought about it, the longer the list of requirements became. Having owned camper trailers in the past I knew the positives and negatives. I decided that to fit my needs I required the following:
- Heavy-duty leaf springs, easy to repair or replace when in the bush.
- 17-inch rims with the same width, offset and stud pattern as the Prado, to be interchangeable.
- 265/65/17 AT LT tyres to be a match with the Prado tyres.
- Two water tanks, one for potable water and one for non-potable water. With separate filling points, they wouldn’t be connected. The potable water tank would have a manual hand pump and be used for drinking water; the non-potable would be connected to a pump and fed to a tap mounted at the front of the trailer.
- Two taps to be mounted on the trailer; one as an outlet via the water pump and one as an inlet to allow pumping water from a creek.
- A hot water unit for washing dishes, and showers.
- Two batteries to supply power and run the lights and fridge.
- Pure sine wave inverter to charge my camera batteries and laptop.
- Awning to provide cover.
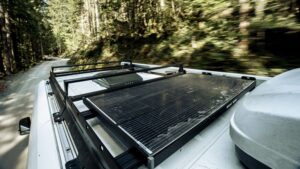
- Roof rack to carry our recovery Treds.
The draw bar would need to be extended to allow a minimum of 1,100mm space – allowing the rear door of the Prado to be opened fully. It also needed the following:
- McHitch 3.5-tonne drop-on coupling.
- Heavy-duty swing-up jockey wheel.
- Stoneguard (I already had a D-Flector stone guard).
- Spare wheel and dual jerry can holders.
- Mesh on the A-frame to allow me to easily tie down firewood.
BUILD STAGE ONE
I contacted Lorry from Lorry’s Trailers in Diggers Rest and explained my requirements, and organised a meeting to discuss my plans. I redrew my design… simplifying it as much as possible so that by the time I drove into Lorry’s yard, I thought my plans were perfect.
When I handed over my design, the first change Lorry made was to the size of the trailer (to 7×4 foot). This would be better balanced with the axle better placed than on a 6×4 trailer. Everything else passed and after a couple of days he rang me with a quote – accepted on the spot. It was now left with Lorry to start the build.
Before works began I needed to research my kitchen options. One option was a tailgate-mounted kitchen, but that was rejected straight away as I have seen rear doors sag with the weight of some kitchens. I came across some stainless steel versions that included a stove and sink, but they didn’t have acceptable slides… so I was left scratching my head.
Checking out the Drifta website, it wasn’t long before we decided on a suitable package of slide-out wooden kitchen with space for a fridge and stove and slide-out storage draw to match. Once I had the dimensions sorted with Drifta, Lorry calculated the dimensions of the rear door. As the draw and kitchen only measured 1,830mm in length and 535mm in height, it meant Lorry could box the drawers in – allowing a false floor above for plastic tubs and room to mount batteries in the end space.
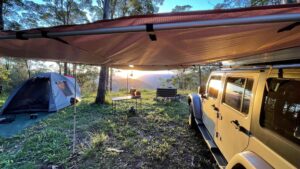
We also decided to order a 270-degree fox wing awning from Drifta to be mounted on the passenger side, folding all the way around to the rear of the trailer. This provides great protection from the weather. The rooftop tent folds out to the driver’s side, leaving only 0.5m of uncovered space between the awning and the tent.
The hot water solution needed to be easy to carry, set up and use. I stumbled across the Joolca Hottap and, after researching the product, ordered the Hottap Outing package that was a complete system including a 12V water pump, power connections, hoses and shower head.
Lorry installed a mounting point for the Hottap at the front of the trailer, close to the water tap and gas. It couldn’t be installed anywhere else as it would be dangerously close to the tent or awning. The shower head is on a long hose – so it still reaches the kitchen sink.
Within four months, the camper trailer was ready for handover. Once I had taken the camper to Vicroads and sorted the registration it was up to me to hook up the water tanks, water pump and taps, as well as install all the electrical gear. I had organised for Lorry to run my cabling for the Anderson plug connection from the Prado to the camper batteries.
BUILD STAGE TWO
So now it was up to me to finish the job. Thankfully I’ve had loads of practice with 12V cabling, usually in 4WDs; but a camper trailer is simpler, really. I sourced most of the gear from eBay:
- Narva 12-way fuse block.
- Pure sine wave inverter.
- 6mm twin-core 50amp automotive cable.
- 3mm twin-core 10amp automotive cable.
- Anderson plugs.
- RV water tank meters.
- Double water tank gauge.
- Narva dual socket & USB socket.
- LED dot light switches.
- 50 amp Anderson plug covers.
- VSR unit.
- Dual-battery monitor.
- Jaycar were also helpful for gear as I found them cheaper than any of the auto retailers in town:
- Heat sink.
- Jiffy boxes.
- Loom tube.
All the hosing, joints, taps, etc for the water tanks (as well as the 240V gear) I purchased from Bunnings. From Ironman 4X4 I picked up a 10amp battery charger.
Deciding on the cable to use for power considerations is a minefield with every man and his dog having an opinion on what is right. I used the philosophy that size does matter, with thicker wire reducing voltage drop.
From the fuse block I ran 50amp cable to the fridge, to an Anderson plug at the rear of the camper and to an Anderson plug on the board. I also ran 50amp cable from the battery direct to the inverter and from an Anderson plug direct to the battery for a solar panel connection. I used the 10amp cable for all the LED lights, the Narva sockets and the water pump as this was sufficient.
I found that by laying all the components out on the boards they were to be installed on, it was easier to make up a template on some tracing paper that enabled me to work out where to drill holes for the wiring to poke through. I also found that creating looms eased the process and kept the cables neat and tidy; and labelling all the cables at either end made things easier to follow when completing the final installation.
Where cables ran from outside the camper to inside, I drilled holes big enough to allow grommets to be installed. Once the cables were all run through, I silicon sealed the gaps to prevent dust and water ingress.
A 15amp power inlet was required to allow for 240V power within the camper. I spoke to my sparky, and he gave me a list of what was needed.
The hardest part was drilling a large hole in the side of the camper to fit the power inlet. I ran flex cable to where the 20amp RCD and two double GPOs were positioned before my sparky completed the installation, tested it and then provided a certificate of electrical safety (ensuring it is legal and safe).
Once I was happy with everything and had tested that each item worked correctly, I screwed all the boards into place. The final step was to connect the hosing to the water tanks. Silicon was used in copious amounts to stop any leaks and the hoses were covered with loom tubing to try and protect them a little bit.
I am glad I decided to tackle this project and I am extremely happy with the result. We missed the goal of spending only $10,000… but only by 10% mainly due to cost of the Drifta awning that was an add-on during the build. I now plan to take my camper wherever I go, enjoying the simplicity and creature comforts that it offers.