We’ve knocked together a quick DIY wildlife water station that will help the recovering wildlife in the massive burnt tracts of land and drought-stricken areas we all love to go wheeling in – read on for the instructions. We’ve all…
We’ve knocked together a quick DIY wildlife water station that will help the recovering wildlife in the massive burnt tracts of land and drought-stricken areas we all love to go wheeling in – read on for the instructions.
We’ve all dug deep to throw a few bob into the hat for the bushfire appeals going around at the moment, which is and will continue to make a huge difference for those of us who have been affected by the bushfires tearing our great country to shreds. Something oft-forgotten is the native wildlife trying to survive in a bush ravaged environment, with bugger all rain around, their water sources are now often acidic and undrinkable due to the amount of ash that has fallen into dams, creeks and waterholes since the fires. Is there a DIY wildlife water station we can knock up?
This got us thinking (and what else do we really sit round on weekends and do at Unsealed 4X4?) – what specifically can we do to lend a hand directly. Not just lob a couple of dollars in the tin, but go out there and make a difference. So we got chatting to WIRES, well my local Newcastle equivalent; The Hunter Wildlife Rescue (Native Animal Trust Fund). We got chatting with the local group and asked their opinion on building a few of those water stations we’ve seen kicking around the internet. Not gonna lie, they were pumped. We were told that these things are a magical bit of kit, so long as you can get back out there and fill them up, and don’t lose where they’re placed. Both of those are easy to manage – we’re going to put the ones we’ve knocked up on trails we go wheeling on all the time, so we can fill them from the Jerry Cans on the back of our rigs, and we’re also going to GPS mark them, so we don’t lose them.
If you don’t have a spot you can put them on private property, don’t just lob out to your local national park or state forest. We’ve asked the question of both National Parks and Wildlife Service and NSW Forestry Commission, and we’re yet to hear back on whether we are all OK to put some out (we’ll keep you updated on what we hear!). What you can do, however, is knock a couple of these up, and call your local WIRES or native animal rescue group, and chances are they can tell you where you can put them, or they can get them out in places for you. Doubly so, as they’re going to know where they’ll be the most useful, and where they are needed most.
So without any further ado, this is how to knock one up.
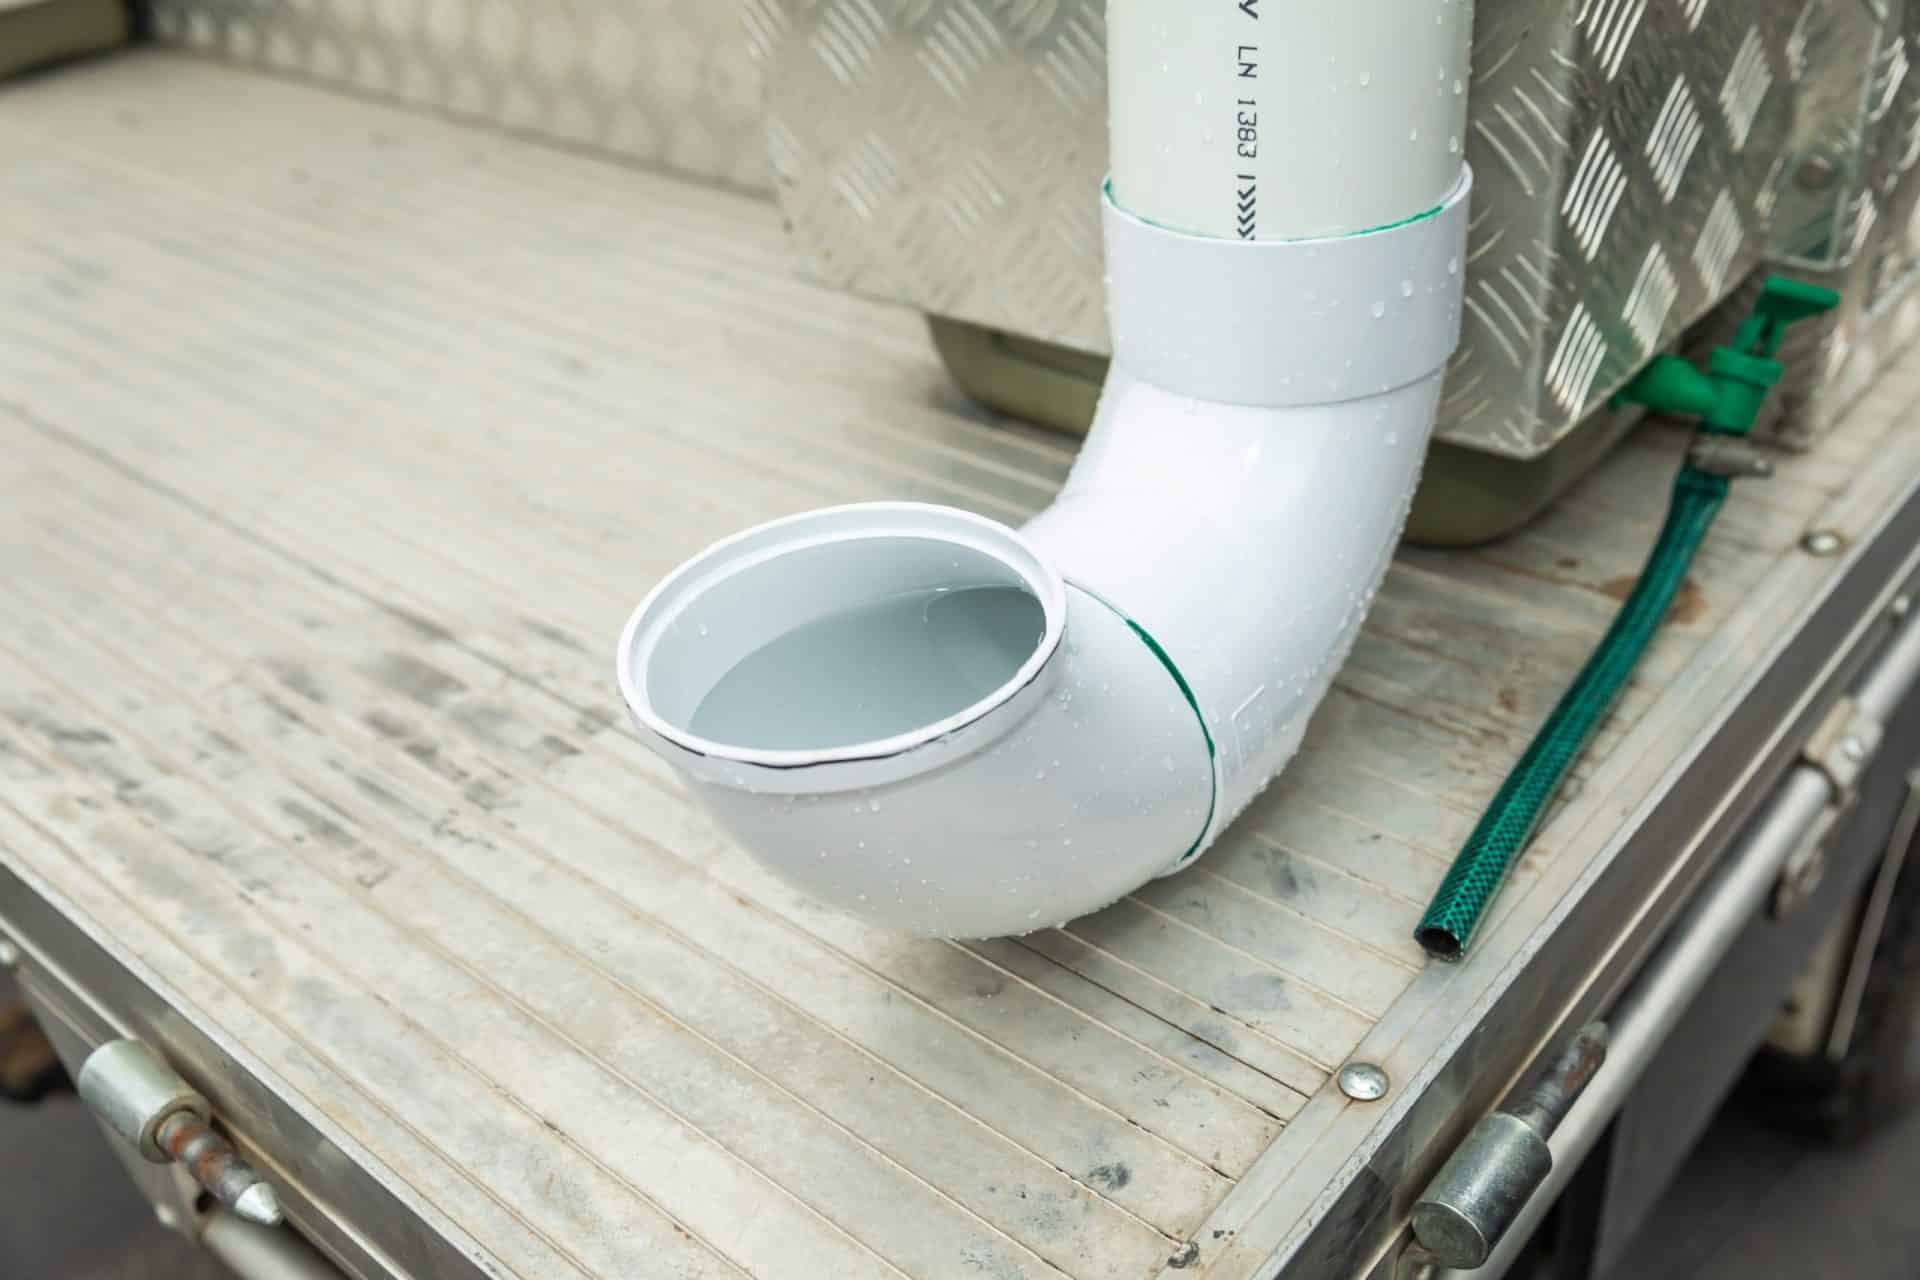
You may have seen a few examples of water feeders getting around that work on a vacuum principle. As the water is drunk at the bottom, it refills from the top, and the vacuum at the top stops the water from flogging out – think of the little guinea pig/bird water stations from when you were a kid. Same idea – you just need to make sure you use the right PVC cement in these to get a complete seal or it won’t work.
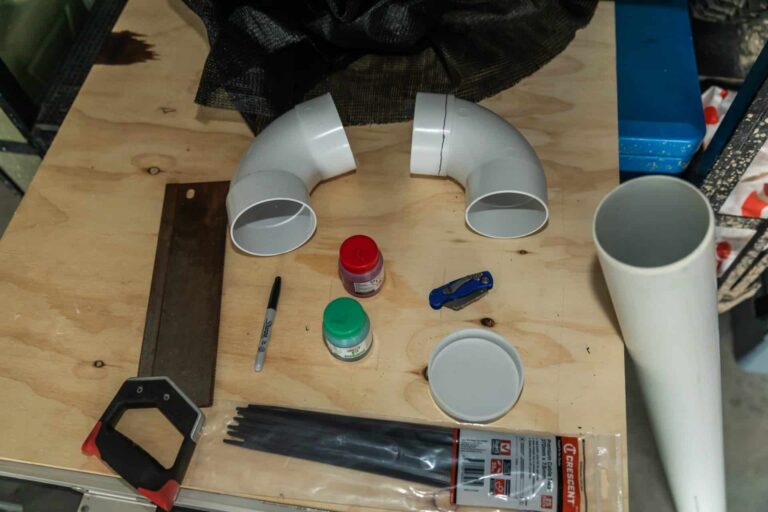
What you’ll need
All of the parts you need can be bought from Bunnings (and some stuff you’ve probably got lying around at home). We bought the everything, and it cost us just under $100, and that will make four of these little buggers that hold about 12-litres each.
You’ll need:
1x 6m length of 100mm PVC down-pipe – cut into 1.5m lengths;
4x 100mm 90-degree bends (male to female);
4x 100mm 90-degree bends (female to female);
4x 100mm end caps;
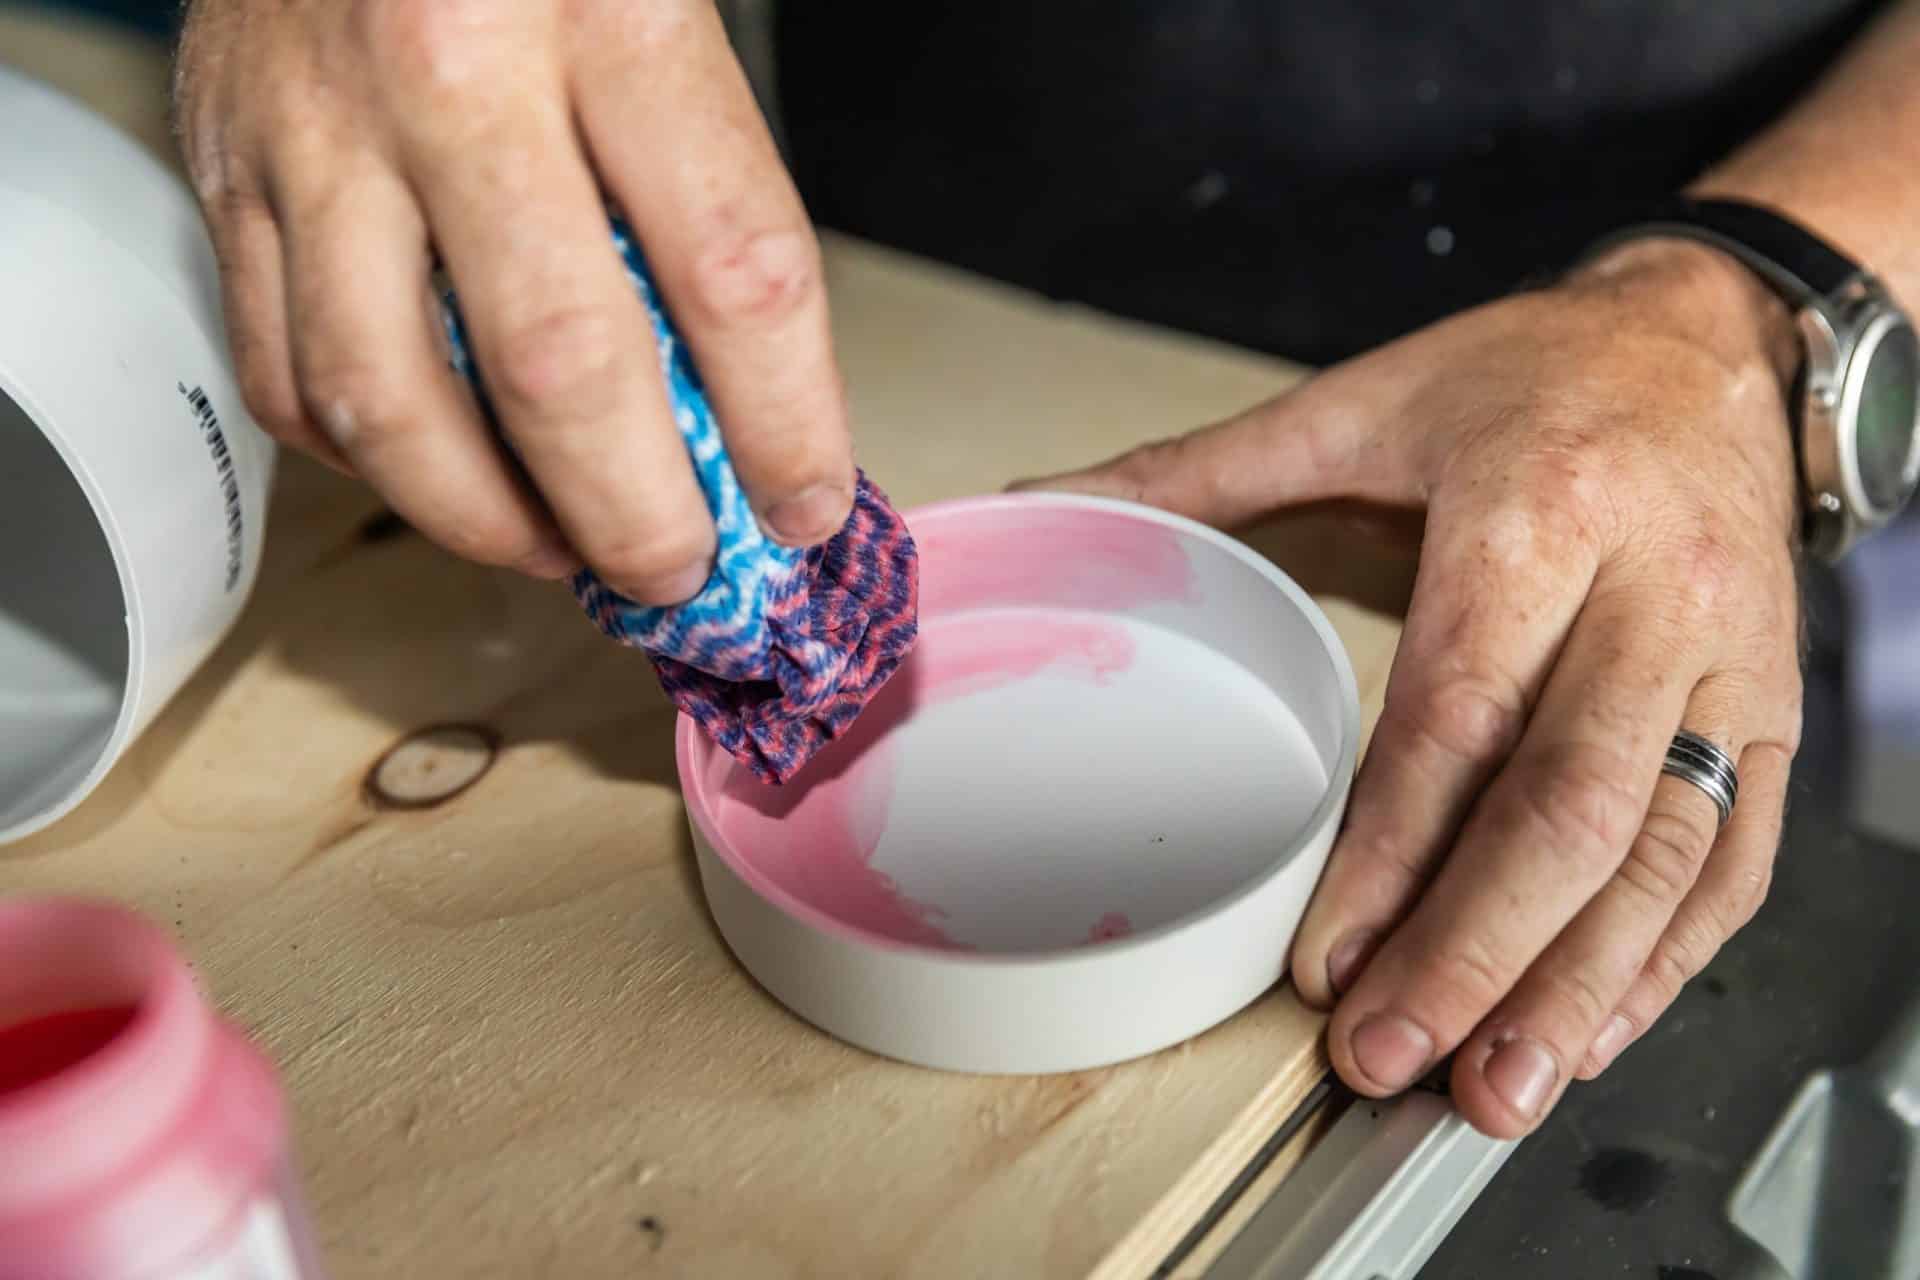
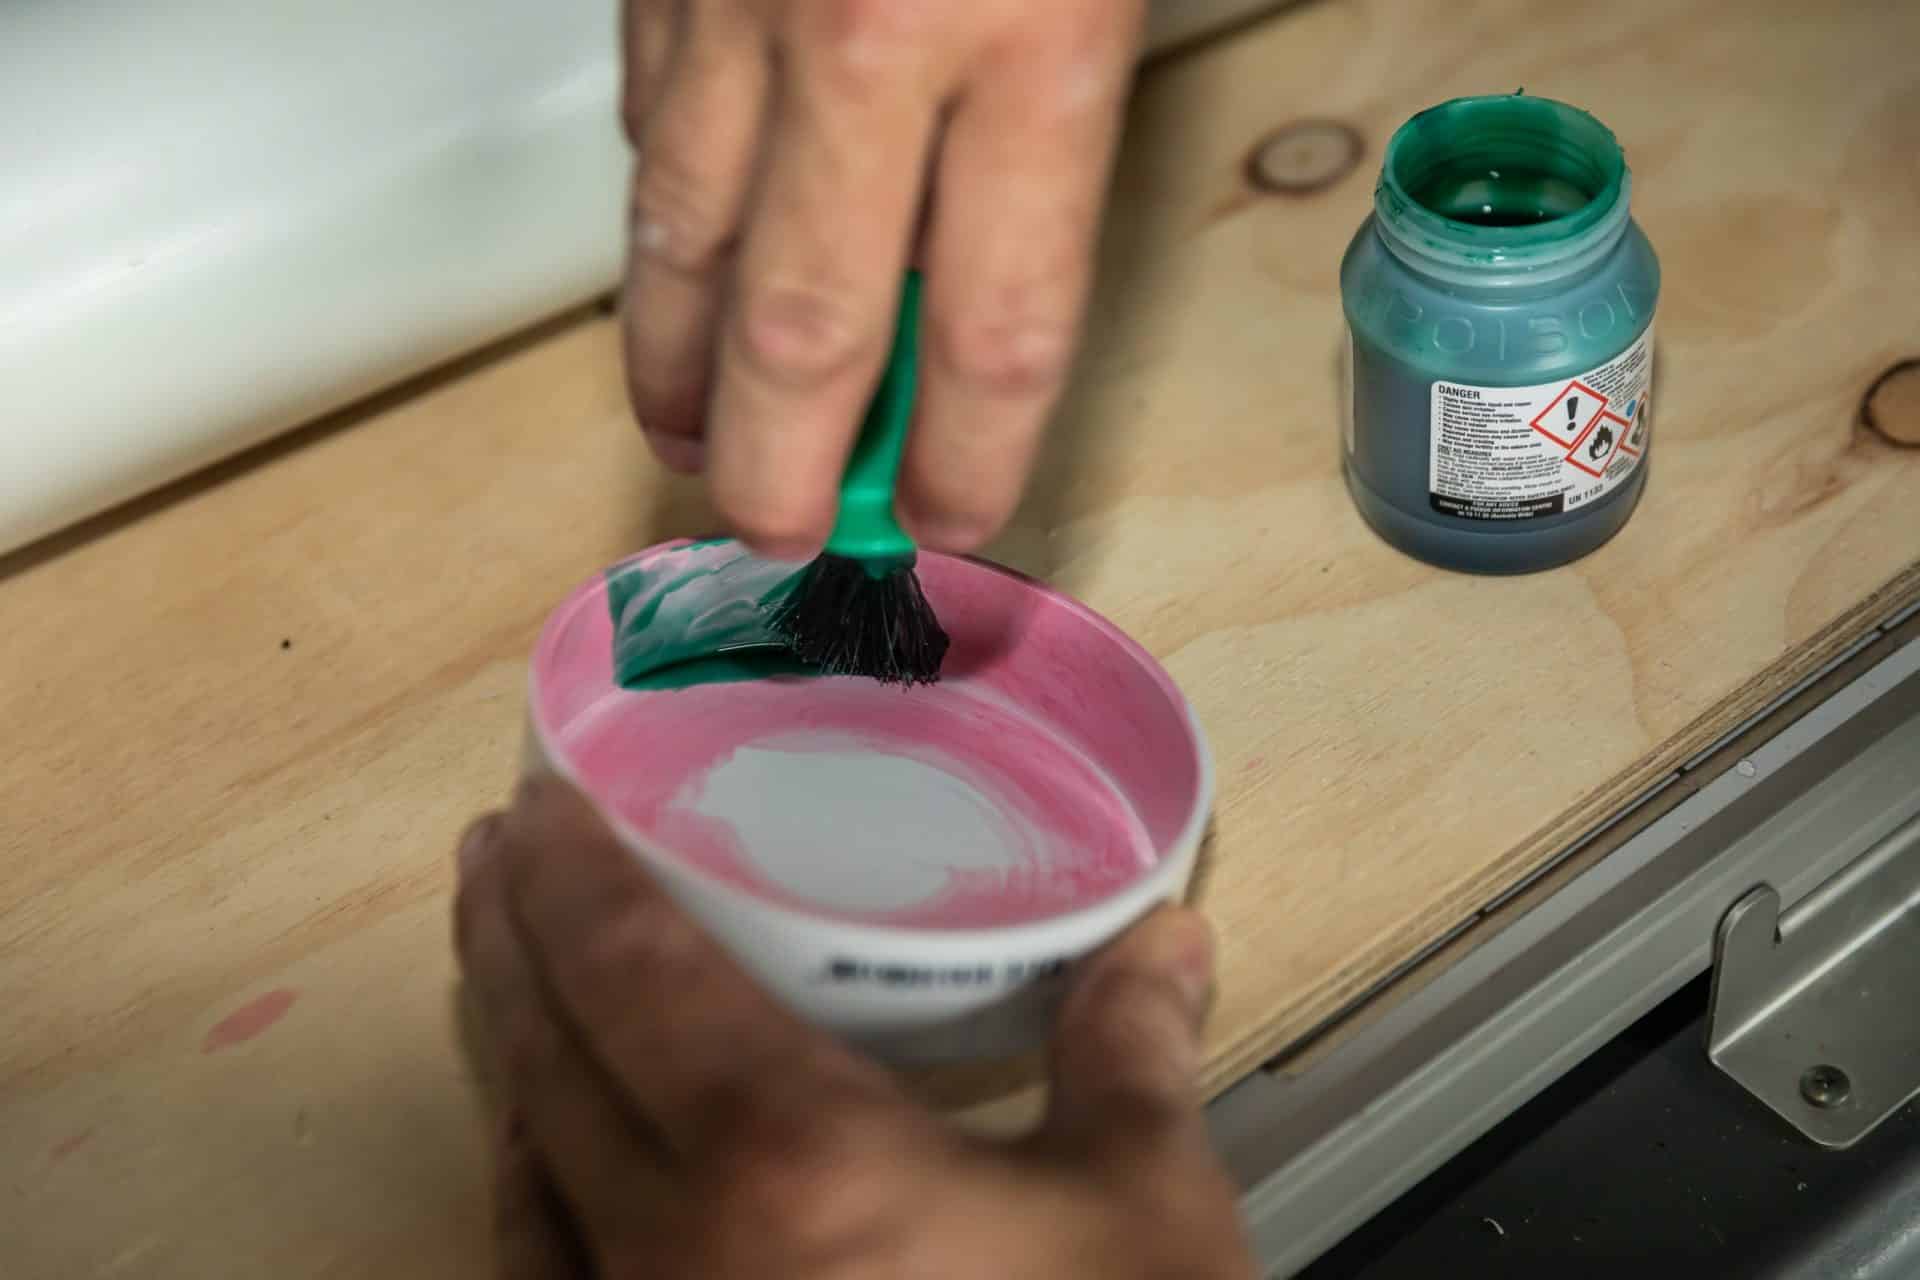
PVC primer and cement;
4x stakes or star pickets;
a handful of cable ties;
some old shade cloth or flyscreen; and
and about an hour of your time.
How to build the water feeder
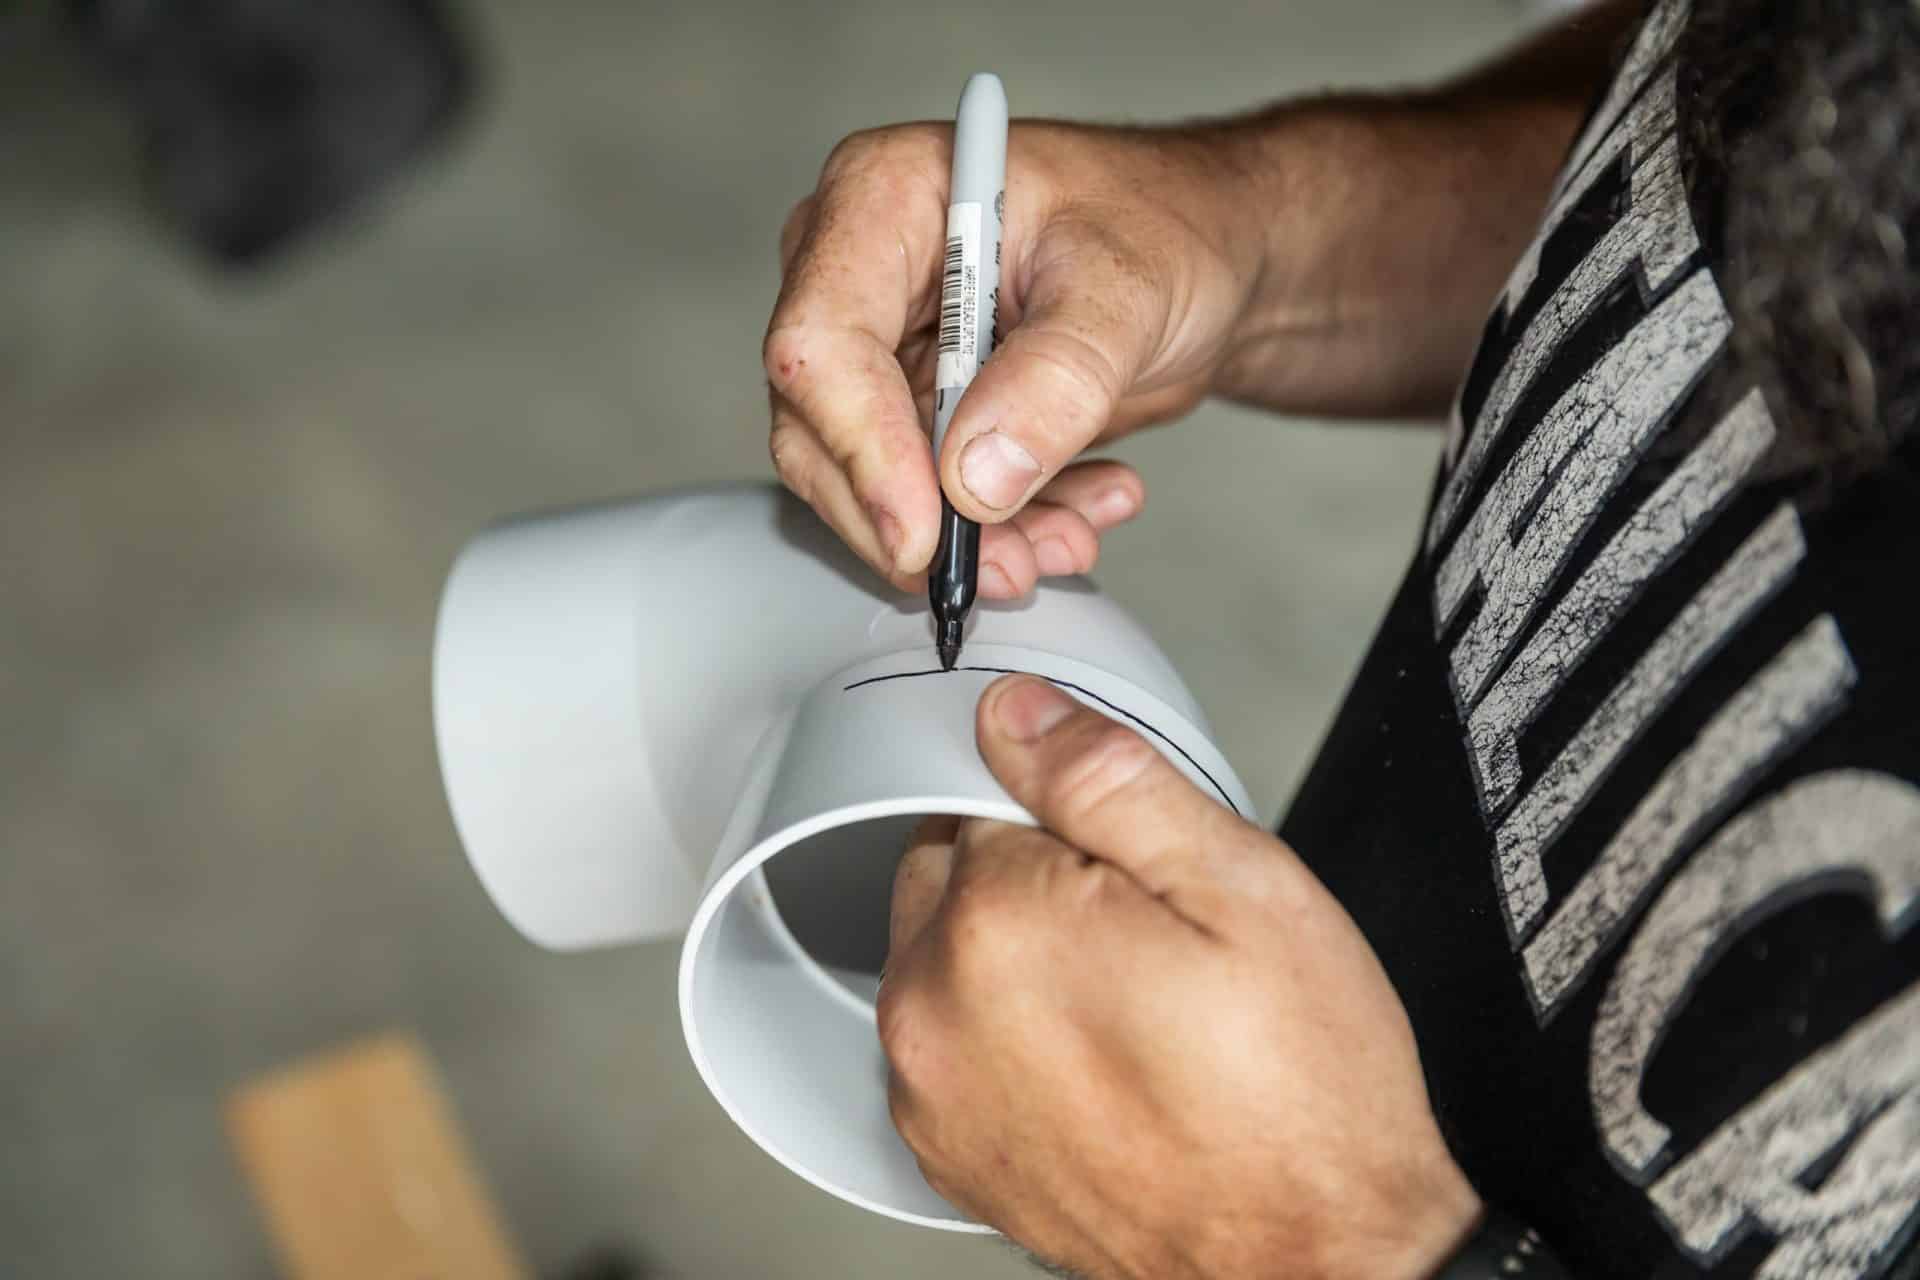
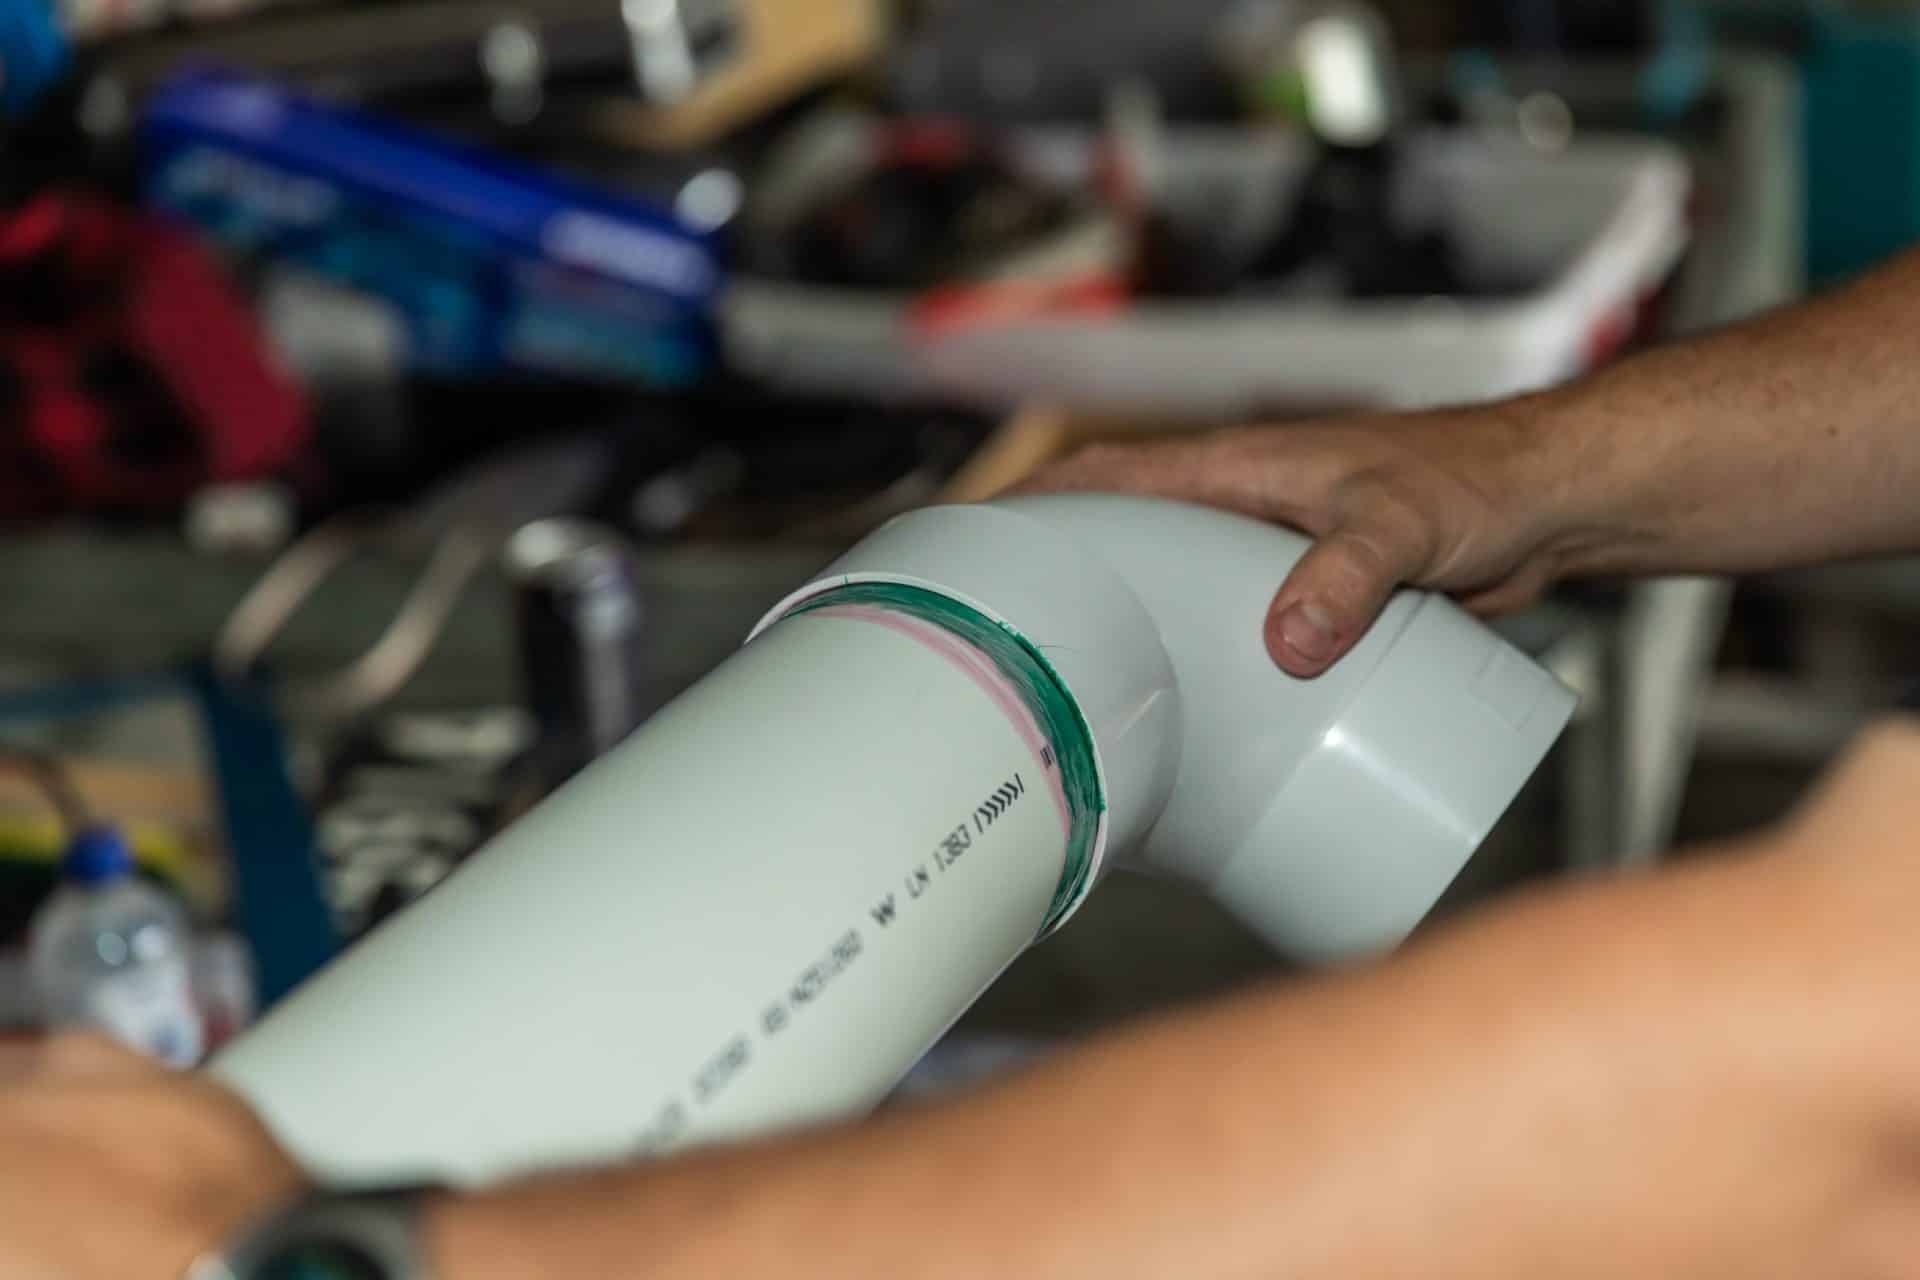
Ok, first things first, fit everything together without cement so you know where it’s all going to go. That’s the two 90-degree bends joined, 1.5m length stuffed in one side, and the cap on the top. That’s it done.
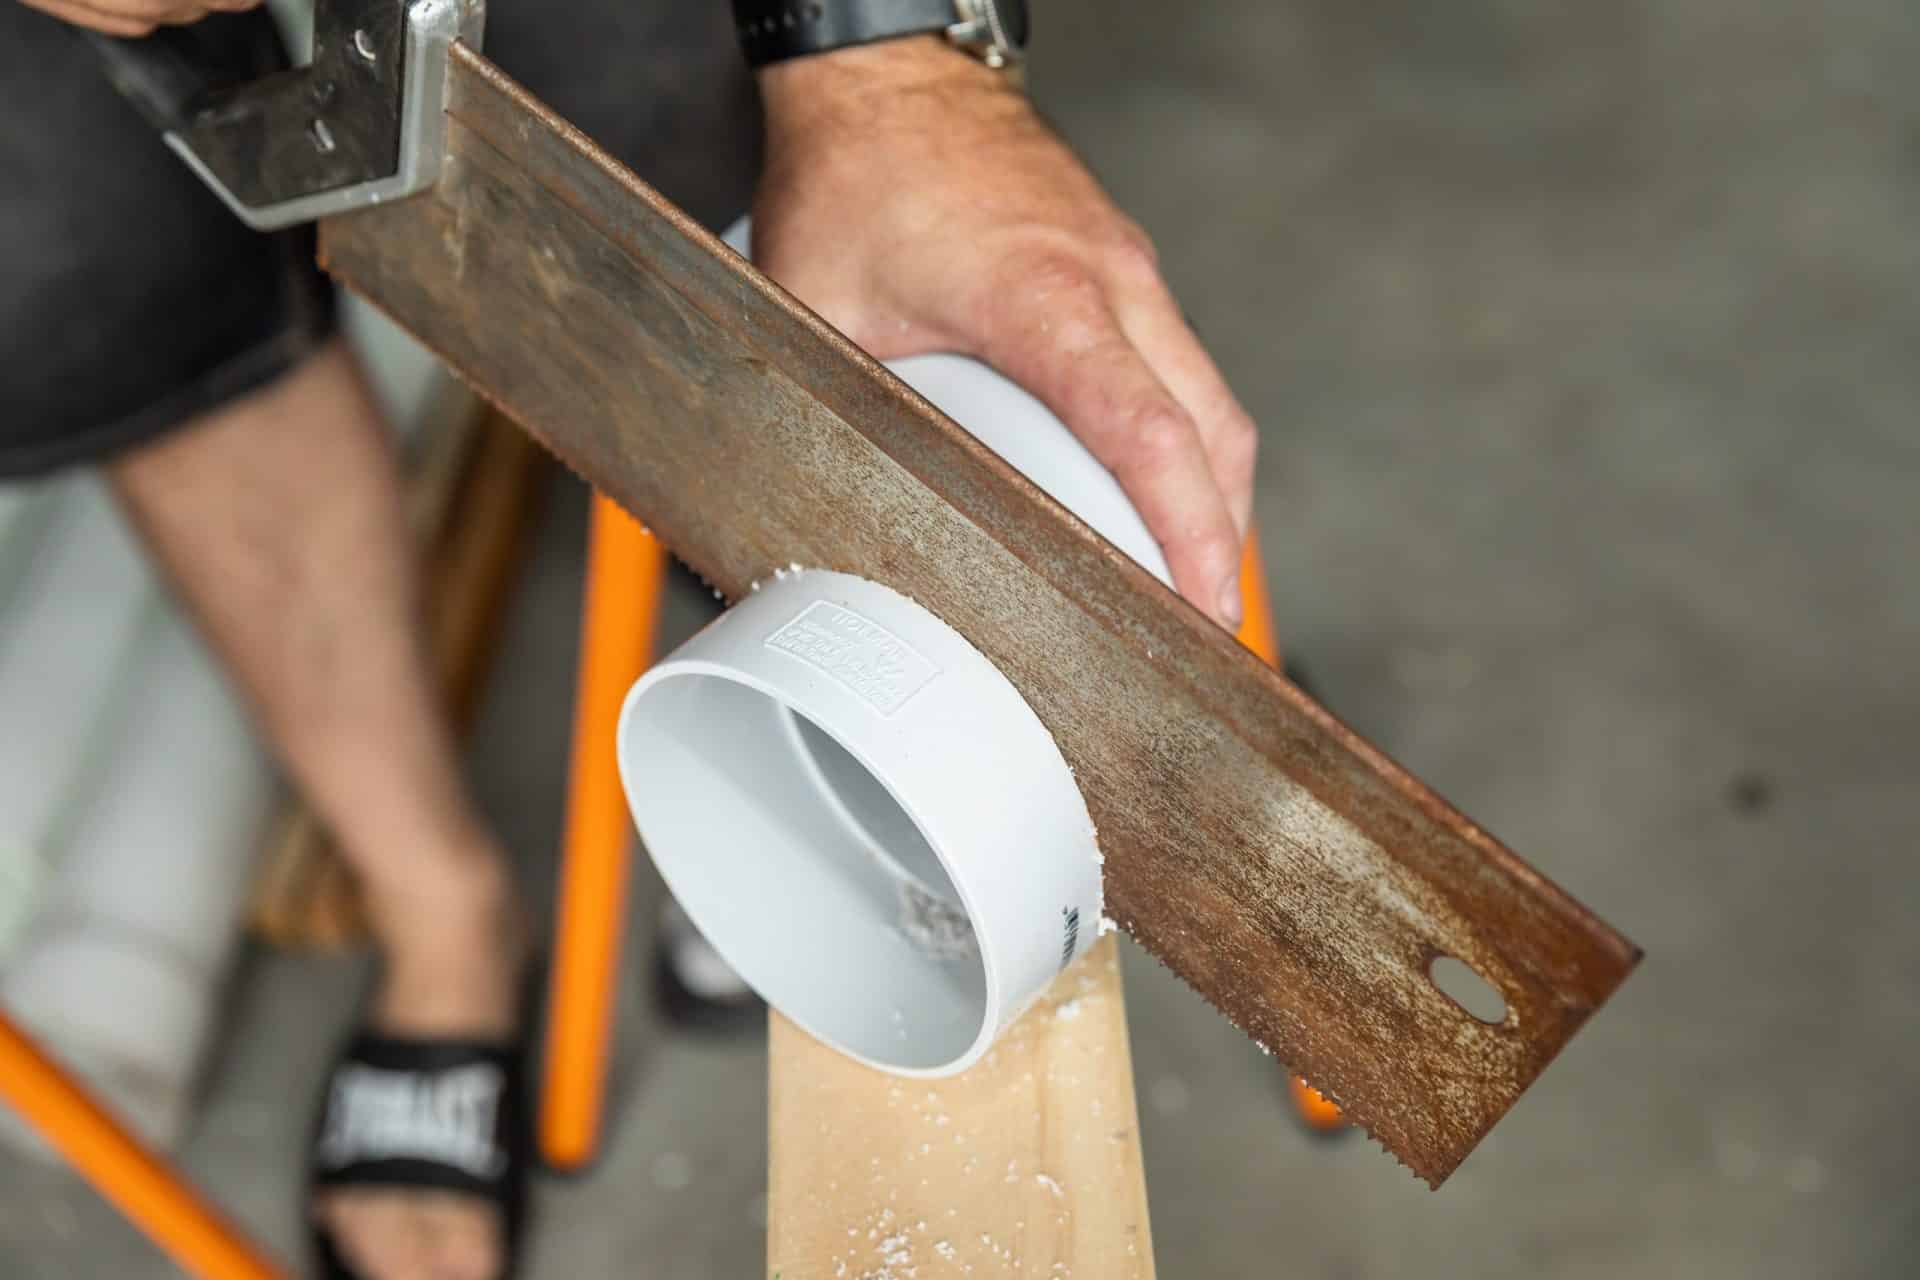
You’ll need to kick off with cutting about 20mm off one of the female ends of the bends. That’s the end the water will be sitting at and lets the animals get close to the water to drink. Use a hacksaw or mitre saw will make sure your cuts are pretty well square.
From there, prime up all the pieces that are going to be joined, and get your cement ready to go.
Cement the cap on the ends of the 1.5m lengths
Next, you’ll want to cement the unshortened female-female elbow to the 1.5m pipe.
From there, you’ll want to cement on the shortened female elbow to the other one, making sure it’s square and the elbow makes a square 180-degree bend – if it’s off-kilter too far it won’t work and will leak water.
Then, just leave it out overnight to dry (I used pressure cement to ensure I got the vacuum seal we need), and you’re good to go.
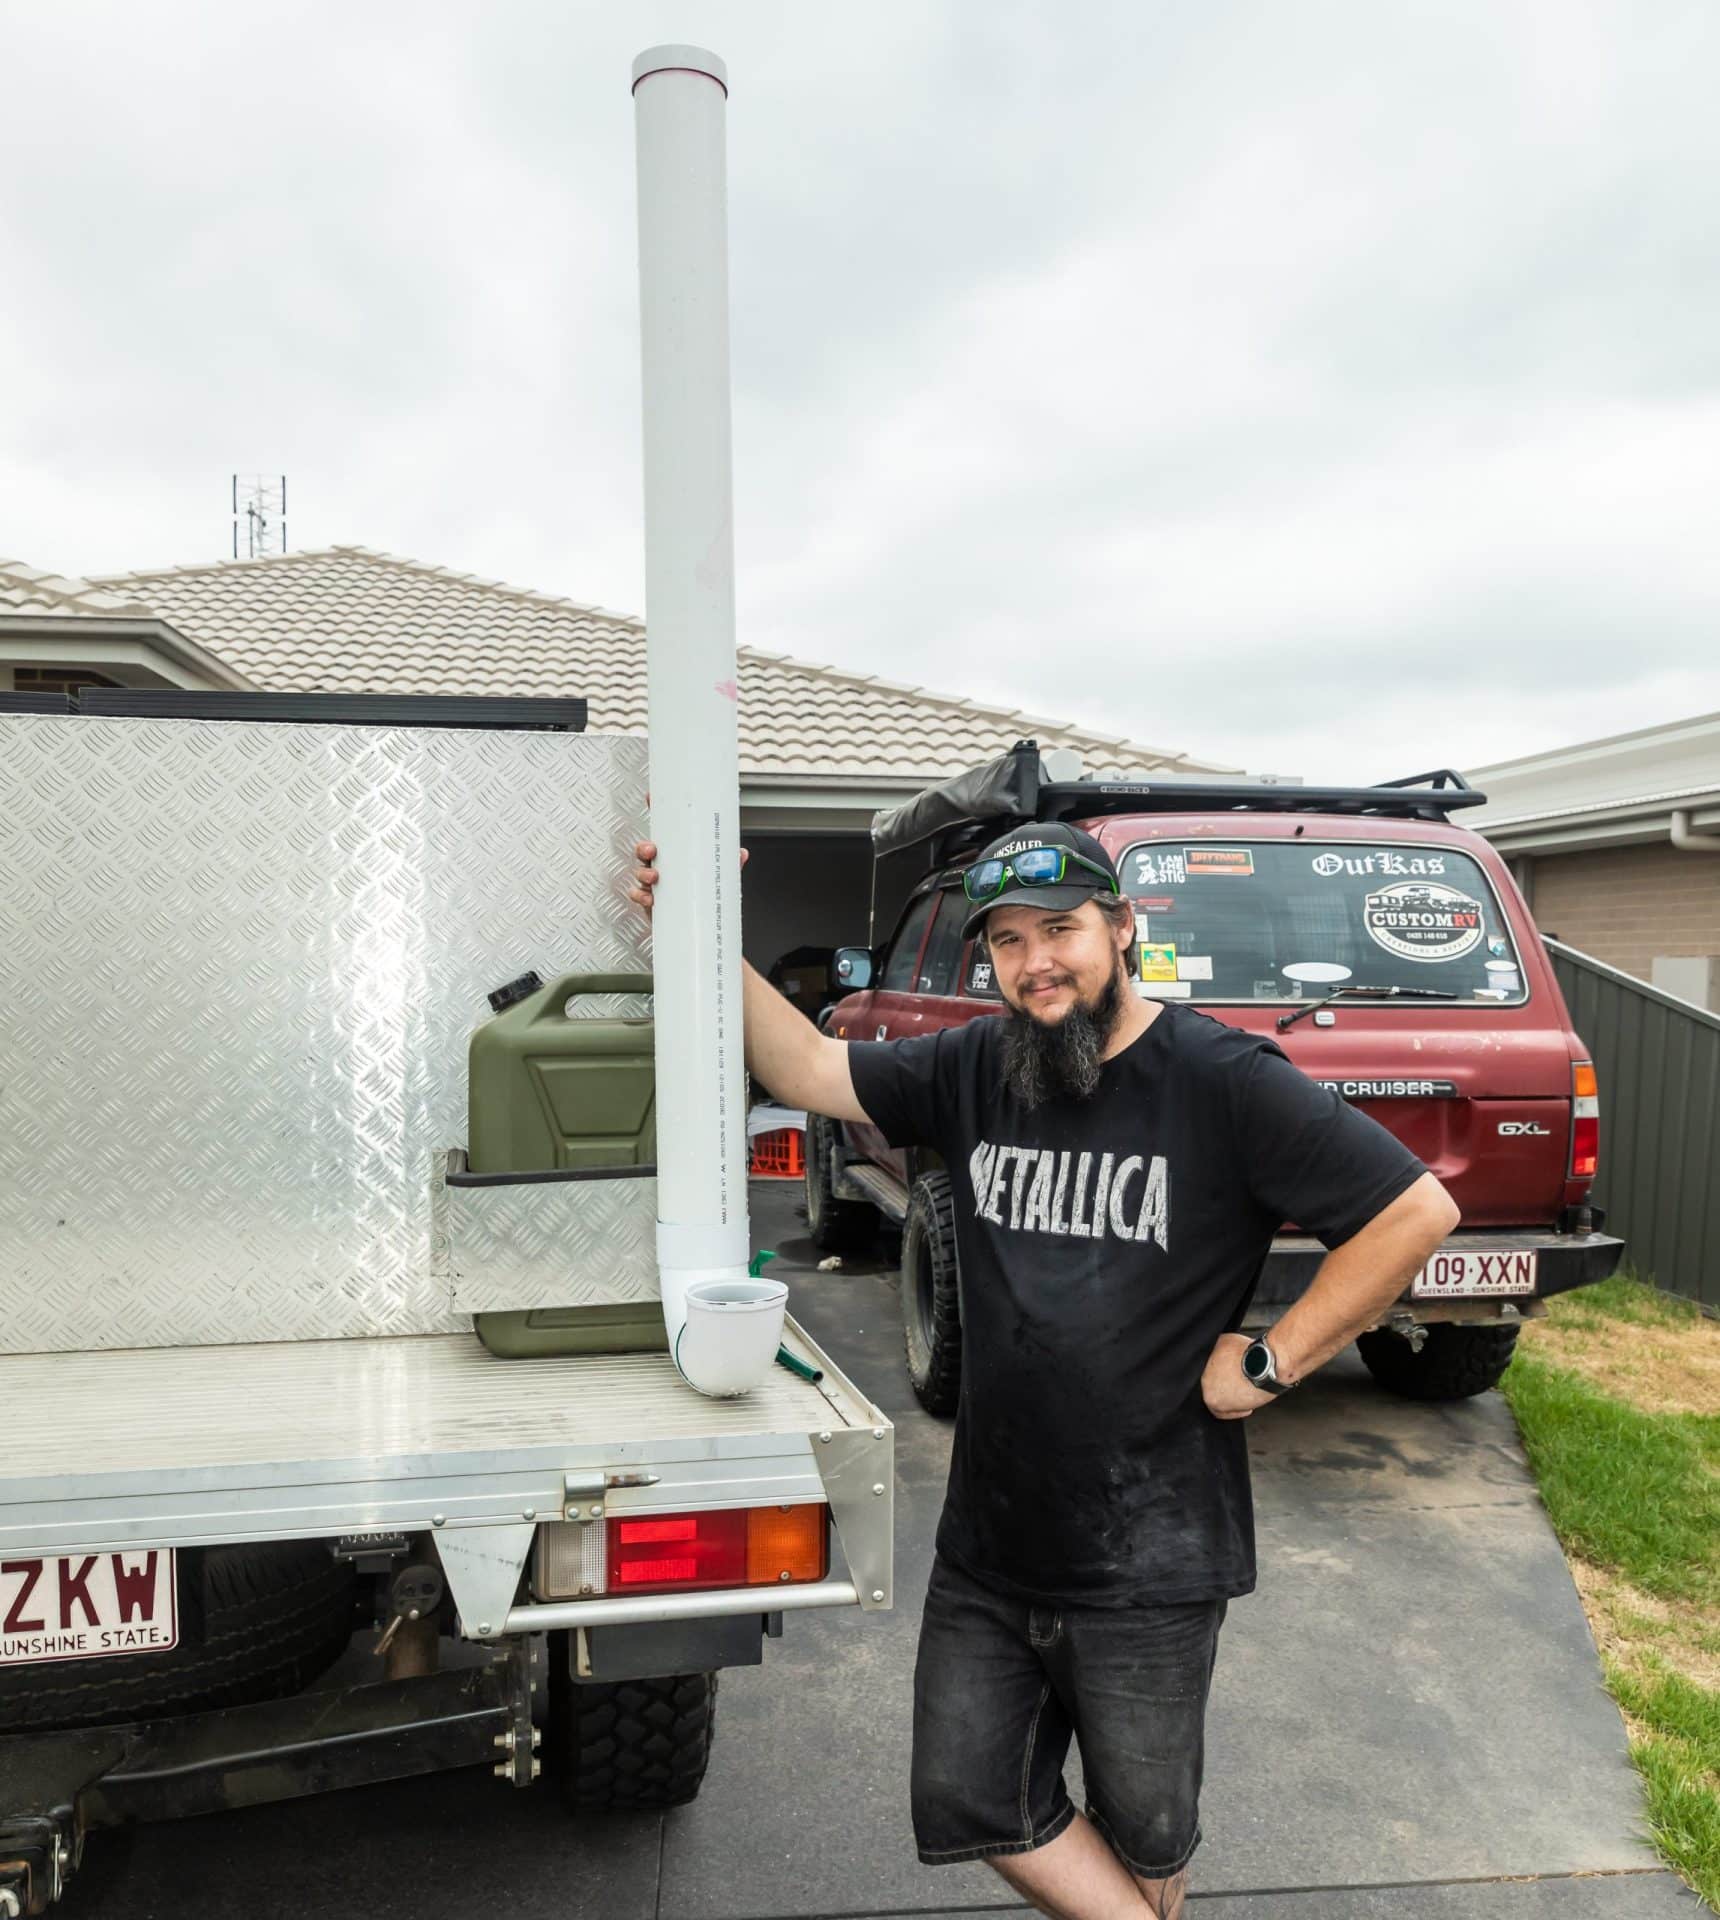
Simpo the model… Not exactly a willing model that’s for sure
As a side thought, I’ve got a bit of shade cloth I’ve cable tied around the lip from the join, and pushed loosely into where the water will sit, and pushed in far enough that the water is accessible through the shade cloth. This allows animals to still drink the water, but if something small happens to fall in, like a lizard, antechinus or maybe even a microbat, they can crawl their way back out, and not drown!
From there, you just need to fill the beggers up from the Jerry Can on your four-wheel drive, (upside down), then quickly turn it over, and the vacuum should hold the water in place until is drunk. Hot tip: Make sure you turn it over quickly, or the water will come flogging out and you’ll get wet and waste water! Then drive a stake into the ground, and cable tie these things to the stakes, and bobs your uncle.
So there you go folks, a quick guide for a DIY wildlife water station for you to knock up, and do something first hand to help out.