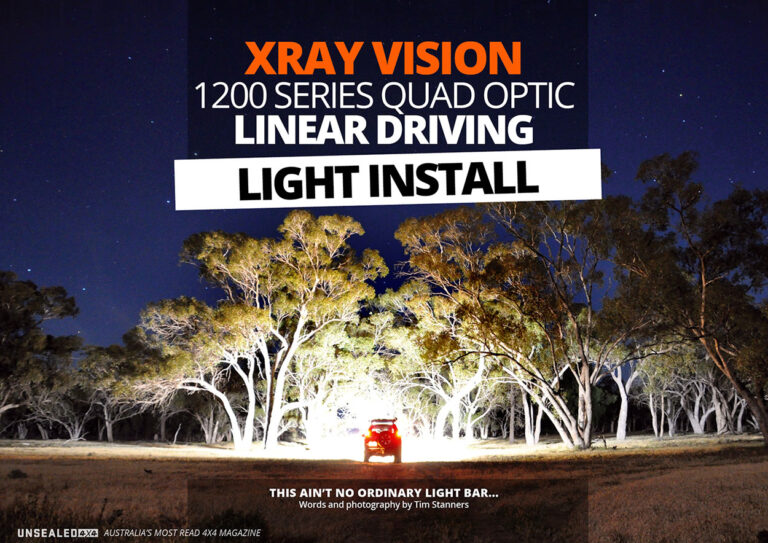
We’ve finally got our hands on a brand new 1200 Series Quad Optic Linear Driving Light from Xray Vision and there’s no doubt about it, this is a massive light! But along with size, often comes the next question – where on earth do you put something that big?
For the full story, CLICK HERE
Thankfully, Xray Vision has already thought this through with varying sizes in their brand new linear driving light series. Starting from the 300mm 60 watt 300 Series, up to the top of the line 1200mm 240 watt 1200 series (which is the one we’re giving a run to see how it performs as one of the first pencil and spread LED combinations available on the market in a single fitting).
The 1200 Series Linear Light is the equivalent of having four top end LED spotties on your vehicle. Rip off the packaging and it soon becomes apparent there’s been a lot of thought put into the design. They’ve incorporated vertical heat sinks for maximum heat efficiency, new multiplexer optics to control and focus the beam patterns and one of the most versatile mounting systems available – all of which are testament to the level of R&D that Xray Vision have invested in these lights.
When it comes to installation, there’s actually a bit to consider. For starters, there’s multiple switching combinations (an optional position light safety feature can be connected to the parking lights and a switched spread beam, a switched pencil beam or both which are connected to high beam). Then there’s the mounting brackets which (on the 1200 Series) are able to accommodate mounting holes from just over 1m apart, up to nearly 1.3m apart.
The well thought out mounting tabs offer near infinite adjustment…
The cast heat sink fins are vertical rather than horizontal, which aids in heat dispersion
So, with the recently revised ADR 13/00 2015 Vehicle Standard providing considerably more latitude in available mounting options, we chose to mount the 1200 series to the underside of the roof rack and in a position which wouldn’t contravene the specifications of the revised standard.
First things first, we had to mount this bad boy; and with that in mind, we asked our mates at Penrith Offroad Warehouse to give us a hand in getting the light up above the roof, mounted, wired and ready to hit the dirt.
As any good tradie will tell you, remember to measure twice and drill once. In no time we had the new light bolted onto the underside of the rack. This can be a little fiddly so remember to protect the roof with a cloth to ensure the light doesn’t etch flower patterns into the paintwork while you move it around. Being the first light on the market with a fully die cast, heavy-duty alloy body, she weighs in at a solid 8kg. This is slightly more than a standard 50-inch light bar, but as with all roof mounted accessories it does need to be considered and factored into the decision around the mounting position. Be sure to keep this in mind when choosing a suitable spot, as some lighter singular tube alloy or aluminium racks may require additional support.
On to the wiring harness and running the 3m cord into the engine bay was the easy part. Next came the mouse switches to run through the firewall, then we mounted the relays for the separately switched spread and pencil beams which run off the high beam setting. Finally it was time to connect the wiring up to the battery and we were ready to rock and roll.
Given the 1200 Series is a combination of 24 high powered 10W CREE LEDs, we recommend firing it up while the engine is running to ensure the light functions to its full potential and gets the full power output of the alternator through the main battery.
Turning the workshop lights off and giving the LEDs a quick run sure was impressive to say the least, and adjusting the beam is one of the best design features in any light we’ve seen. It’s simply a matter of loosening the end bolts then adjusting it up or down through the pre-fitted beam adjuster screw and re-tightening the end bolts. Simple and efficient!
We’ll see how these new linear driving lights really perform in the field in an upcoming issue of Unsealed 4X4. We’ll look at varying elements from light output at distance as well as the power current draw and other key features of this series of lights which really set them apart from their competitors in terms of design and quality.
Words and photography by Tim Stanners
[/read]