How to fit a transmission cooler to your 4×4, and is it a DIY job?
Adding an aftermarket transmission cooler to a modern automatic 4X4 makes sense. More sense than slapping a lobster down on Stephen Hawking to take the win in a Kindergarten maths competition. They just work. Especially if you’re towing. Or doing…
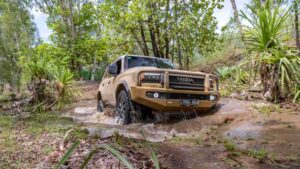
Adding an aftermarket transmission cooler to a modern automatic 4X4 makes sense. More sense than slapping a lobster down on Stephen Hawking to take the win in a Kindergarten maths competition. They just work. Especially if you’re towing. Or doing a lot of off-road (such as sand driving). Or simply have a heavy right boot. An extra cooler can significantly drop the temperature of the transmission. Which trust us, is never a bad thing when they’re under load.
Can’t be bothered reading? Watch this instead…
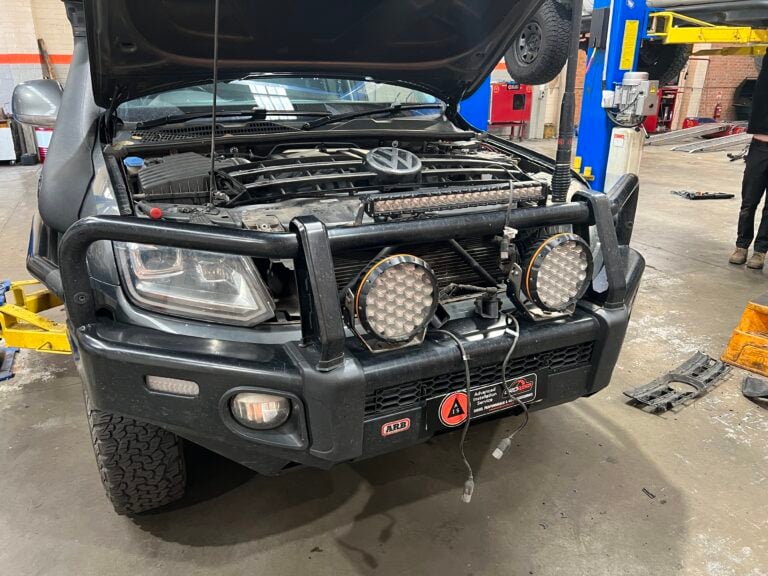
The big question is if you should fit one at home or pay the few hundred bucks to have it done in a workshop? We went to our mates at Advanced Installation Service in Western Sydney to have them show us how the job is done on a VW Amarok V6. As well as see if they could help us answer the “is it a DIY job?” question while we were there.
Step by step, day by day…
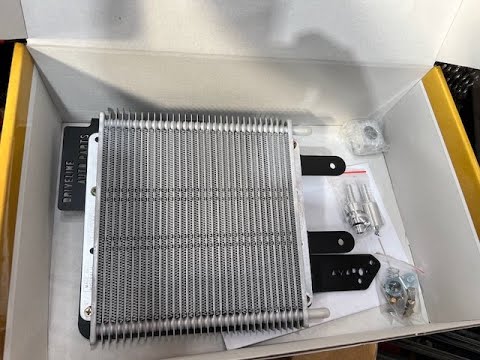
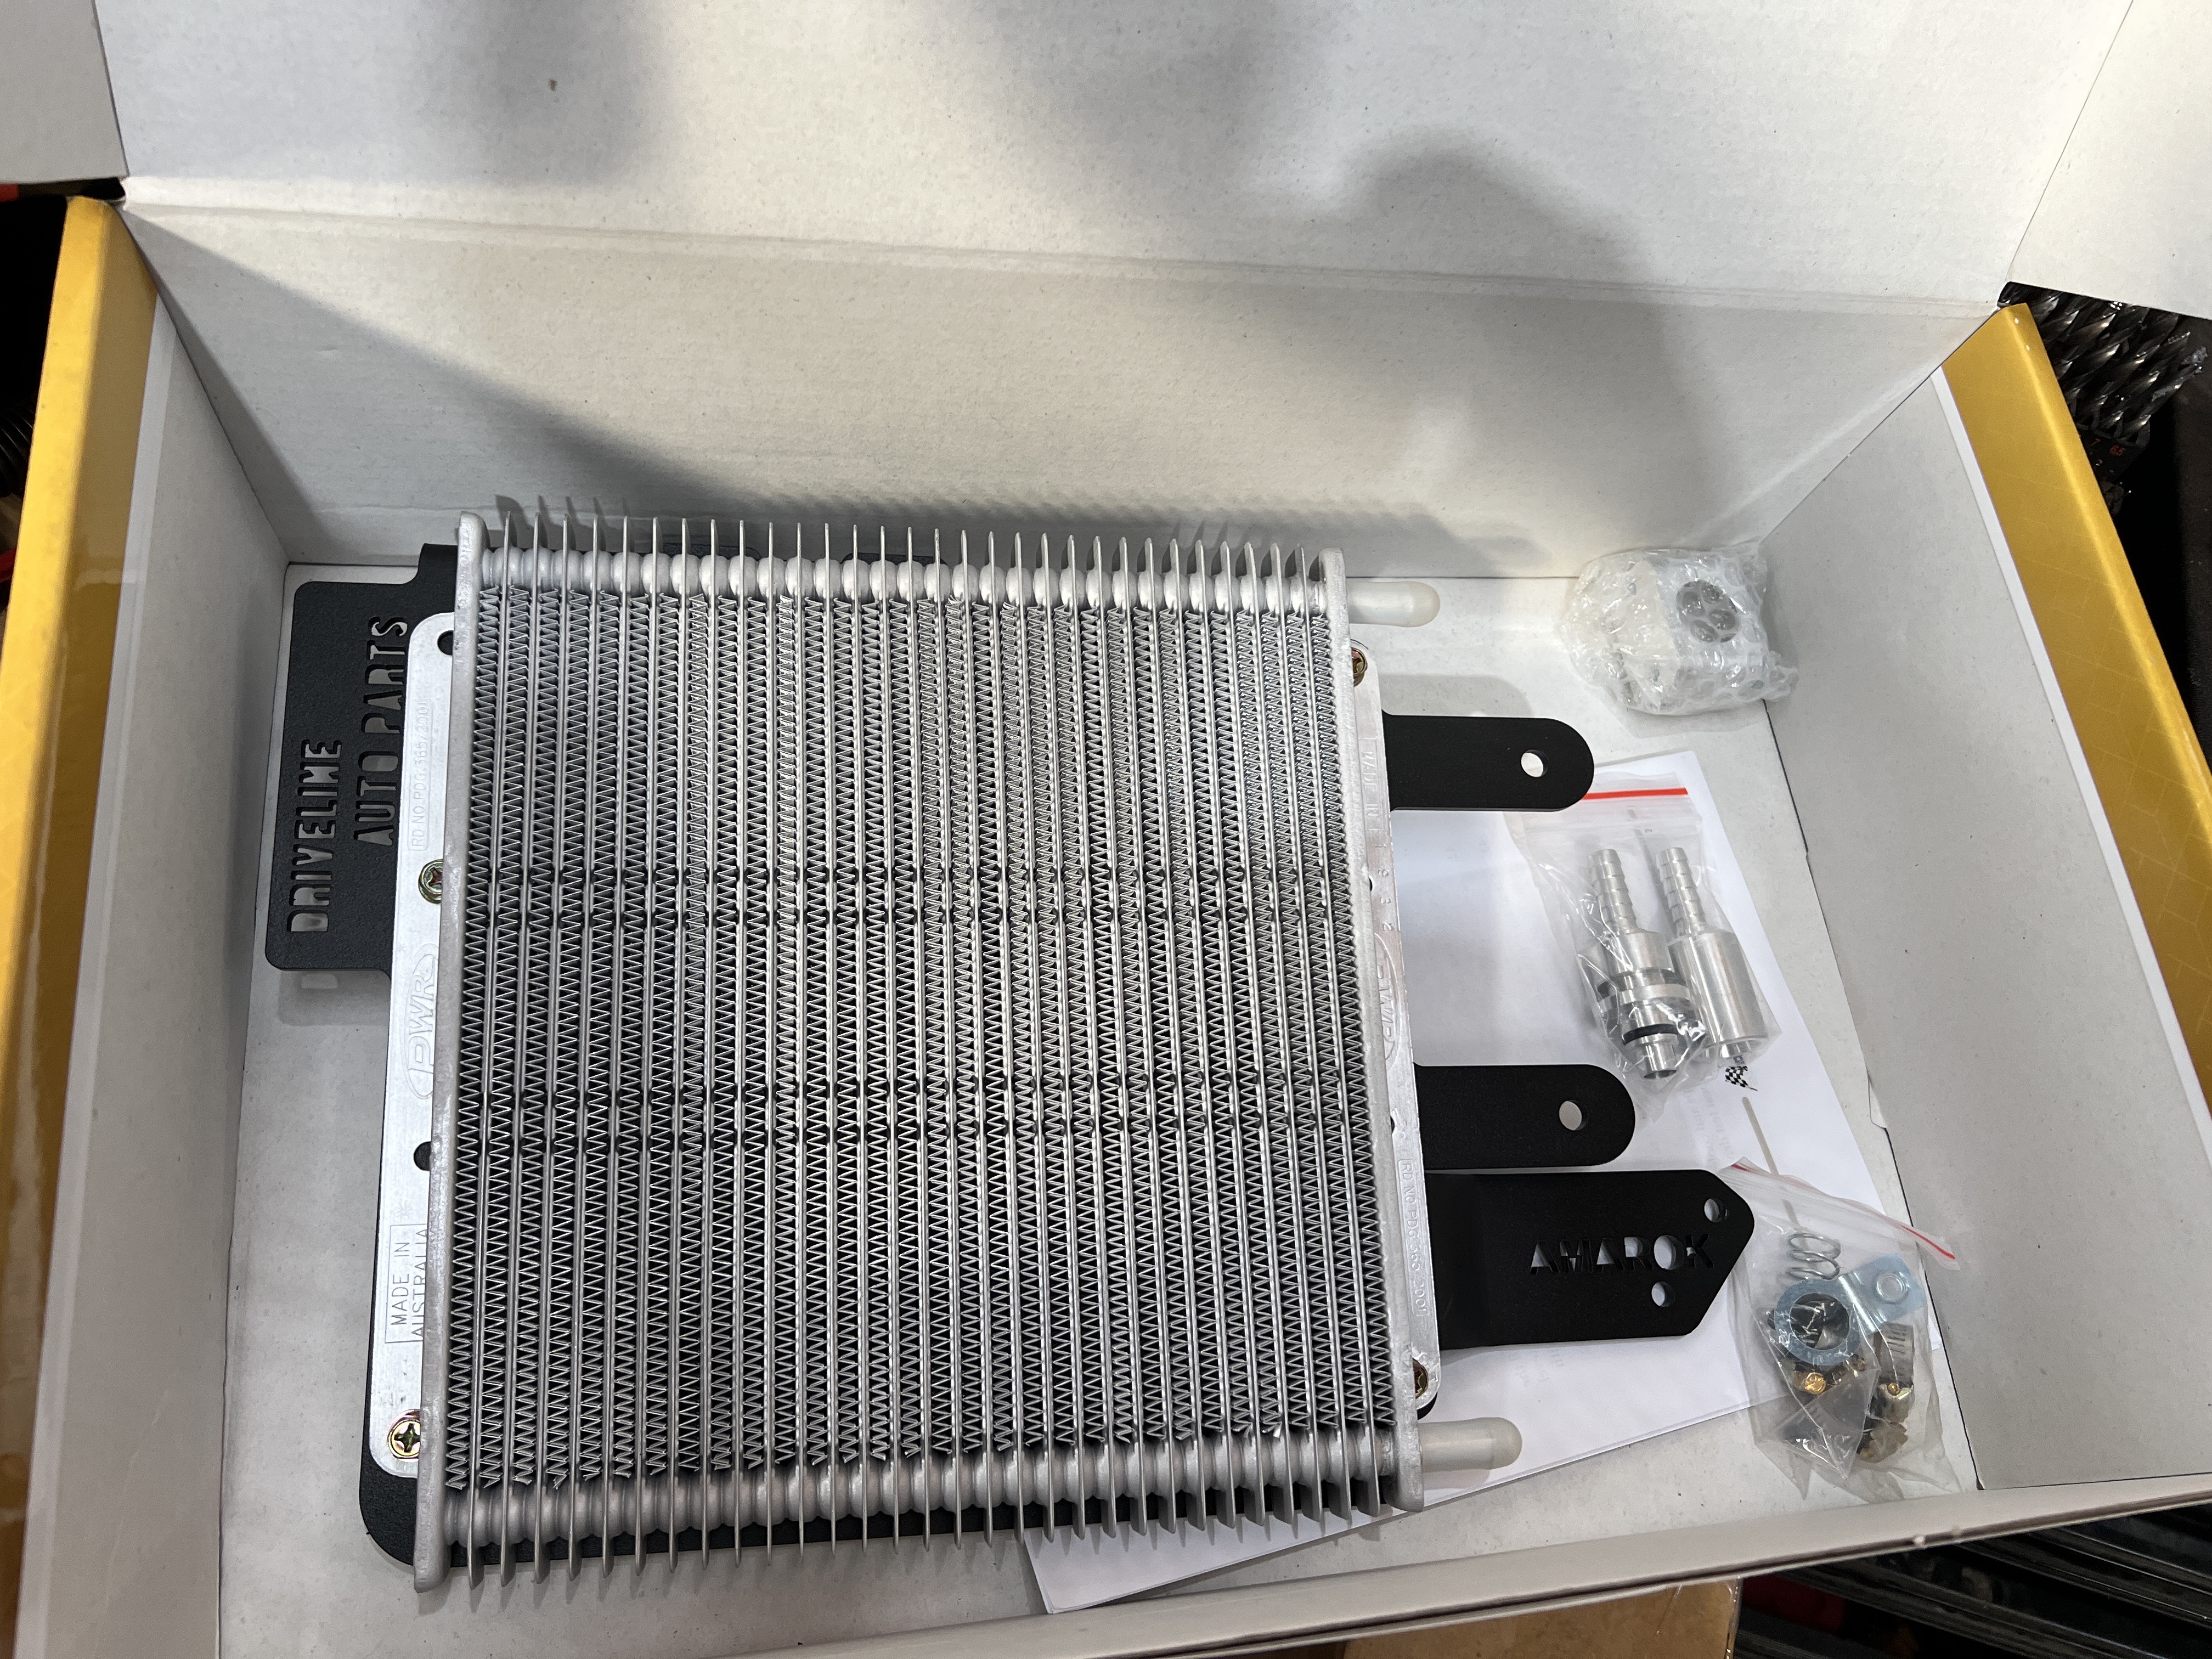
1. This is the cooler kit from Wholesale Automatic Transmissions. It includes all mounts, barbs, clamps and a thermostatic valve delete. Not pictured is the hose, which is also included (duh).
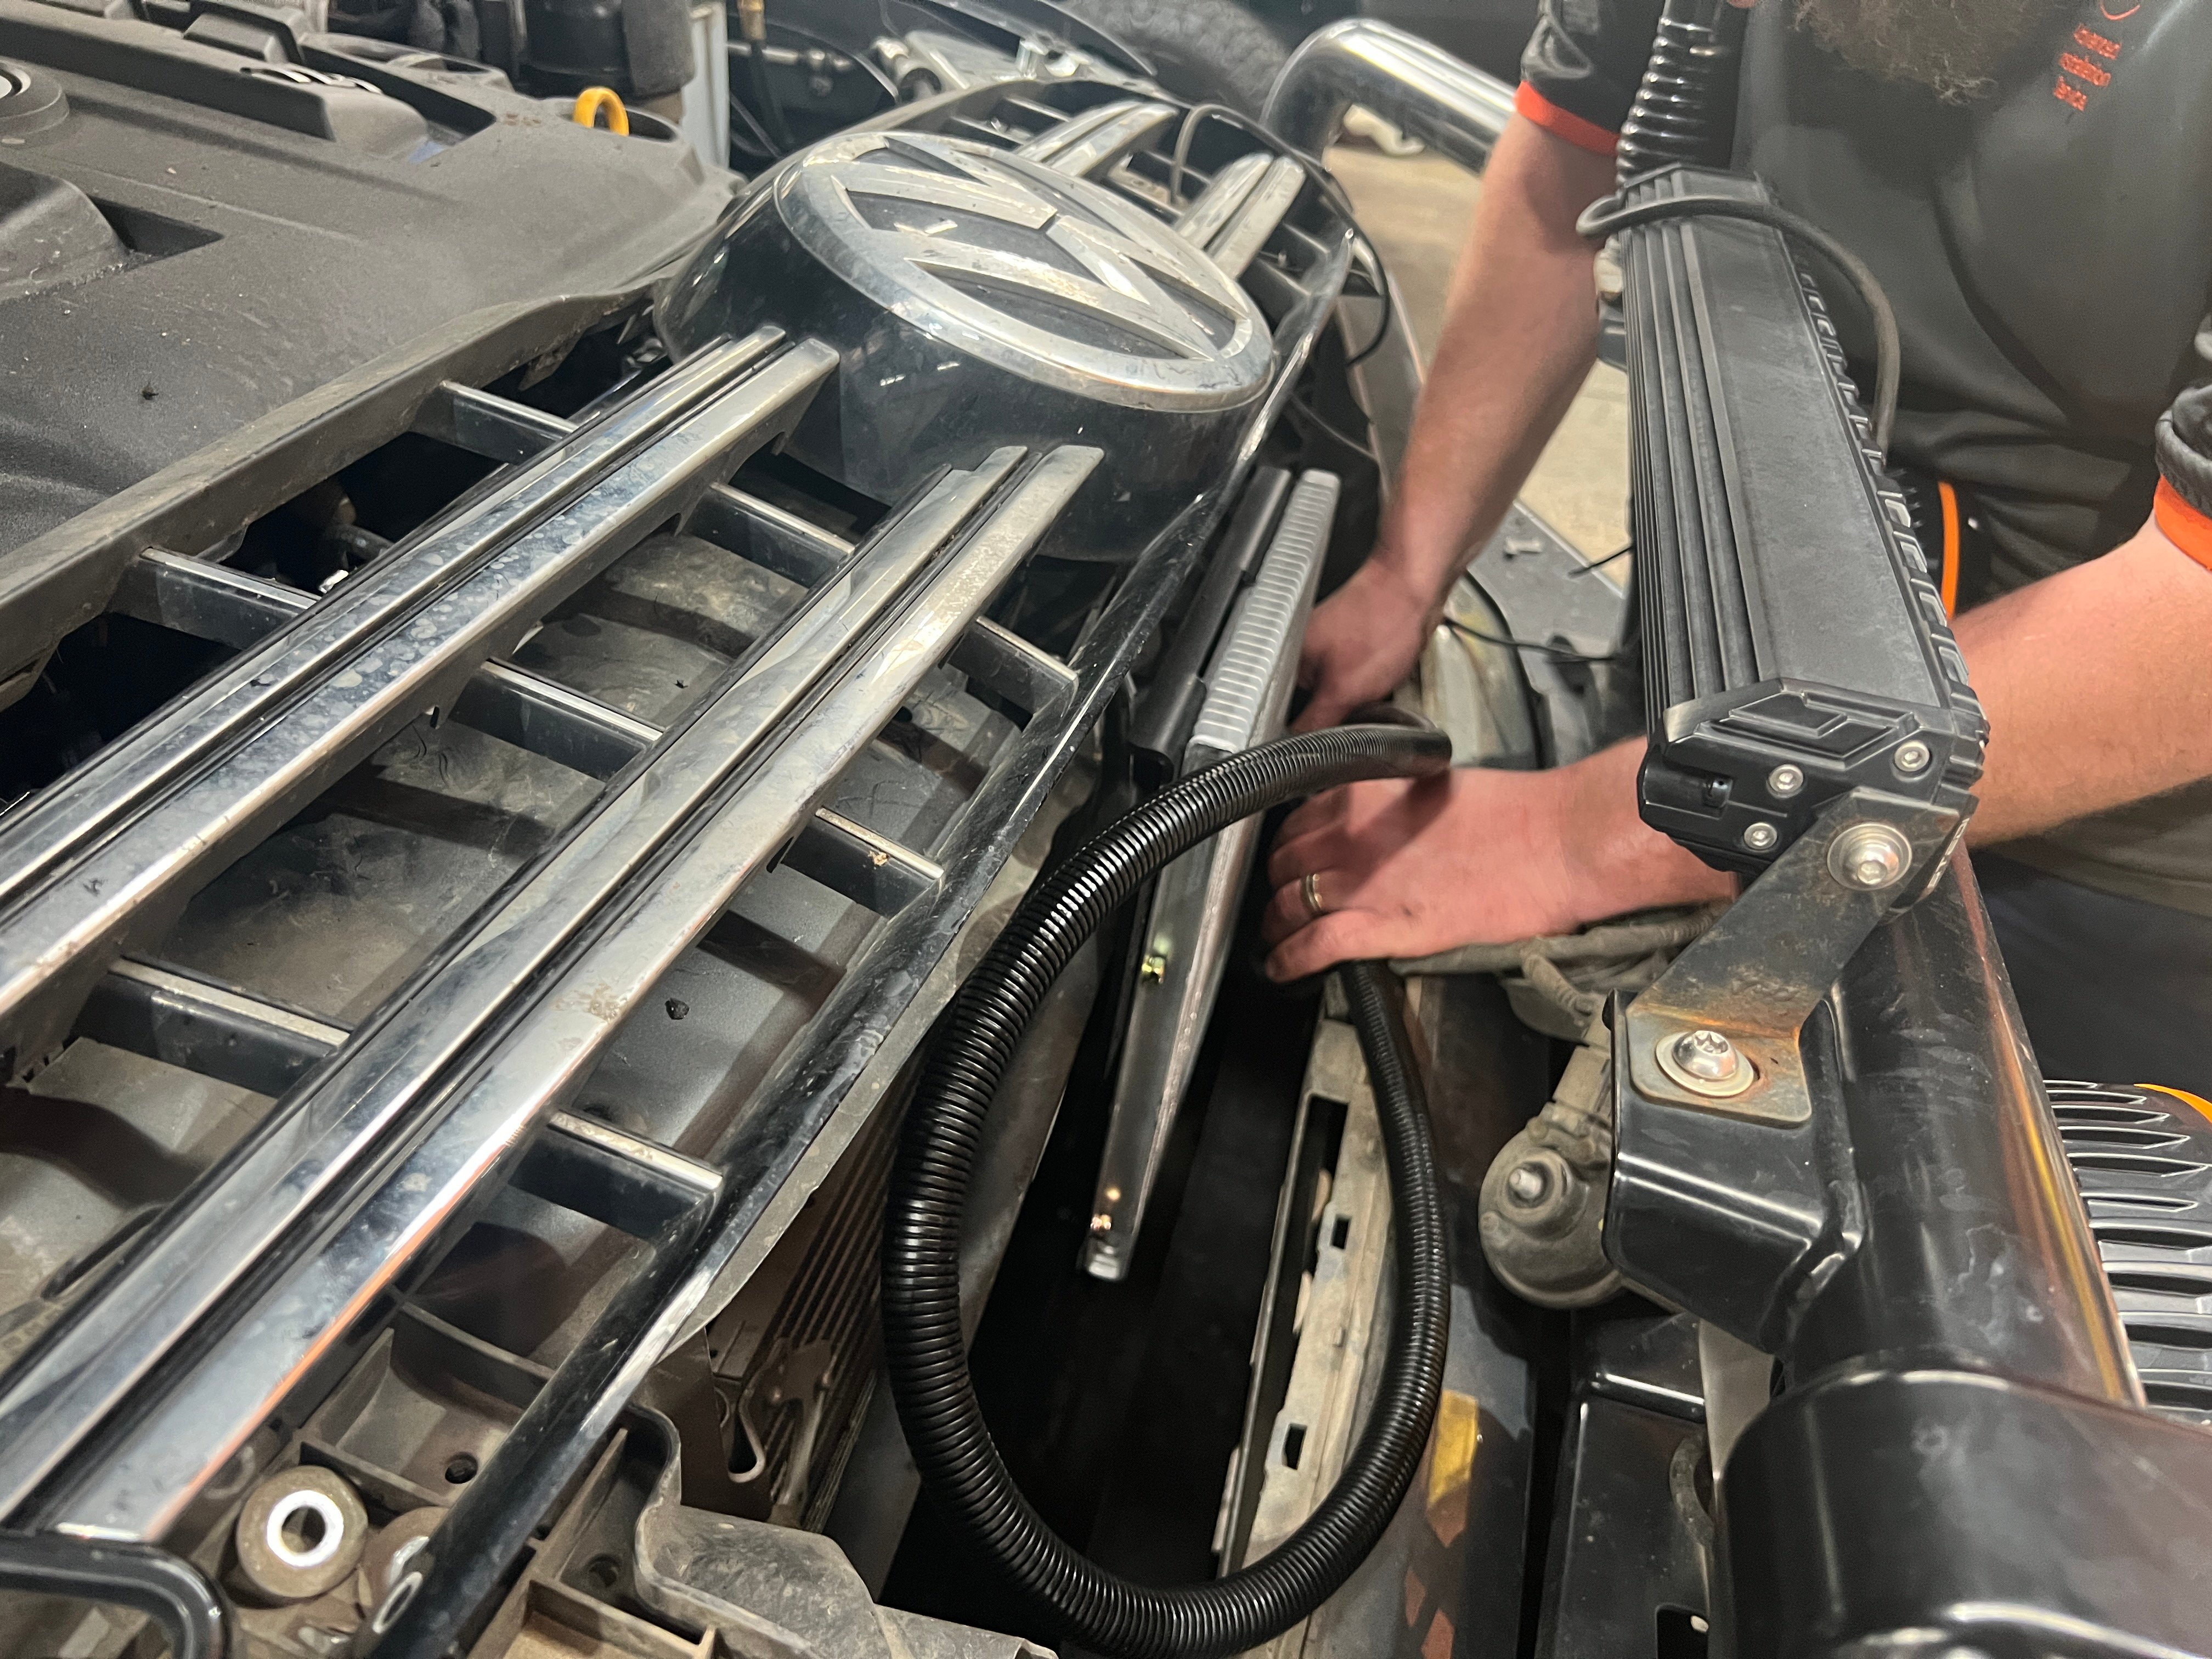
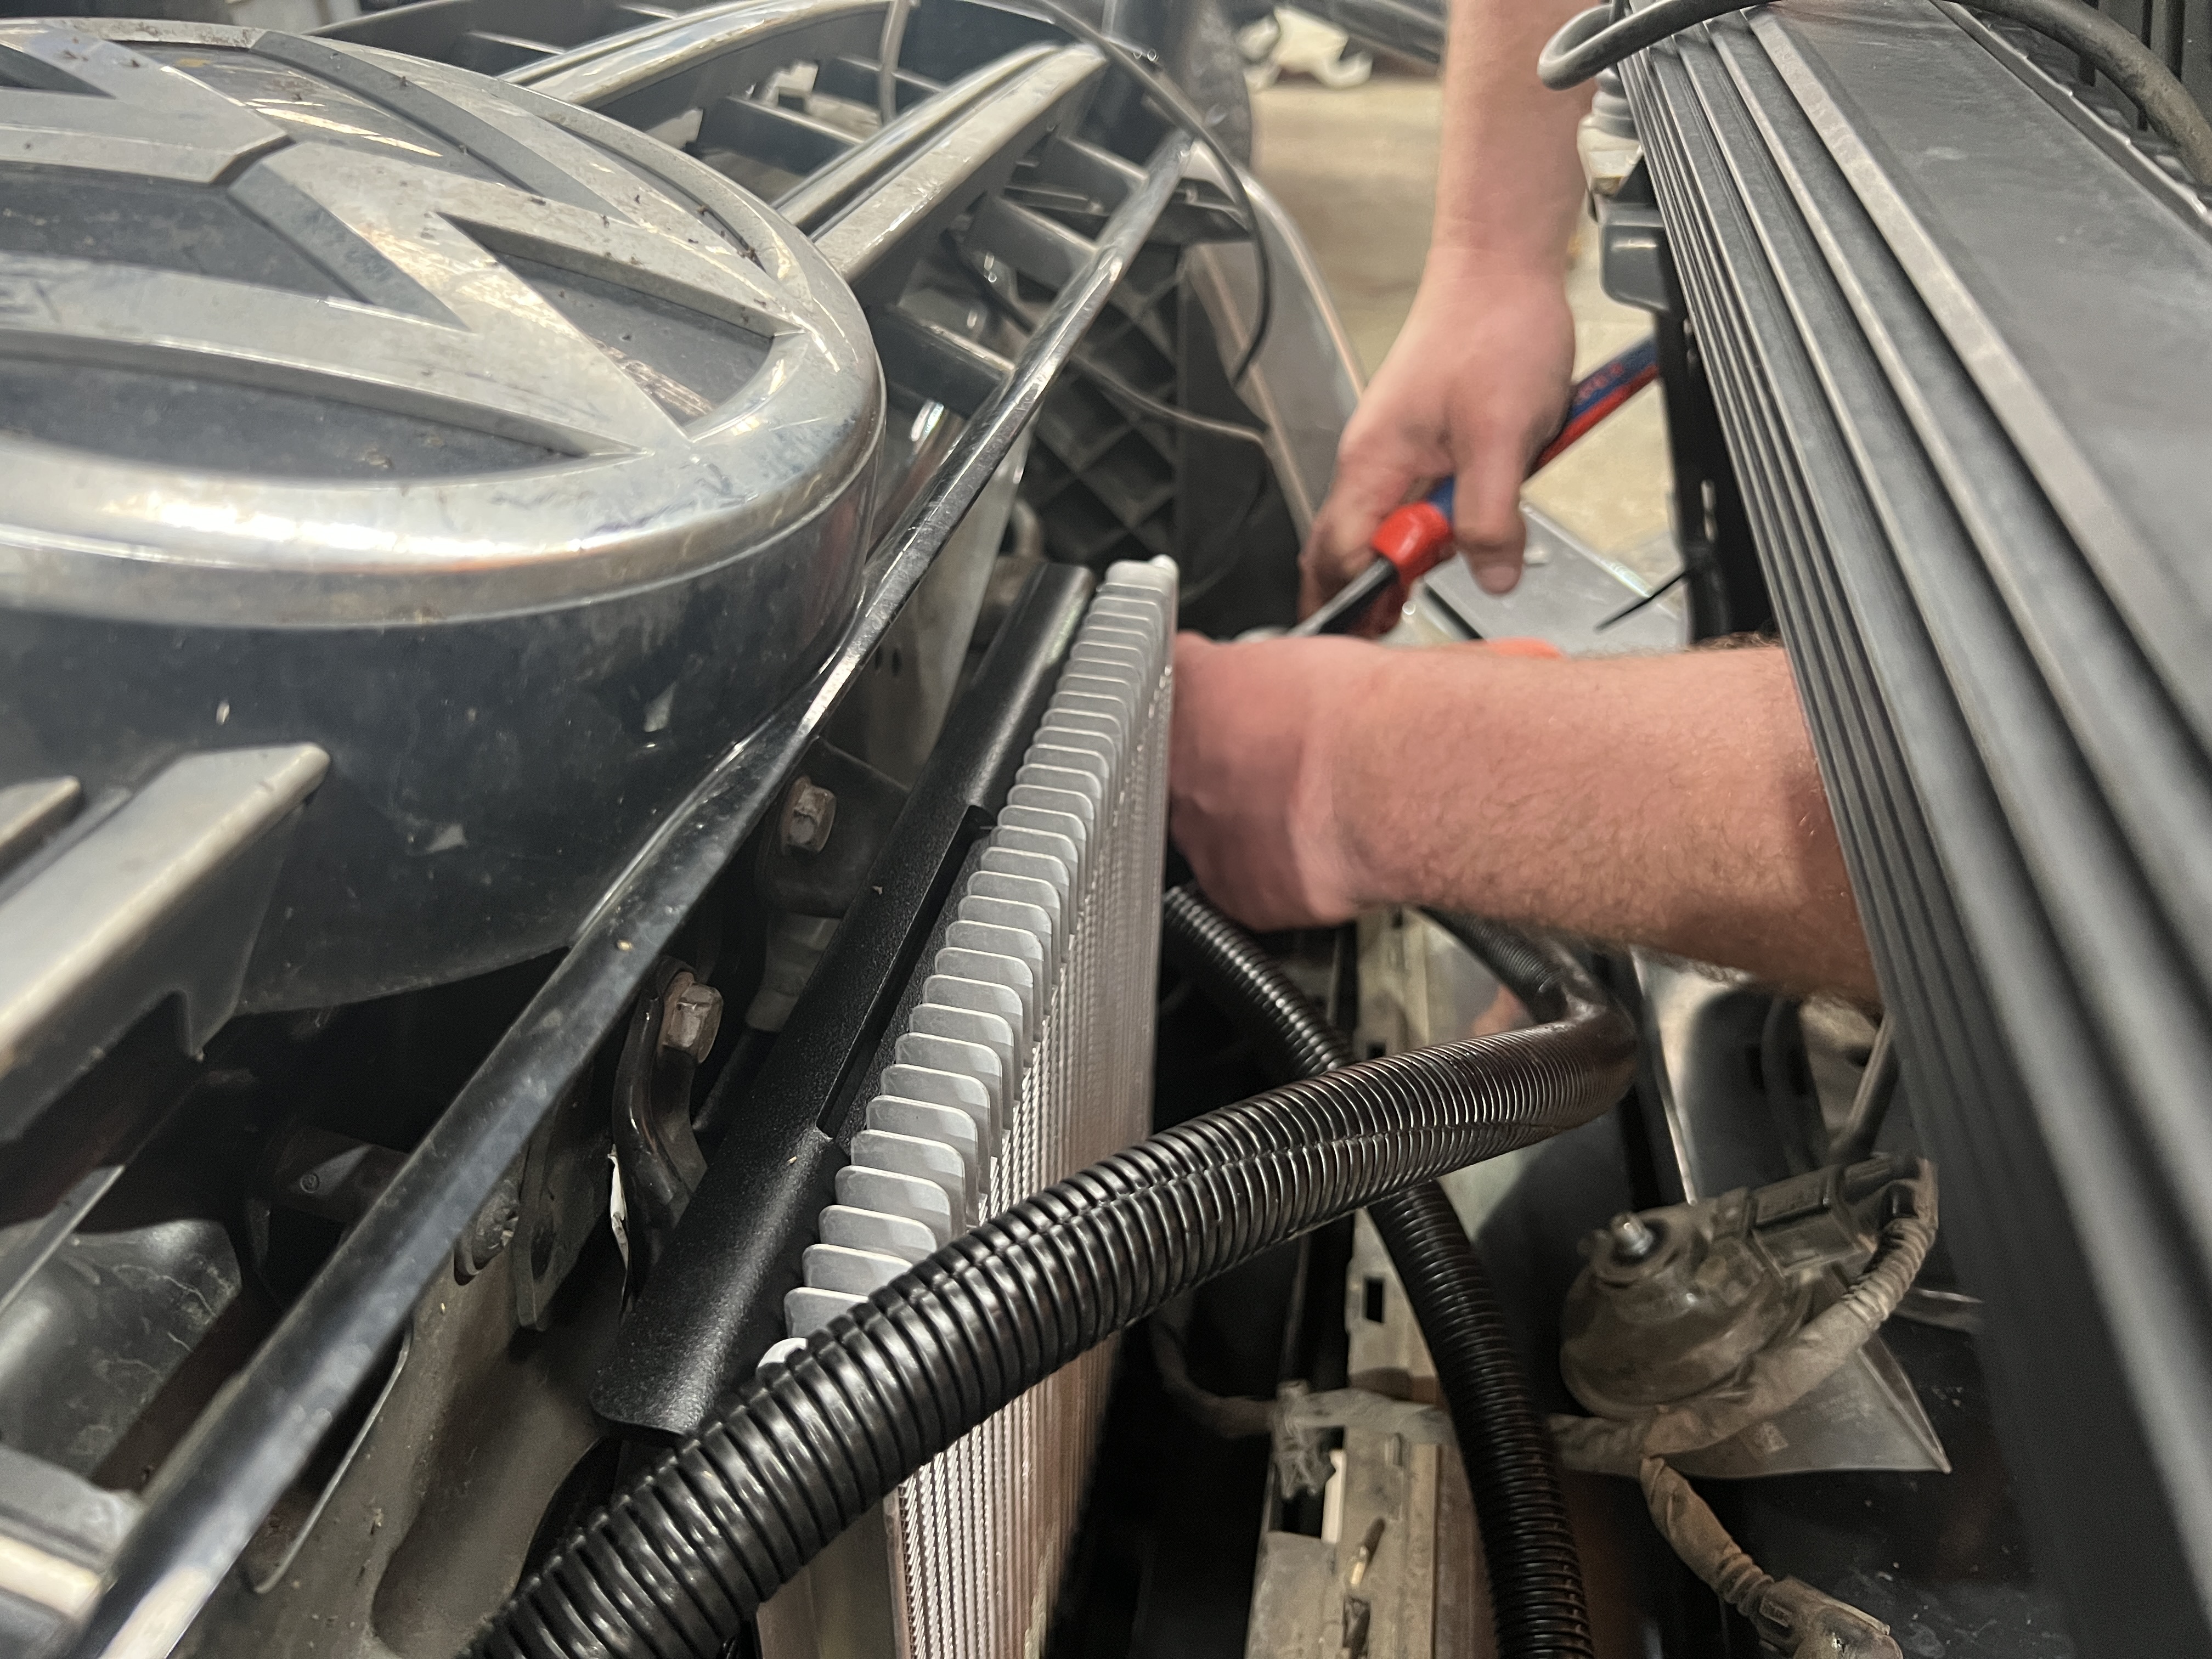
2. Remove the grille. And anything else that’s going to get in the road of the cooler body. In this case the horns had to be temporarily unbolted and the spotties unplugged to get access.
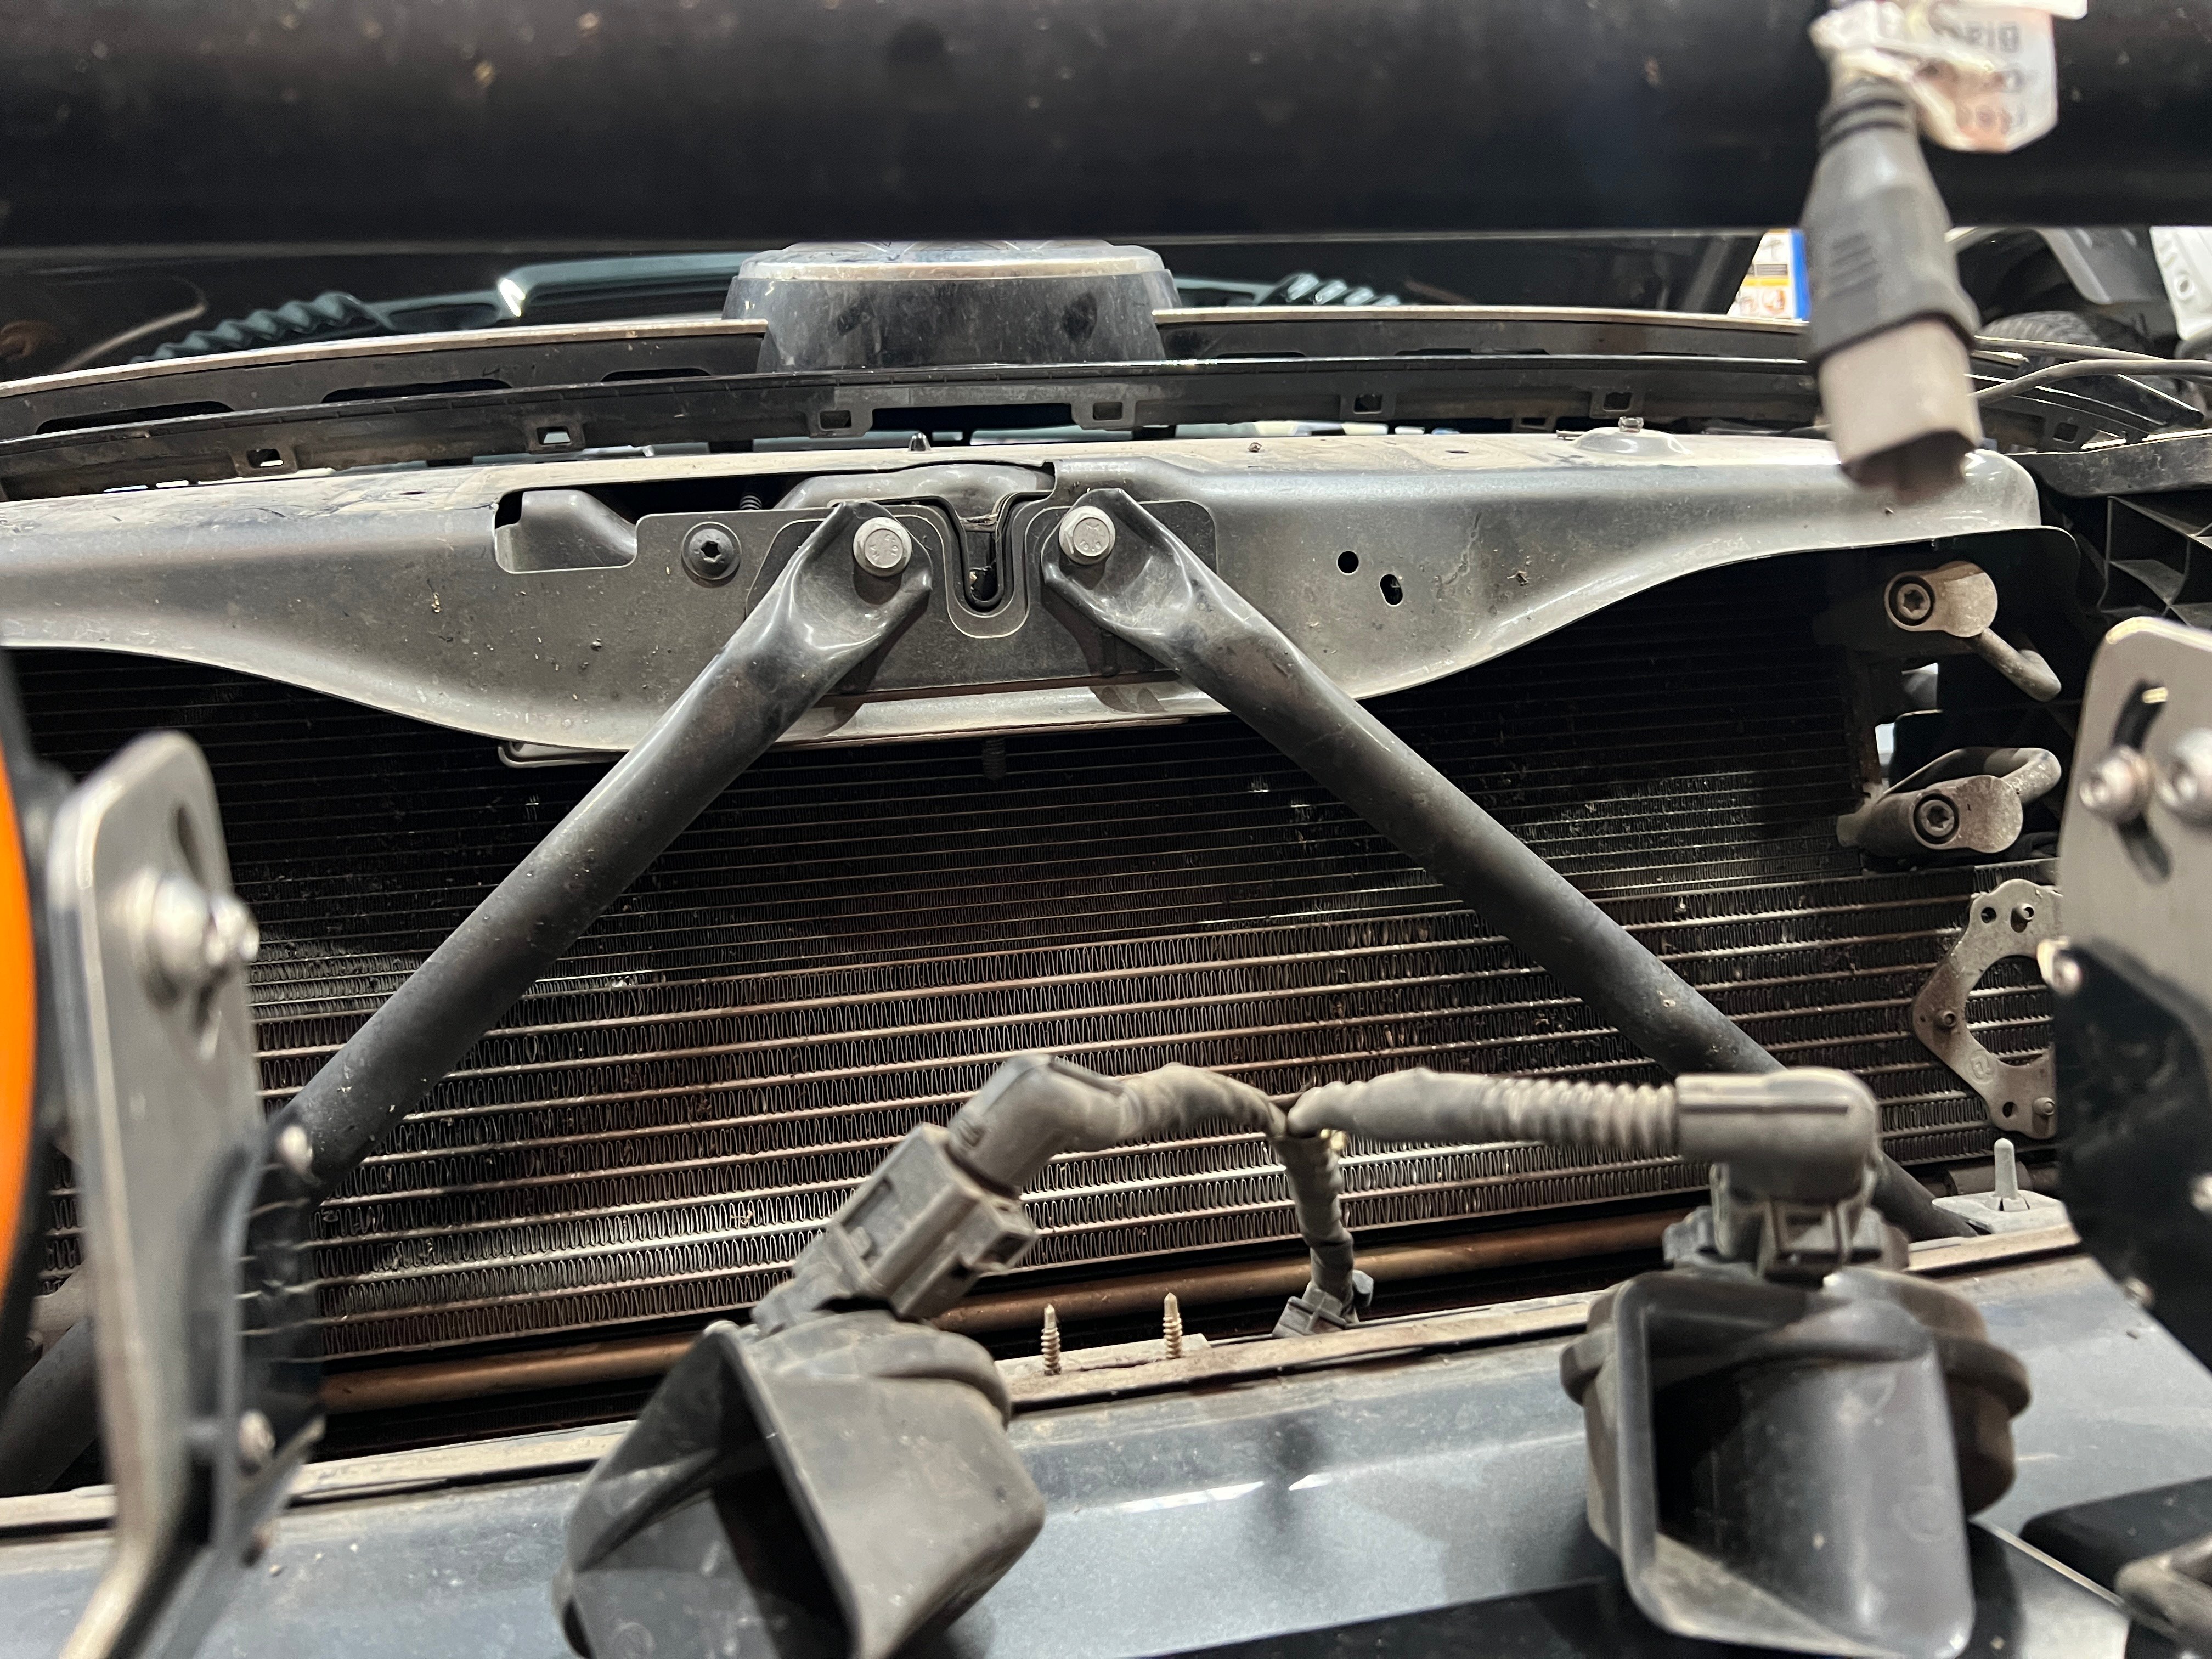
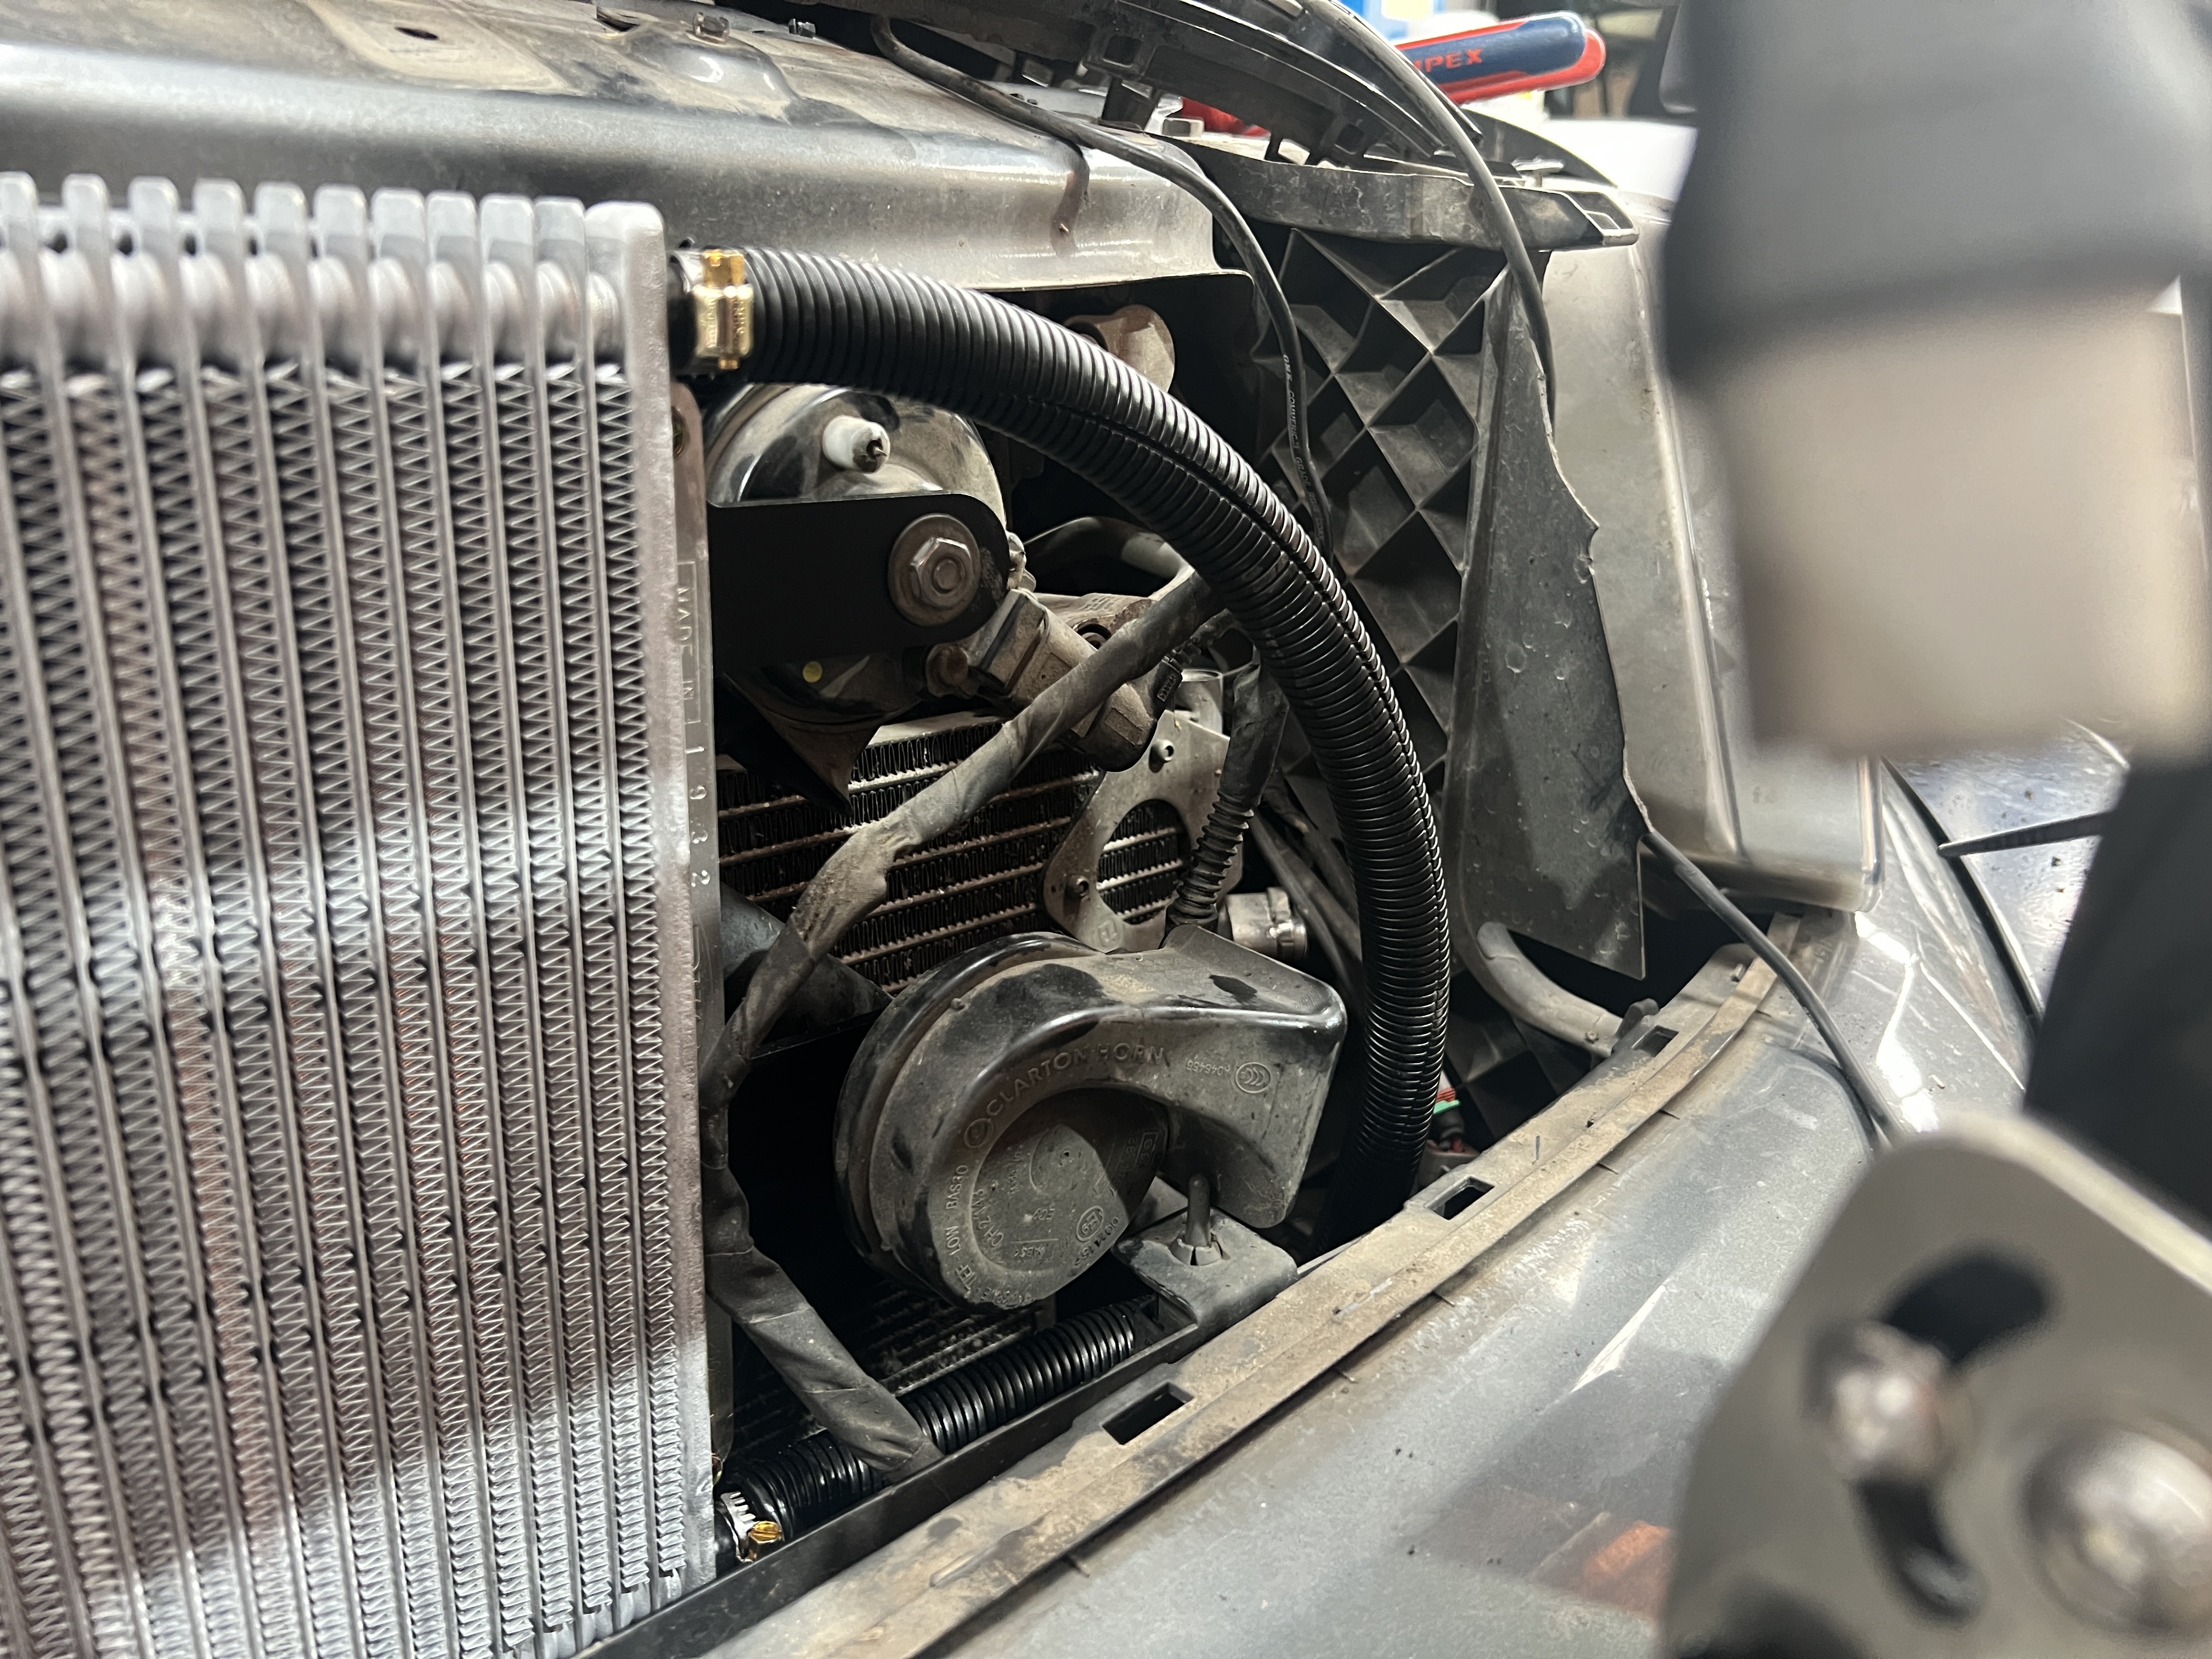
3. The cooler body is mounted on the radiator support by undoing the two 13mm bolts and slotting the cooler into position. A third tube mount sits down on the passenger side bar for extra rigidity. Note the bracketry on the cooler mount? That will house the horns when they’re ready to be bolted back in place.
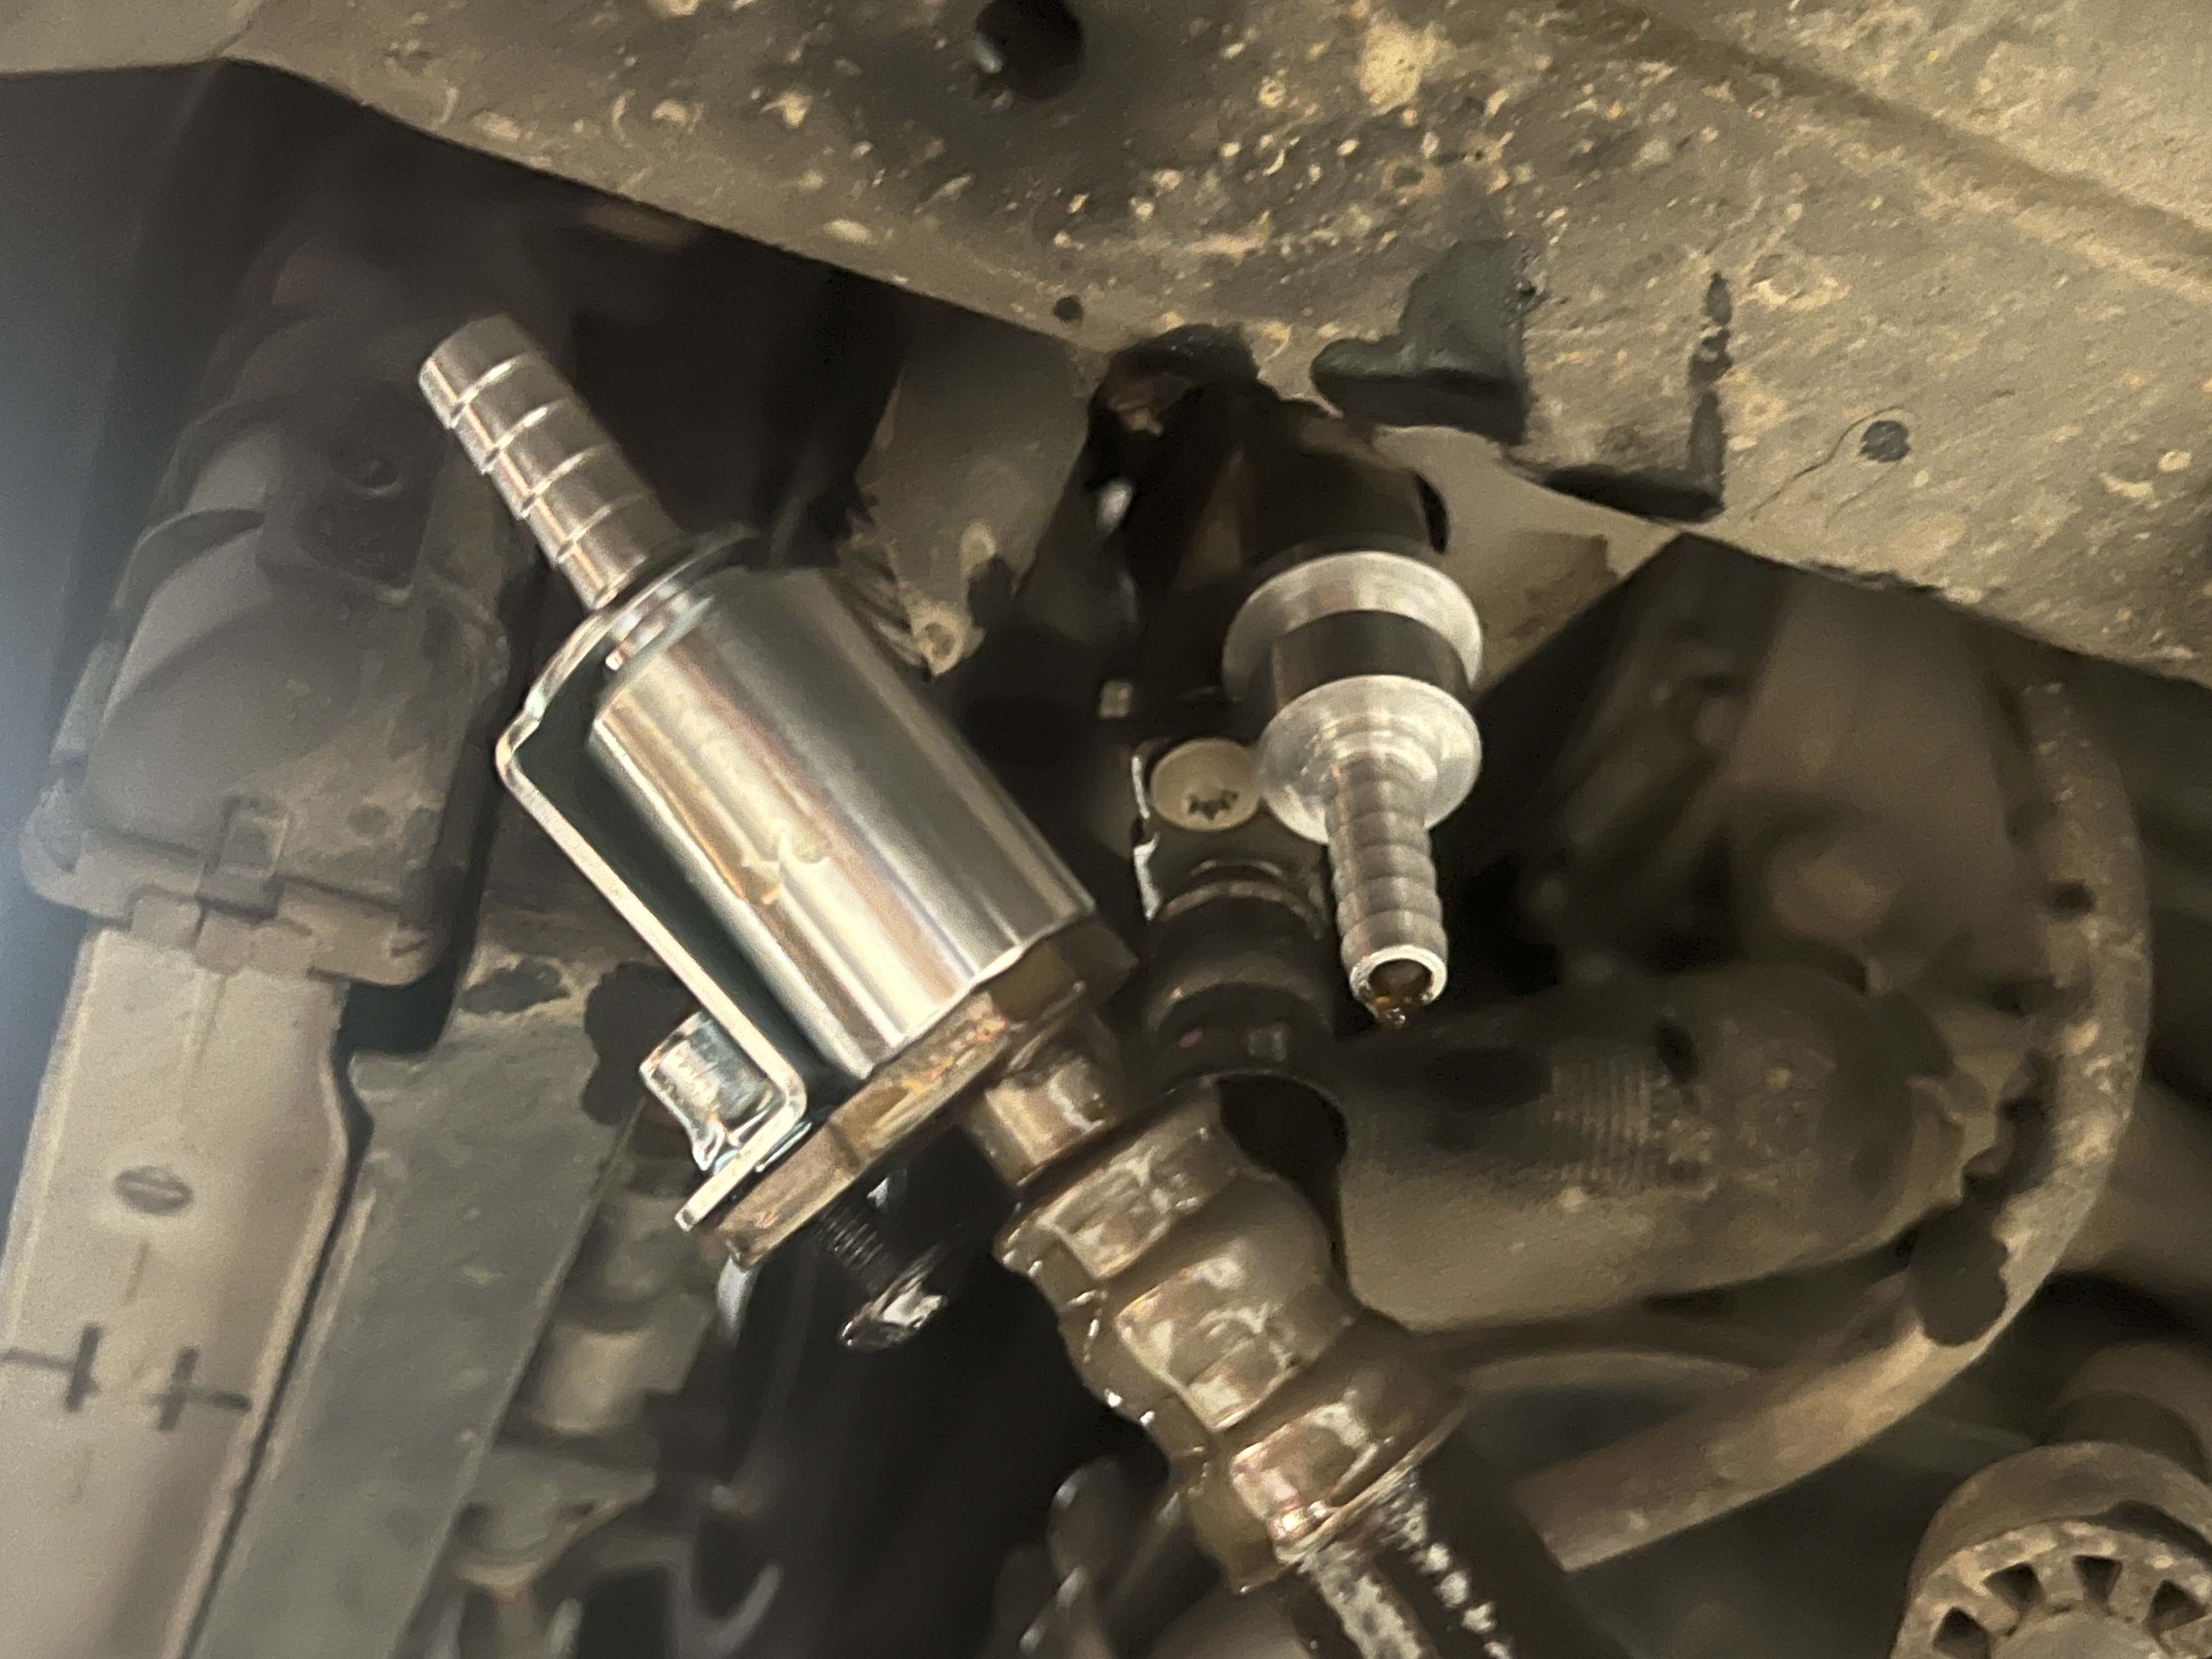
4. Undo a couple of Torx bolts and remove the lines from the thermostatic valve housing on the passenger underside of the vehicle. Note that the Amarok kit requires this housing to be removed. And the valve is bypassed for full cooler functionality (see video) but many vehicles will not require this step. (fun fact: the thermostatic valve is for vehicles that live in climates that see way below-freezing temperatures – they’re not needed in Australia).
Half way there
5. The line from the G-Port Out (again, Amarok specific) is fitted with a male hose fitting. While the factory hose that used to live there is fitted with the second male hose fitting in the kit. Oh yeah, once you’ve removed these hoses, transmission fluid will be dumped all over the place. Including your arms, head and all over your garage floor. So a drip tray is essential for this job.
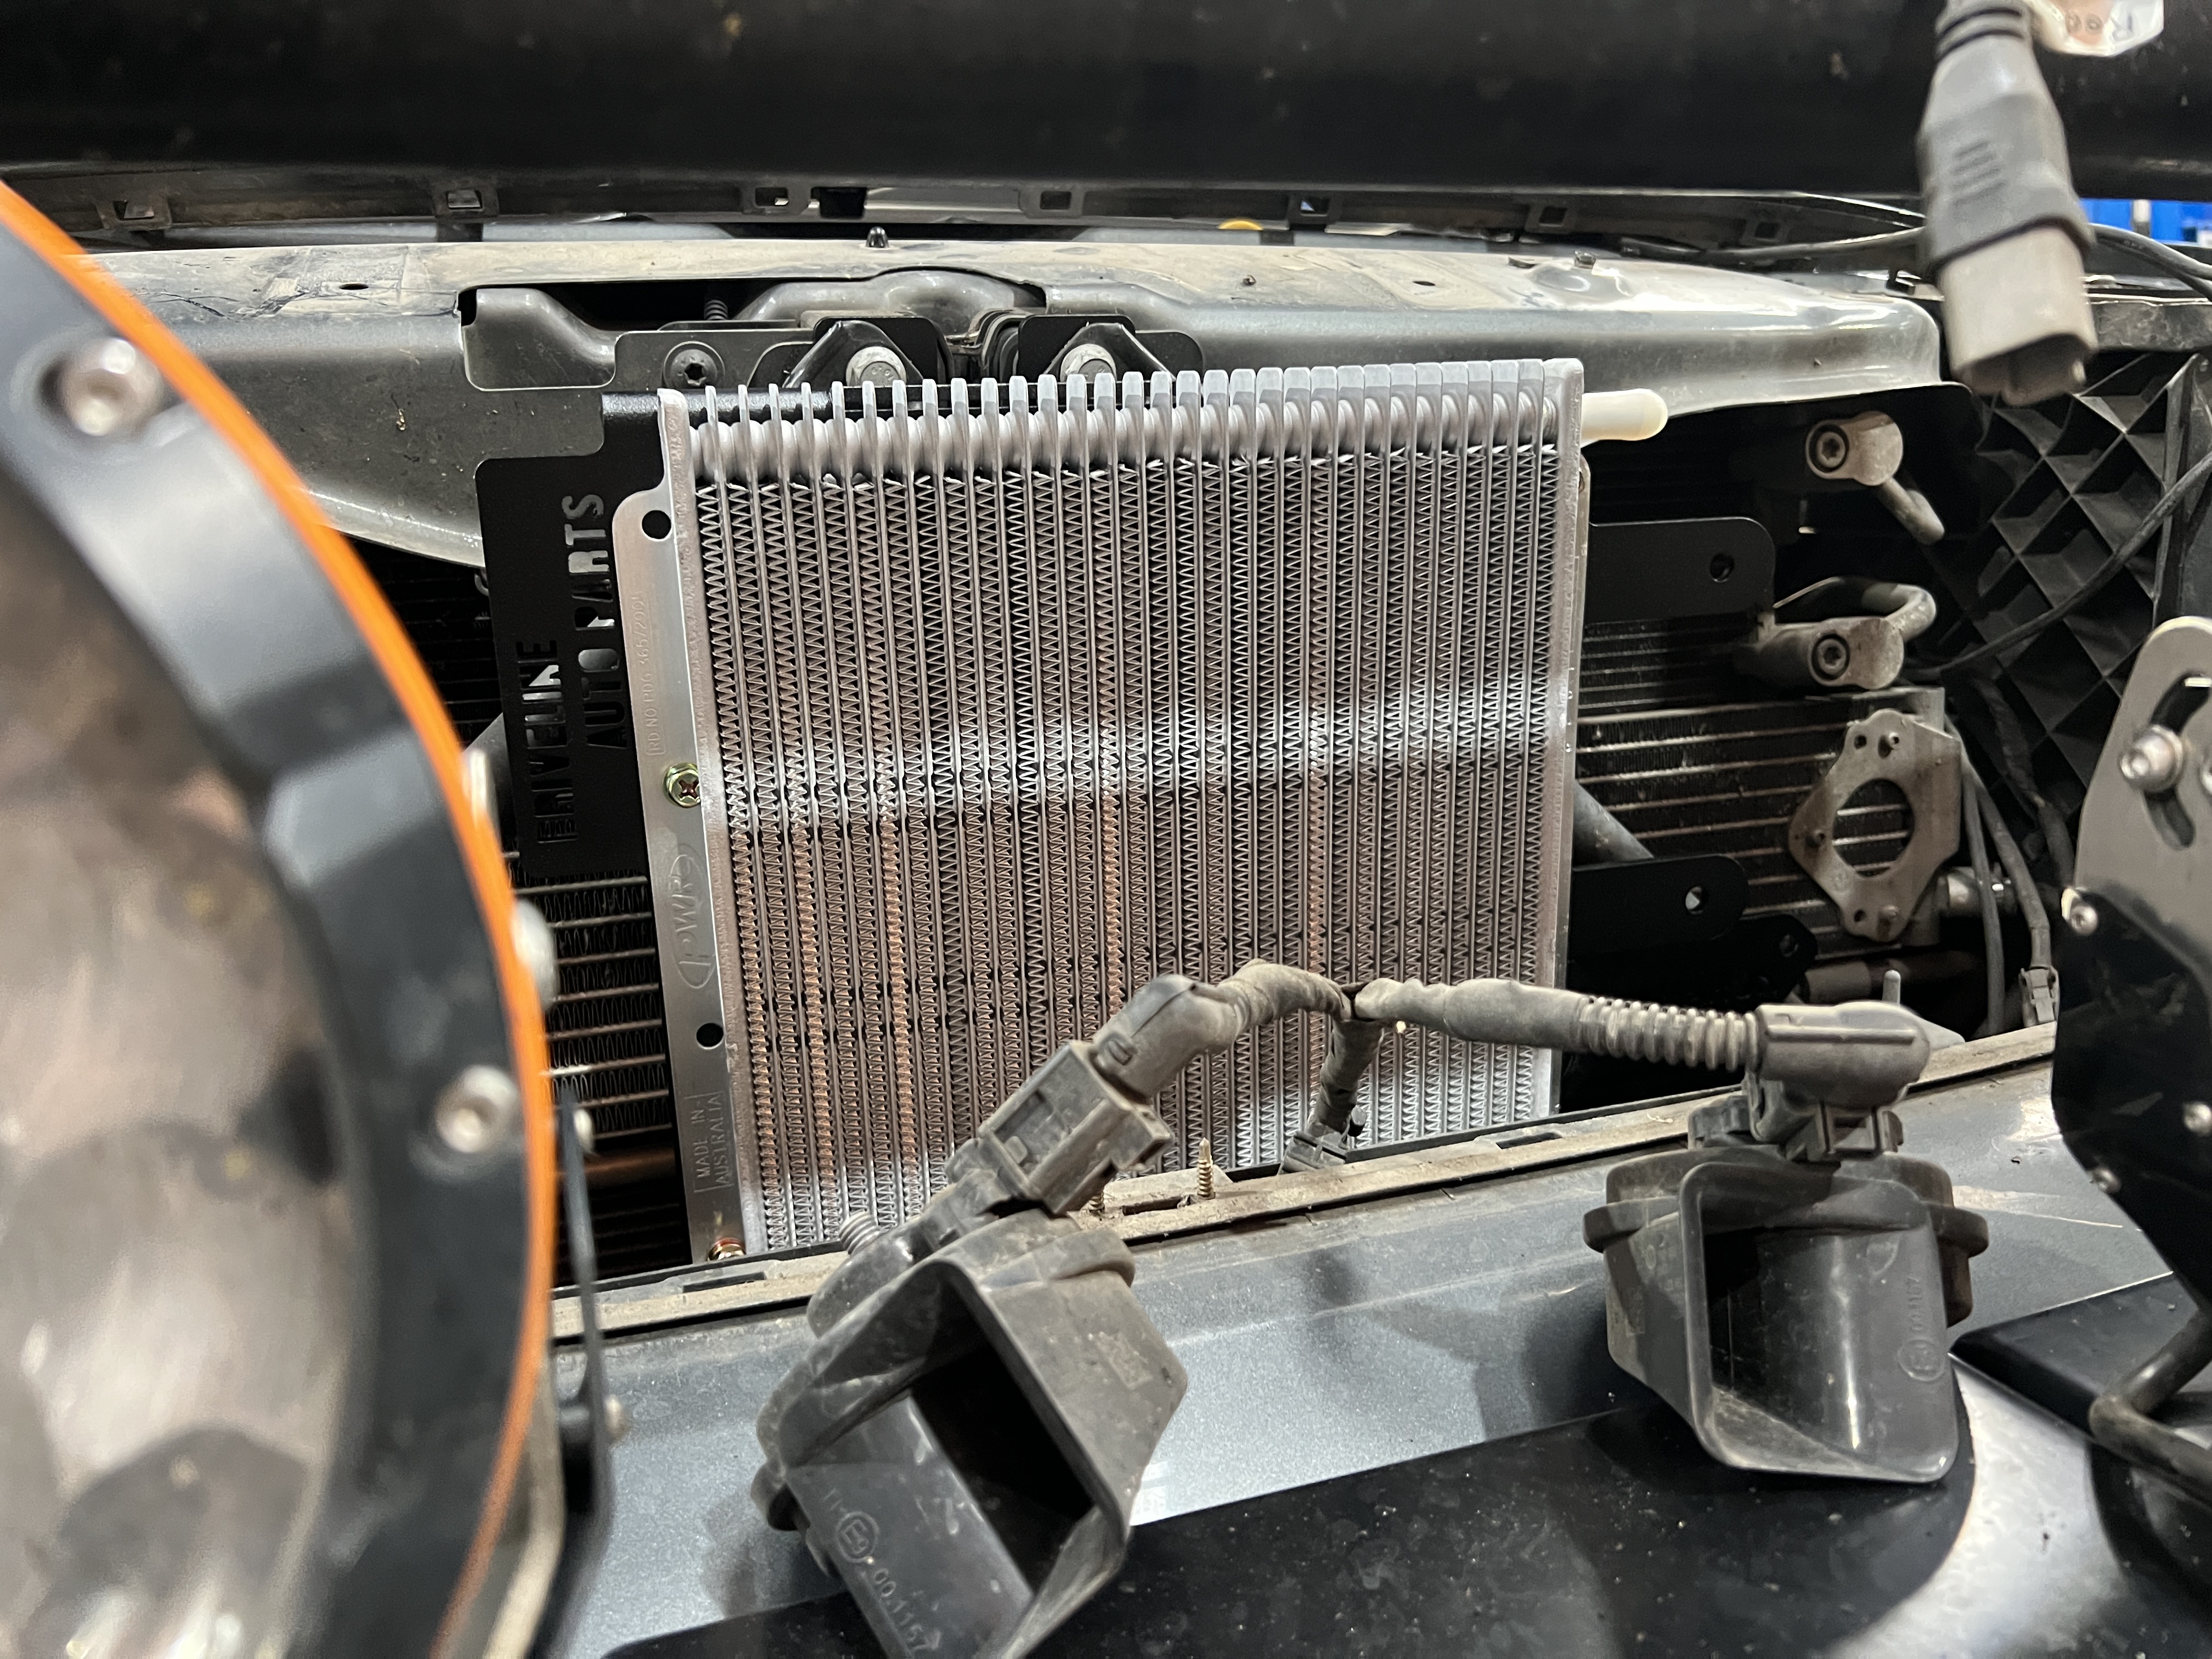
6. Tighten up the hose clamps and feed the hose back up between the front bar and the radiator. It’ll be a closed loop at this stage. Doing it this way allows you to be accurate when you cut the hoses to length to suit the cooler body.
7. Trim them to length and hose clamp the fittings up tight. It won’t matter which end of the hose goes onto which barb on the cooler. The fluid is under pressure so it can run up through the cooler as easily as it can run downwards. You can see the horns here have been fitted back in place, and the grille can go back on as well at this point. The guys at AIS are pros, but if I was doing it at home I’d probably want to run the vehicle and check for leaks before I threw it all back together – but that’s me.
Final steps
8. You now need to set the transmission fluid level. Locate the fill plug and slowly pump fluid into the transmission until it starts to drip out of the hole. Replace the plug and turn the vehicle on (keep it in Park to prevent the driveshaft from turning) then pump some more fluid in, which will fill up the cooler and replace any fluid lost during the install. Once it’s dribbling out of the hole you can replace the fill plug and it’s time for a lap of the block to make sure everything’s Mickey Mouse.
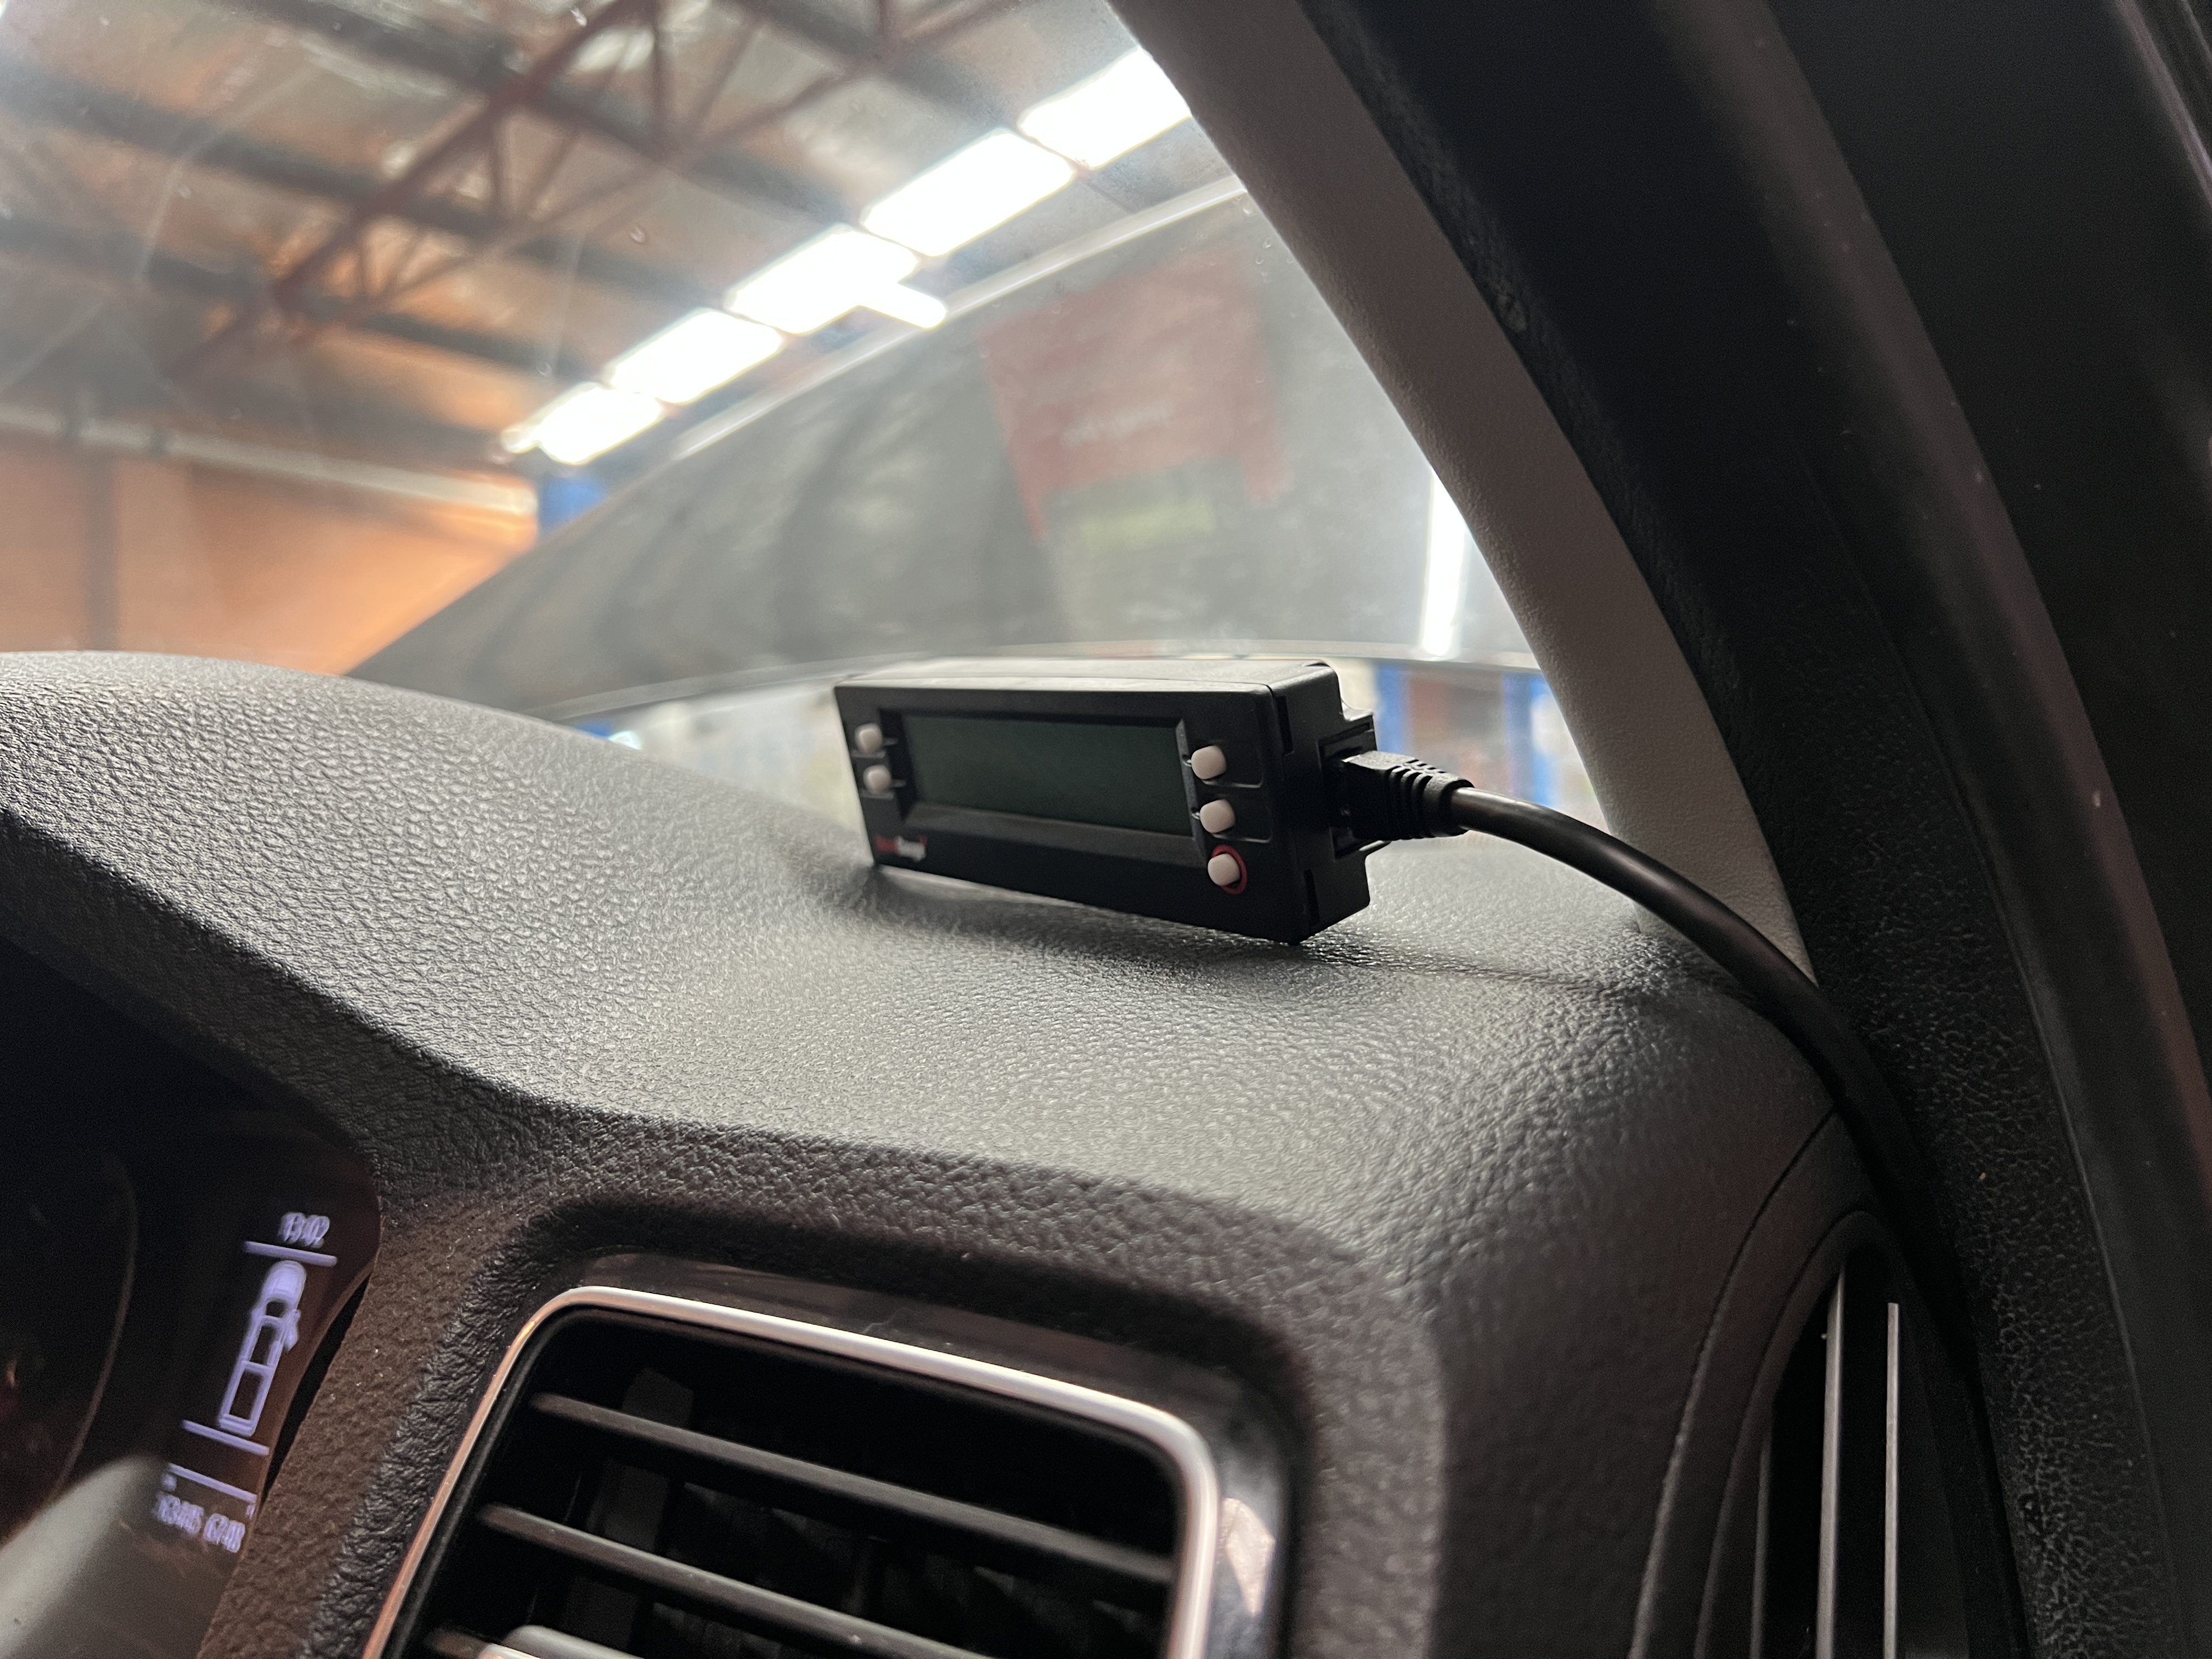
9. It’s a great time to install a transmission Temp Gauge or a Scangauge too. That way you can keep an eye on your gearbox temps as you’re driving. Jeremy, the owner of Advanced Installs, reckons his own Amarok’s transmission simply does not get hot with the cooler fitted, even when towing his plate boat up long inclines.
So, can you do this at home or nah?
Short answer is yes, absolutely, but there’s a but. If your tool collection consists of a shifting spanner, a half-empty can of WD40 and some pruning shears then you’re not going to have a good time. You don’t need the entire Snap-On catalogue in your shed, but a solid array of hardware is going to be required – a Torx set, trim tab pullers, side-cutters capable of slicing hose and the usual sockets and screwdrivers are all going to be needed as a minimum.
It’s also worth noting that the instructions with the Wholesale Automatics kit are freaking excellent, making the job a hell of a lot easier than some kits that just give you the parts and then wish you the best of luck. A quality kit is well worth the outlay.
Towing tip for cooler transmission temps
The guys at AIS were quick to point out that when towing, particularly up big hills or on sand or anywhere the transmission may see high loads, it’s good practice to use the gears in manual mode, which will allow the fluid to be circulated more quickly and efficiently. Jeremy, the owner of AIS and of the most modified Amarok in Australia (ducks for cover) noted that in top gear his trans temps can climb quickly on an incline, but if he manually drops back a gear or two and allow the revs to be a little higher the temps stay consistent. So many things come down to the nut behind the wheel eh?
Anyway, thanks again to the guys at Advanced Installation Services. If you’re chasing a dependable mechanic in Western Sydney, or need an VW Amarok specialist get in touch on the deets below: