Project D-Max part four – time to drill holes in our D-Max, installing an Ironman 4×4 snorkel and Uniden UHF radio
Ironman 4×4 snorkel There’s just something that feels so wrong about drilling holes into the side of a near-new vehicle. But this is exactly what is required to install a snorkel. The anxiety is worth it though. The end result…
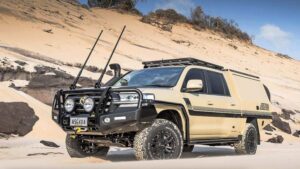
There’s just something that feels so wrong about drilling holes into the side of a near-new vehicle. But this is exactly what is required to install a snorkel. The anxiety is worth it though. The end result not only looks the part but will also protect the mighty 4JJ3 turbo-diesel motor. From both water ingress during river crossings. And dust while travelling on tracks to said water crossings.
For the Ironman 4×4 snorkel to suit the 2020+ D-Max, you’ll need at least three hours set aside to tackle the job. In the case of the D-Max, the forward-facing factory air intake is thrown in the bin and capped off with a supplied boot and hose clamp. Next, the air box lid is removed, the air filter removed and the supplied template taped onto the guard. This is included so you can mark up where to drill. There’s a series of smaller holes that need to be drilled out through the guard for the mounting studs on the snorkel body to attach through. And let’s not forget the much larger hole required for the snorkel intake to pass through the guard. Eeeekkkk!
With all holes drilled out, it is vital to put some protective paint on any exposed metal. This is to avoid rust issues. While the paint is drying, take this time to prepare the snorkel, and install any of the studs or other mounting hardware that’s necessary. Some additional holes are also drilled into the A-pillar near the windscreen to secure the top of the Ironman 4×4 snorkel to its new best friend. A blue 2022 Isuzu D-Max…
Snorkel fitment means airbox surgery
Onto the airbox. This required some surgery to adapt the snorkel. As the forward-facing air intake is now facing a bin. We need to make air come into the air box through the driver’s guard side now. Ironman 4×4 supply a new mounting bracket with the snorkel kit to make this job as easy as it can be. With automotive silicon (commonly called Slaz) applied everywhere it needs to be applied, the whole thing can be put back together and we’re ready for the tracks. Well, nearly…
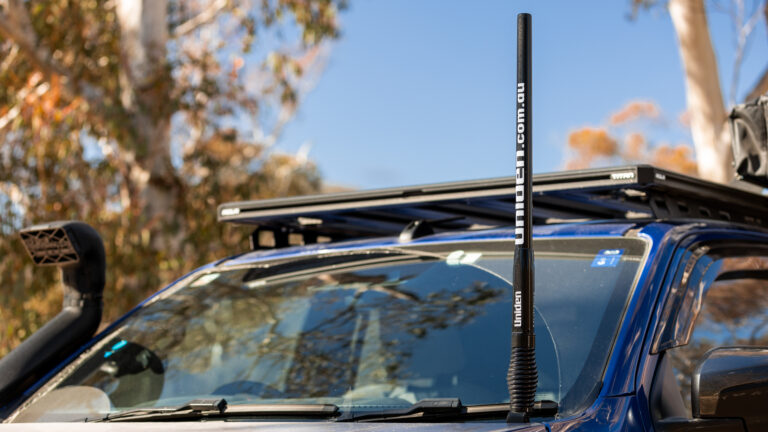
I won’t head bush without reliable communication equipment. This (for me anyway) consists of a 5W handheld UHF, as well as a good-quality vehicle-mounted UHF. I’ve been running Uniden UHFs in my four-wheel drives for nearly 10 years now. So saw no reason not to use them again in Project D-Max.
We actually decided on the same kit I’ve been running in my own FJ Cruiser, and you can read my initial impression of it here.
What I like about the Xtrak 80 Pro Ultimate Pack, is it includes everything you need. All wiring, all connectors, all chargers. Not only does it come with a vehicle-mounted UHF, and antenna. This kit also comes with a 5W handheld UHF which easily lasts me a full day out on the tracks. This is a quality UHF kit, that has everything you need, and I respect that about it.
We had our man Perry and the team at Pez’s 4×4 Fitouts handle the installation, which all went to plan according to Perry. For those playing along at home, there is a grommet in the firewall on the D-Max on the passenger side, that allows you to easily connect the Uniden antenna to the Xtrak 80 base unit. Power can then be found in the fuse panel located low on the driver’s side. The D-Max is the perfect candidate for the Uniden Xtrak UHF, it really fits like a glove. While Perry had the soldering iron out, we asked him to…
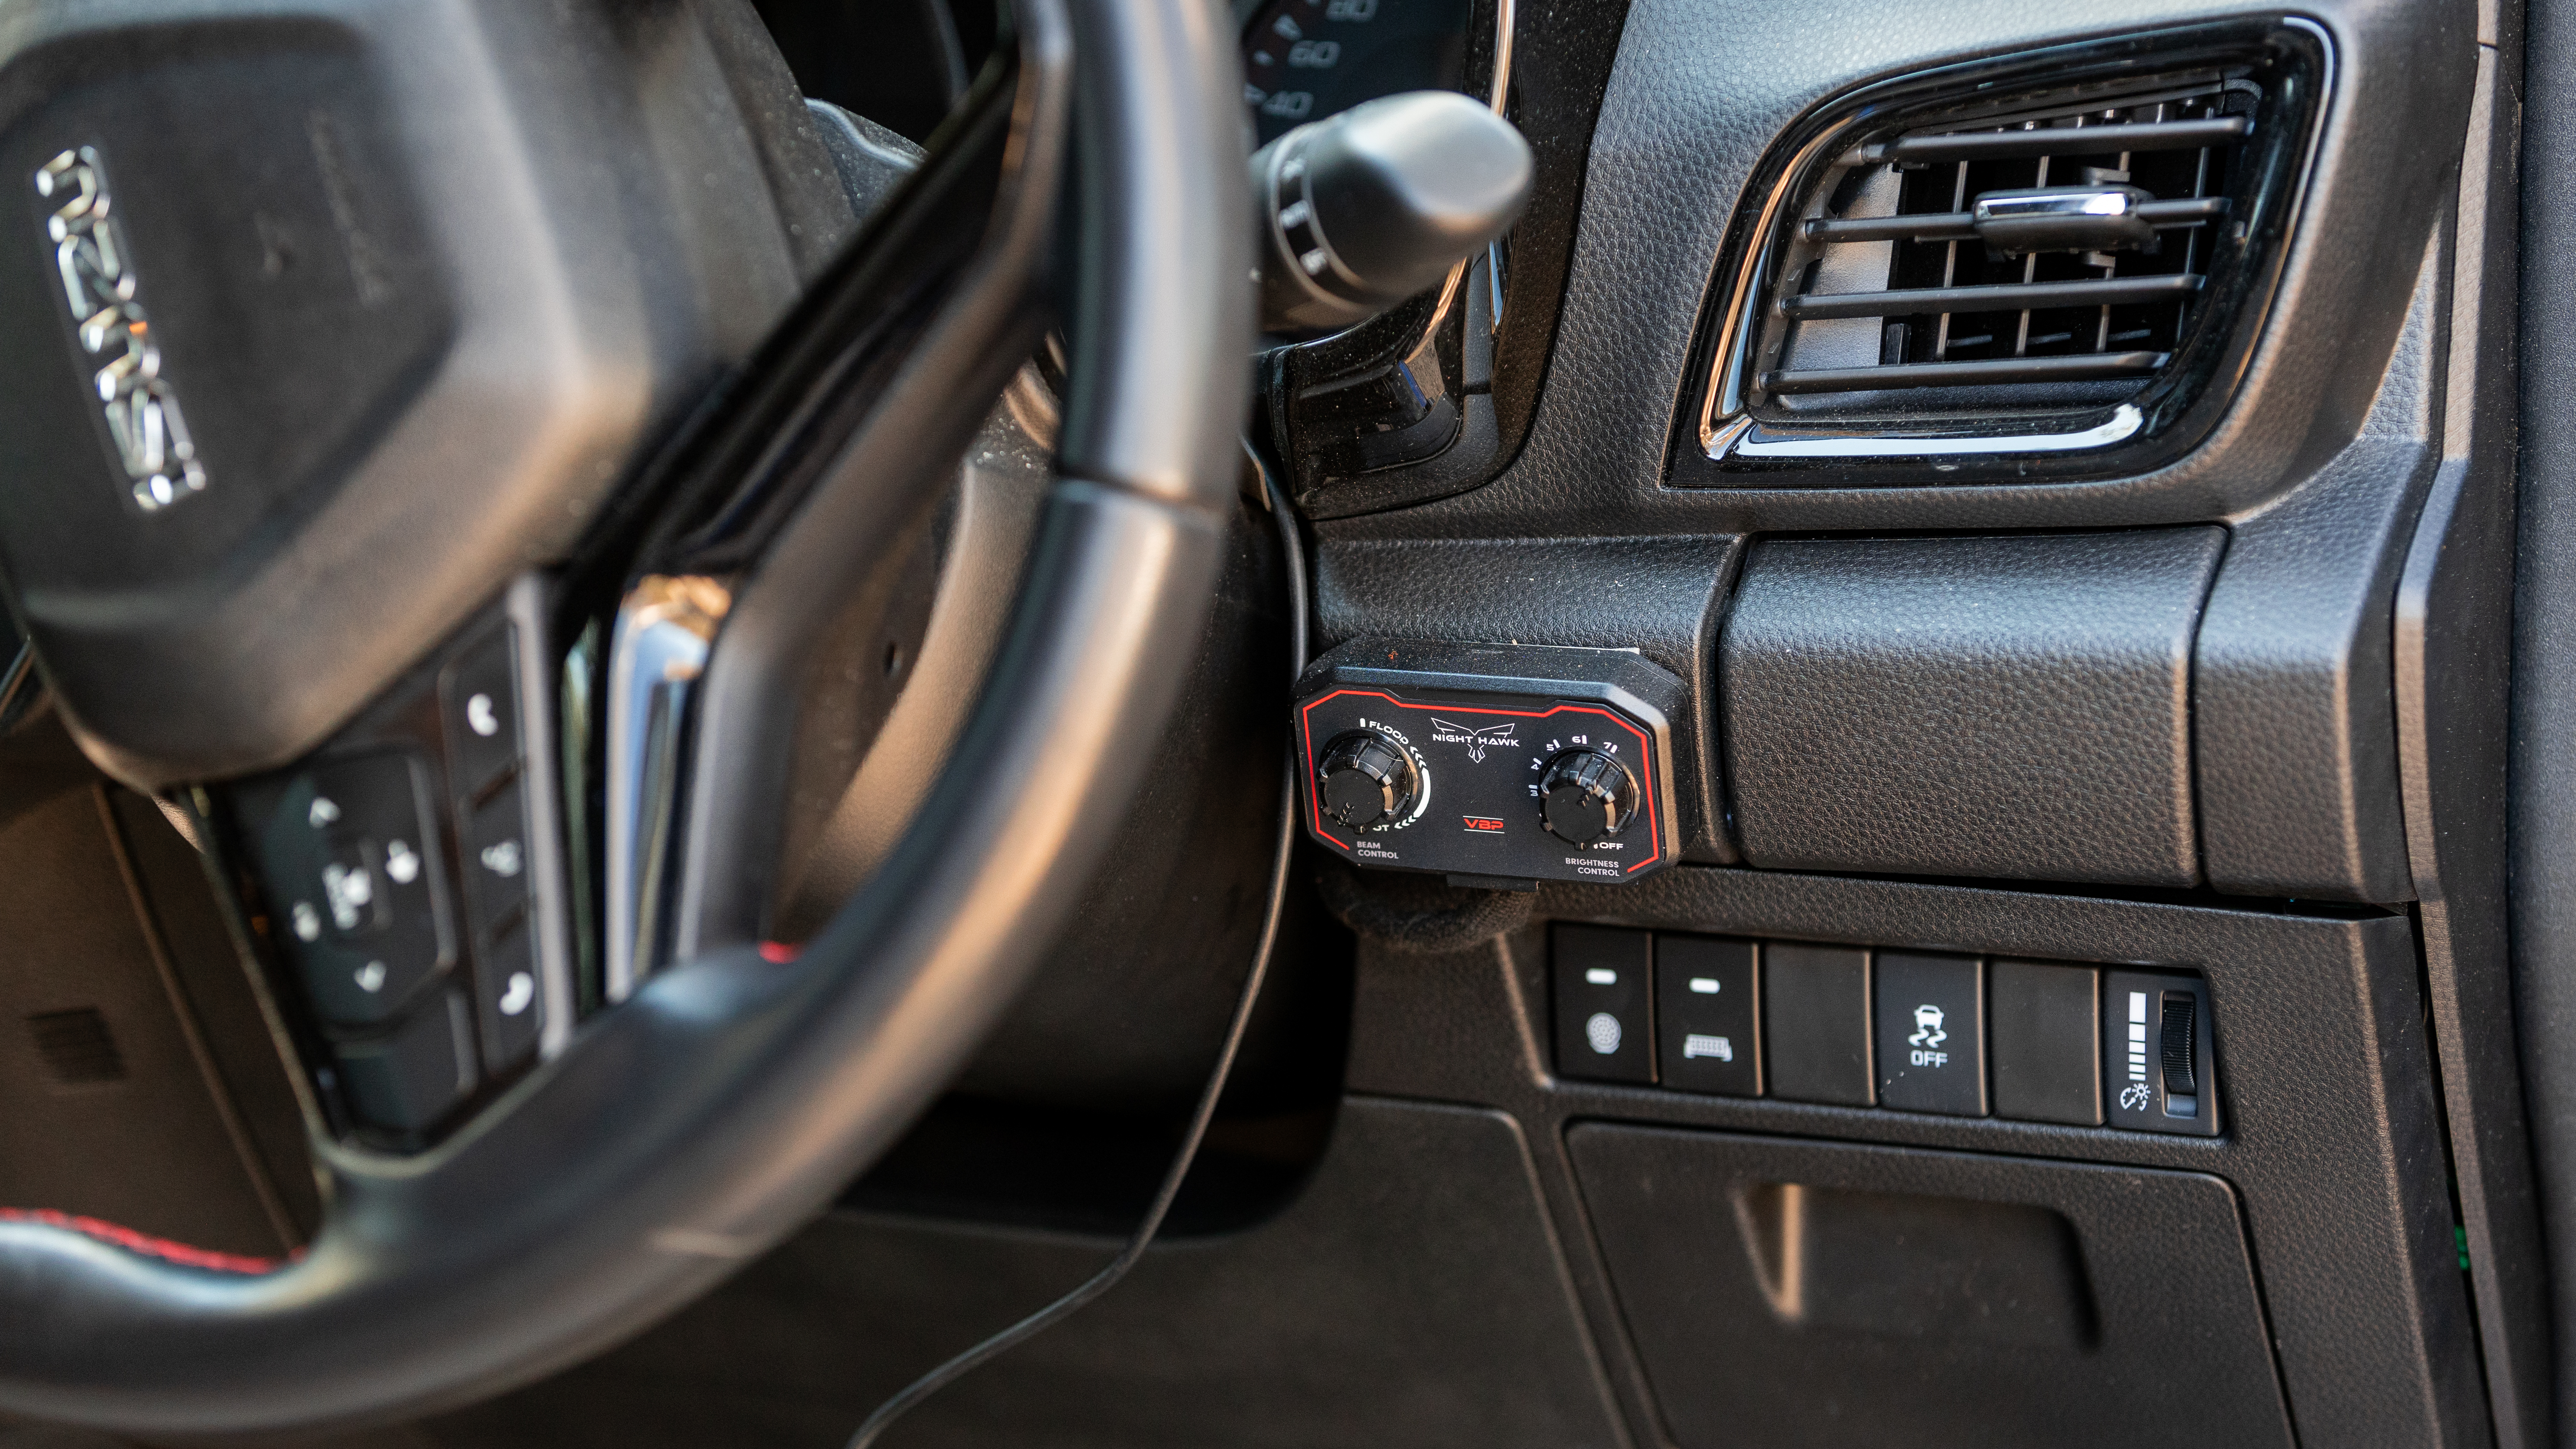
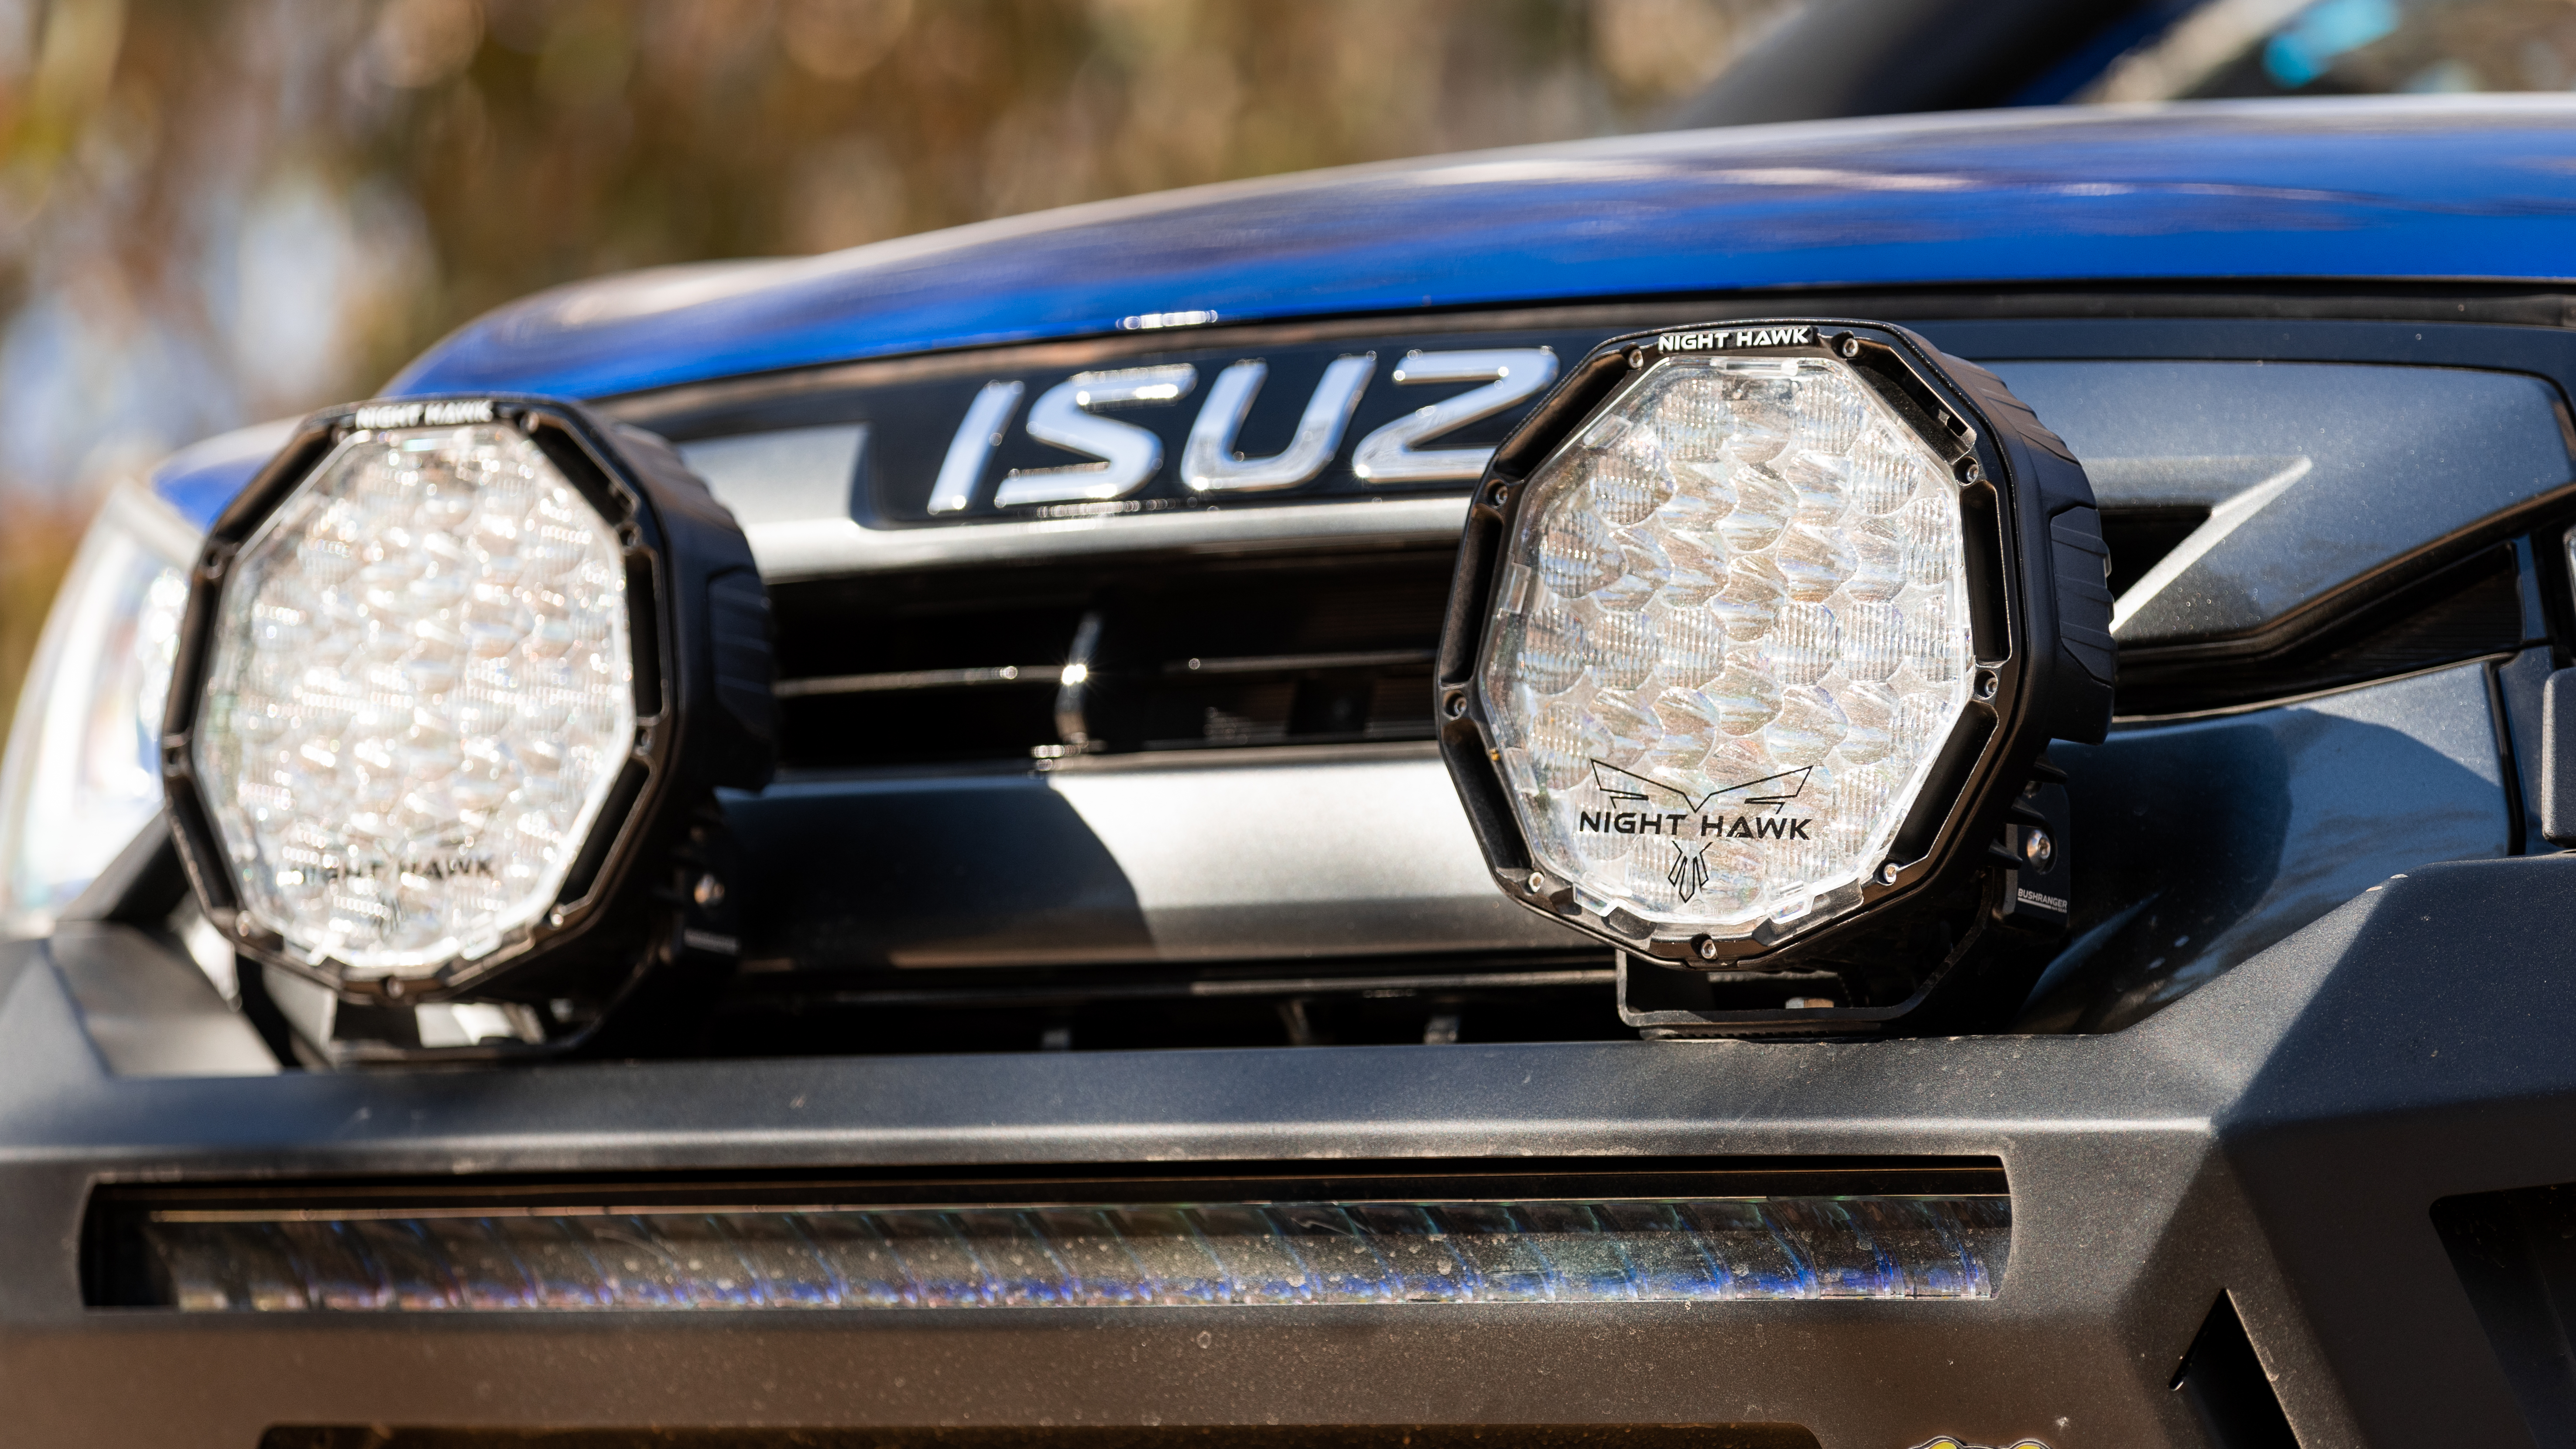
Wire up the Bushranger Night Hawk LED driving lights
While the D-Max was in pieces, the final wiring for the Bushranger Nighthawk LED driving lights was also sorted out. This is an easy process if you have a bit of 12V knowledge, thanks to the wiring loom Buhranger supplies with their Night Hawk LED driving lights. It’s a plug-and-play affair, that doesn’t even use a relay, just some clever engineering.
On the inside of Project D-Max, the controller for the lights was installed, next to the right knee of the driver. This controller has a rotary dial that changes the beam pattern of the Night Hawk LEDs. As these are the VBP Night Hawks (Variable Beam Pattern), we can change these lights from spread beam to spot beam with the turn of a dial. Clever stuff indeed, that is extremely useful in a range of driving conditions. This controller will even power up to four driving lights, so there’s room to grow if we feel there is a need for more light… spoiler alert, there isn’t. These things are super bright!
There is a wide range of lights in the Bushranger Night Hawk range, do yourself a favour and visit their website to experience the clever options available.
Once again, special thanks must go to Perry and the team at Pez’s 4×4 Fitouts in Brookvale. They are handling the upgrades to project D-Max with absolute precision. We couldn’t have turned this project around so quickly without them. If you need any 4×4 modifications or servicing done in the Sydney area, tell ‘em we sent you.