Uniden XTRAK 80 Pro Ultimate Pack: installation and first impressions
I recently upgraded my comms with the Uniden XTRAK 80 Pro Ultimate Pack. Here's how the install went and what I think so far.
Last Updated: 12 May 2023
Advertisement
I recently upgraded my comms with the Uniden XTRAK 80 Pro Ultimate Pack. Here’s how the install went and what I think so far.
In-vehicle communications are vital for four-wheel drivers to keep in touch with travelling companions and other four-wheel drivers. Especially for those of us who are lucky enough to work in the off-road media industry and need to liaise with photographers to get the right shots safely.
While my FJ Cruiser was equipped with an old UHF that I… um…. borrowed from my even older HiLux. It was showing its age in terms of features basically. As was my handheld UHF, which is so old it only has 40 channels available. Not 80 as is the industry standard these days.
Enter the Uniden XTRAK 80 Pro Ultimate Pack, which seems to solve all of my communications problems. Not only is it a top-of-the-line in-car hard-mounted UHF, but this pack is also supplied with a 5W handheld radio too, which goes under the banner of XTRAK 50 Pro UHF Handheld. It even arrived with a shorter 3.0dbi antenna whip, which suits my needs perfectly. Sweet!
I was overwhelmed in a good way opening the packaging, as it comes with so many goodies inside. From mounting brackets to cable extensions – everything you’re going to need to handle a solid installation basically. Let’s take a closer look at what you get for your money.

This is a complete list of what you get inside the Uniden XTRAK 80 PRO ULTIMATE PACK. As I mentioned earlier, to say this is a complete package would be an understatement.

The installation was fairly easy for me, as I’ve handled this task a few times before. You’ll need a few super basic tools, like a soldering iron, solder, heat shrink and cable ties. I’d really recommend having a go at installing a UHF yourself so you know how it works should something go wrong while out on the tracks.
The main challenge was self-imposed, as I decided to mount the UHF antenna whip on the back of my FJ Cruiser instead of the front, using a special mounting bracket purchased from Aussie manufacturers Kaon. Since I had just bolted in a set of storage drawers, they had to come out to access the side trim panels I wanted to run the coaxial cable from the antenna through. This hurt my feelings to no end but had to be done.
Thankfully, my FJ Cruiser is a bit like a LEGO set on wheels. So these panels all came out super easily, and I was able to start by mounting the supplied antenna whip on the back door bracket, and run the coaxial cable to the front of the vehicle, tucked neatly away in the sill trim panel.

I decided to mount the actual UHF unit under my transmission/centre console trim, which took a few minutes of persuasion. And about double that time watching YouTube clips on how to remove said panel. Two cable ties were all it took to secure the unit, with the coaxial cable screwing into the back of the unit with the supplied adaptor. Simples.
Powering the UHF can be done in a few different ways. However, it was an easy choice in my case as the power was already run from the old unit I had removed. The first and easiest, but not what I’d call the neatest option, is to simply plug it into your factory CIG socket point, which will activate with the ignition turned on. This option will definitely get the job done, but I wanted to do things right the first time.
The next option would be to run a (fused) positive and a negative cable from your vehicle’s battery to power the UHF. There’s nothing wrong with this at all but can get a bit messy if you have other accessories running off your battery.
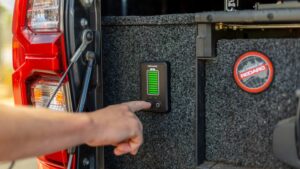
The third, and in my opinion neatest (and not at all hard) option, was to use an add-a-fuse adaptor and tap into the factory fuse block on the driver’s side. Using the diagram printed on the back of the fuse block trim cover, I was able to identify an accessory port, which would only be activated with the ignition on, and tap into it quickly and easily. Uniden supplies a fused section of cable in the kit, which I used, meaning it has a fuse at either end of the 12V connection.
Once I knew where to put the add-a-fuse, it was just a case of soldering on a cable from here to the positive side of the supplied cable, and run the earth side to a factory earthing point on the vehicle.

The last step, and one that you need to spend a bit of time on, is where to mount the actual handpiece for the UHF. You want it in a spot that is easy to access, for both the driver and passenger ideally. You don’t want to be banging your knee on it constantly either. As there is a speaker built into the handpiece, securing it somewhere you can hear communications well is also worthy of your consideration. Spend a bit of time playing with options. Or research online where other people that have the same vehicle chose to mount them.
Grab something with alcohol in it. No, not a beer – think Prepsol. To clean the mounting surface down, and press on the supplied magnetic mounting bracket that has quality double-sided tape already attached. I have to say, the magnetic mounting bracket is a work of art. And is so much easier to use than previous clip-on versions. It’s nice seeing innovations that actually work in the real world.

The first thing I noticed, was how much louder the Uniden XTRAK 80 is compared to my old UHF. Also just how clear I was receiving and transmitting communications. It made me wonder how I put up with my old setup for so long. If that’s not enough, which I assure you it is, you can even use Bluetooth to connect the XTRAK 80 to your vehicle’s speakers.
The OLED screen is also nice and bright, and easy to read in all light settings. Another first for me, was having a UHF radio that featured an instant replay function. If I’ve got Hootie And The Blowfish cranked up a bit too loud, which is always possible, I can listen back to any messages I might have missed with the press of one button.

While it’s early days, fitting the Uniden XTRAK 80 Pro Ultimate Pack into my FJ Cruiser has definitely been a premium upgrade. With the tools packed away, it’s time to put it through its paces over some longer touring trips. I’ll report back with more figures and a full review with a few more months of use under the belt of the XTRAK 80 Pro Ultimate Pack.
One thing I’d love to do is a range test between the hard-mounted UHF vs XTRAK 50 Pro handheld UHF that came in this bundle. To see which one works best in the real world, in a range of conditions. If there’s anything else you want to know about this UHF, be sure to let us know in the comments. We’ll get it done. Over and out for now.

Priced from: $999.95
For more information, visit: https://uniden.com.au/product/xtrak-80-pro-ultimate-pack/