Advertisement
Advertisement
Well, all good things must come to an end. Project D-Max has rolled out of the Pez’s 4×4 Fitouts workshop for the last time and is ready to hit the tracks. Which is exactly what we did the second the keys were handed back to us.
Now, rather than go through every detail here in article format, we decided to create a full walkaround video for Project D-Max. Time to run through just what accessories we had fitted, and why we chose them.
Because we documented the build process instead of pretending to know how to use a torque wrench, there is a complete series of articles about the process. We’ll list them all below, so Project D-Max content lives in one easy-to-find location.
Let’s start at the beginning, with part one of Project D-Max.

In part one of the Project D-Max build, we installed Terrain Tamer suspension, including parabolic leaf springs. This is a full 40mm lift kit, which not only gave us more lift and suspension travel, but it rides better than stock too.

Read Here: https://unsealed4x4.com.au/terrain-tamer-suspension-upgrade-for-project-d-max/

In part two, we look at touring upgrades and modifications. This includes fitting an Ironman 4×4 Raid bull bar, as well as Ironman 4×4 recovery points and under-vehicle protection.

We also decided on a Bushranger Revo winch with synthetic rope, as well as a pair of Bushranger Night Hawk LED driving lights. Lastly, we head to the back of Project D-Max, and had a Hayman Reese X-Bar towbar fitted up. Complete with in-built recovery points.


Things are really getting serious now, with a load of effort put into addressing a flaw with every ute. Not having a canopy. Pez’s 4×4 Fitouts installed a Maxliner Maxtop canopy to the back of Project D-Max.

While the tools were still out, they also installed an excellent Bushwakka 270-degree awning, which has been a game-changer while working and camping out in the field. While we love the awning, it’s useless without a solid place to mount it.

We decided on not just one, but two Rola Titan roof platforms. We now have shade, places to store gear, and a secured tub area.
Read Here: https://unsealed4x4.com.au/project-d-max-part-three/

This was a scary one, as some rather large holes were drilled into the side of Project D-Max, to install an Ironman 4×4 snorkel. The end result looks incredible, so it was worth the effort.

Then, it was time to fire up the soldering iron, and wire up our new Uniden UHF as well as finish the installation of the Bushranger Night Hawk LED driving lights.

Read Here: https://unsealed4x4.com.au/project-d-max-part-four/

What a massive update this was. Going through the 4WD Interiors roller drawer installation, which has absolutely made touring in the D-Max a breeze. The quality of this gear is first class, and now all our gear has a home.

Speaking of quality, we also decided on an aux battery setup with a difference. Installing a Redarc GoBlock to power all our equipment and keep the fridge cold while on the tracks.

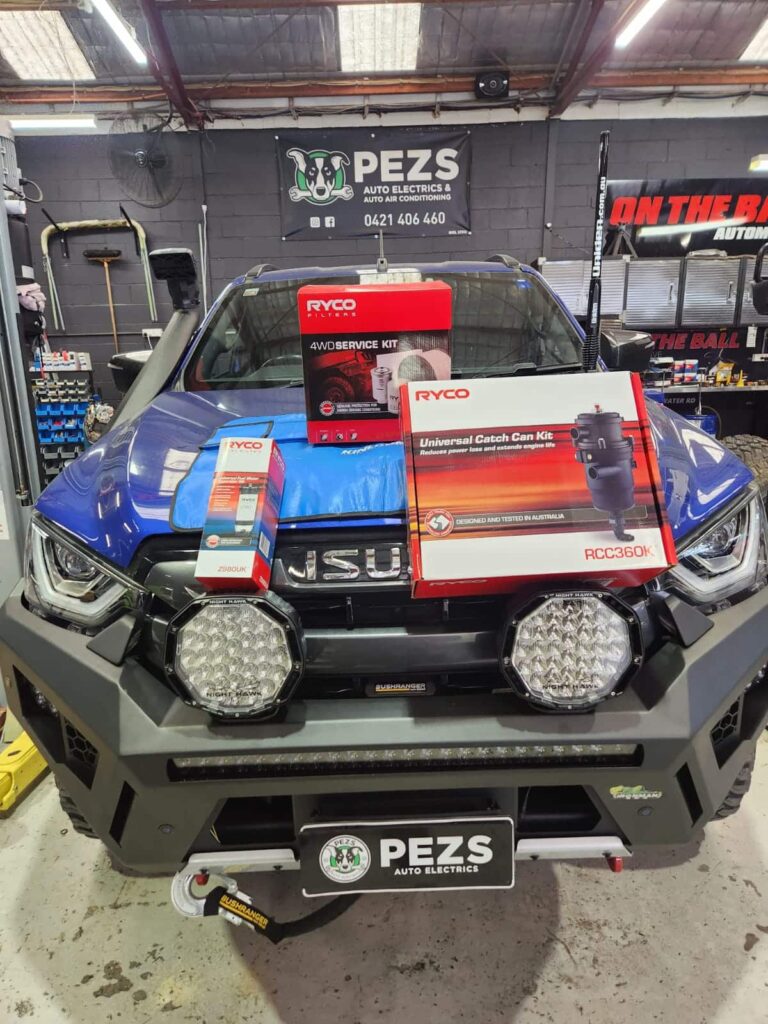
The final job to tick off the list, was to install a Ryco oil catch can and a Ryco water/fuel separator. We also decided to give Project D-Max a service, ready for the full reveal photo shoot.

Well there it is, Project D-Max is all wrapped up with nothing left to do but actually use it. Stay tuned for next week’s update, as we put Project D-Max up against a highly modified 79 Series LandCruiser on 37-inch tyres, to see if it can keep up on the tracks.
Unsealed 4×4 would like to thank everyone involved with this project. It takes an army to get a project like this done, to a high standard, and a tight deadline. We loved and appreciate having the support of so many companies along the way, and would appreciate you supporting them back in return.